Juicy Bacon Cheeseburger Bombs Recipe: Bite-Sized Flavor Bombs
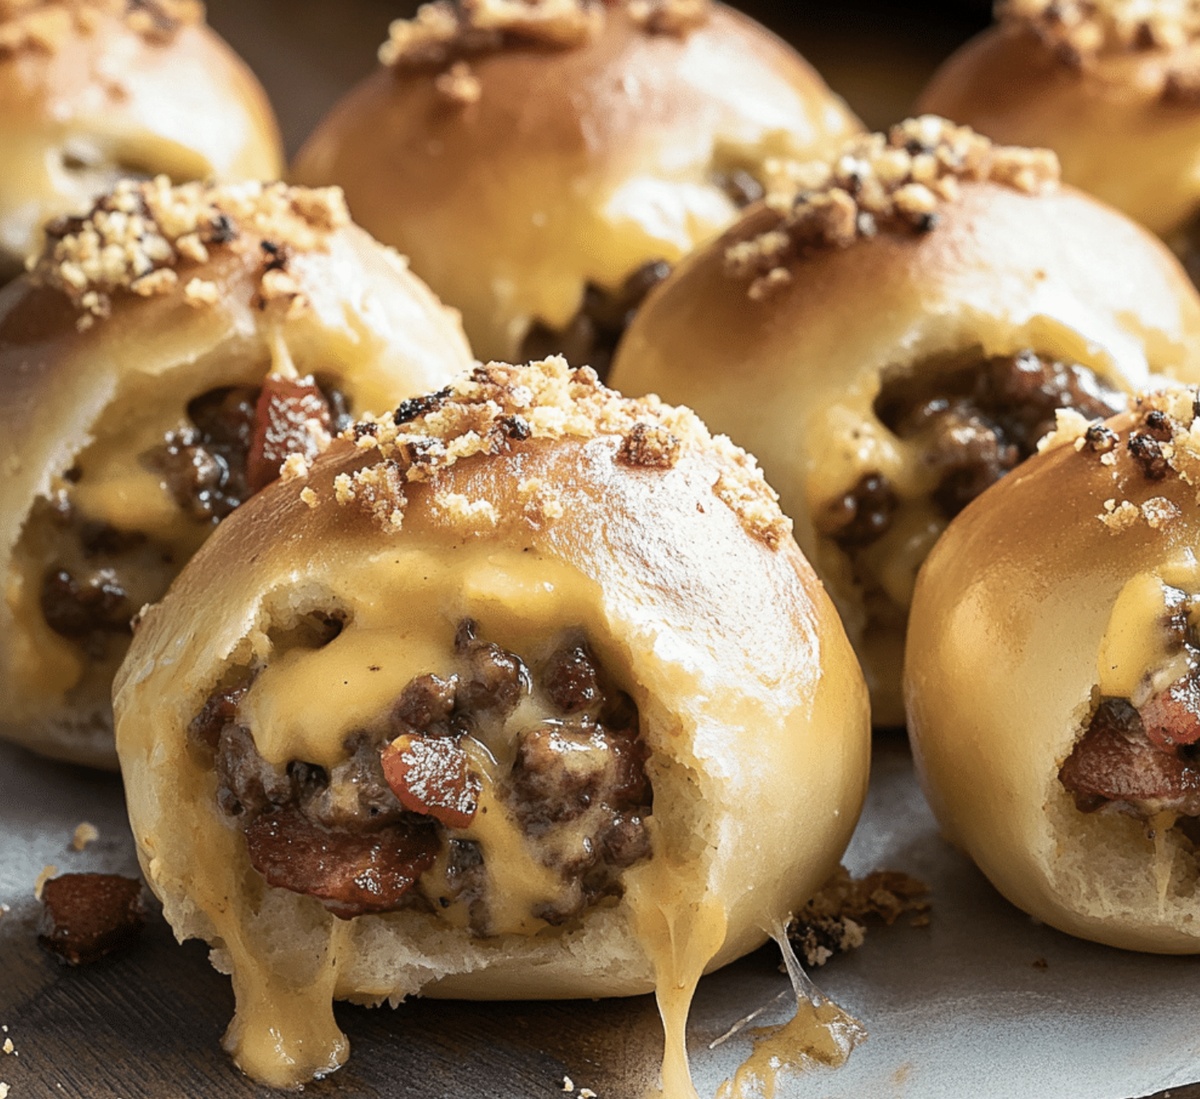
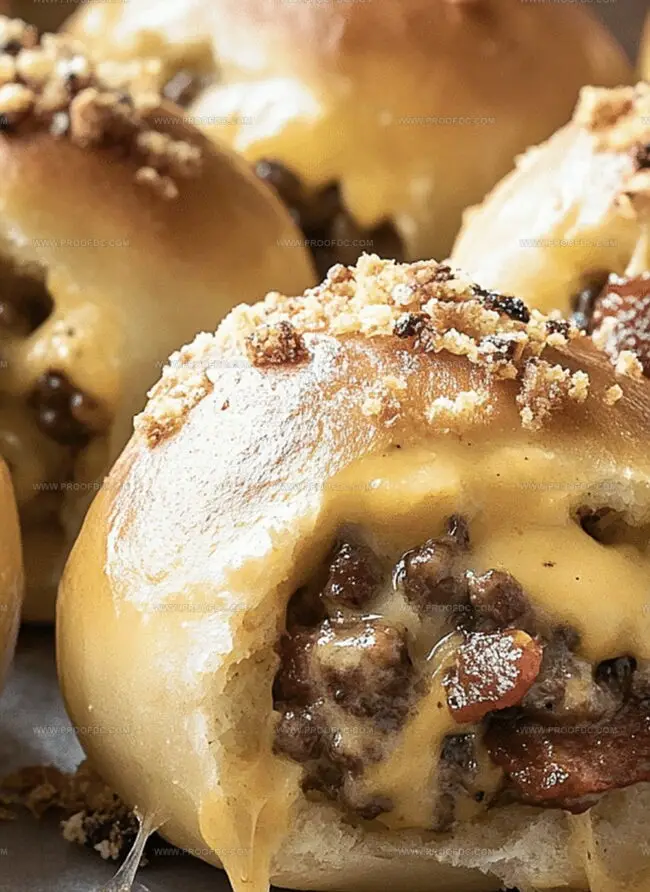
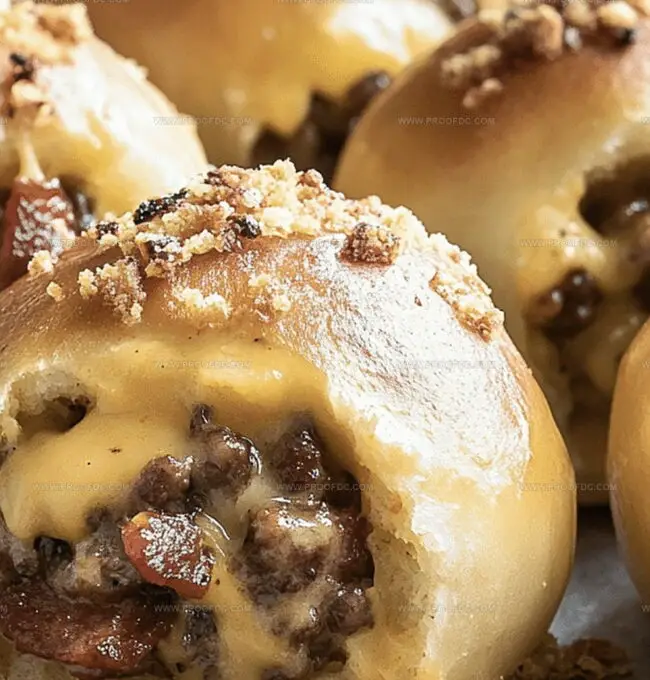
Crispy, golden-brown pockets bursting with savory bacon cheeseburger bombs delight taste buds with every single bite.
These irresistible morsels pack explosive flavor into a compact, handheld treat.
Melted cheese mingles with seasoned ground beef, creating a mouthwatering combination that screams comfort food.
Sharp cheddar and crisp bacon bits nestle inside soft, pillowy dough, promising a satisfying crunch.
The exterior turns beautifully golden when baked, revealing a molten center that oozes with rich, meaty goodness.
Each bomb delivers a perfect balance of textures and flavors that transform an ordinary meal into something extraordinary.
Dive into this crowd-pleasing recipe and watch these delectable bites disappear in seconds.
Quick Recipe Overview
Everything That Goes Into Bacon Cheeseburger Bombs Recipe
For Filling Ingredients:For Wrapper Ingredients:For Exterior Ingredients:Gear You’ll Want For Bacon Cheeseburger Bombs Recipe
Follow These Directions For Bacon Cheeseburger Bombs Recipe
Brown ground beef with diced onions in a hot pan until meat is fully cooked and onions turn translucent. Season with smoky spices for deep flavor. Let mixture cool slightly after mixing in tangy condiments.
Gently stretch soft biscuit rounds into wide circles. Layer chunks of melty cheese and seasoned meat mixture in the center. Carefully fold edges to create plump, sealed pouches that hold all the delicious filling.
Drape crispy bacon strips around each pocket, creating a savory outer layer. Secure bacon with small toothpicks if needed to keep everything snug.
Place pouches on parchment-lined baking sheet. Brush with silky egg wash for extra shine. Bake until dough turns golden and bacon edges crisp up beautifully, filling your kitchen with irresistible aromas.
Allow pockets to rest briefly after removing from oven. Plate with favorite dipping sauces for a crowd-pleasing meal that combines burger flavors in a fun, handheld format.
Try Fun Twists With Bacon Cheeseburger Bombs Recipe
Serve Bacon Cheeseburger Bombs Recipe In Style
How To Keep Bacon Cheeseburger Bombs Recipe Fresh
Print
Explosive Bacon Cheeseburger Bombs
- Total Time: 40 minutes
- Yield: 7 1x
Description
Savory bacon cheeseburger bombs deliver explosive flavor in compact packages. Melted cheese and crispy bacon wrapped in golden dough create an irresistible appetizer you cannot resist.
Ingredients
- 1 lb (450 g) ground beef
- 8 slices bacon
- 8 slices cheddar cheese (cut into squares)
- 1 can (16 oz / 450 g) refrigerated biscuit dough (8 biscuits)
- ½ cup (75 g) diced onion
- 1 tbsp ketchup
- 1 tbsp mustard
- 1 tsp garlic powder
- 1 tsp smoked paprika
- Salt and pepper, to taste
- 1 large egg (beaten, for egg wash)
- Sesame seeds (optional)
Instructions
- Meat Preparation: Sauté ground beef and onions in a skillet until beef browns and onions become translucent. Mix in ketchup, mustard, garlic powder, smoked paprika, salt, and pepper. Allow mixture to cool slightly.
- Biscuit Foundation: Preheat oven to 375F (190C) and prepare a parchment-lined baking sheet. Gently flatten each biscuit into a thin circular shape.
- Cheese and Filling Assembly: Center a cheese square on each biscuit, layer with seasoned beef mixture, then top with another cheese square to create a rich, molten core.
- Dough Encapsulation: Carefully fold biscuit edges, pinching and sealing to form a compact spherical bundle that fully contains the savory filling.
- Bacon Wrapping: Encase each dough bundle with a crisp bacon slice, wrapping snugly and securing with a toothpick if necessary.
- Pre-Baking Finishing: Brush bombs with beaten egg and optionally sprinkle sesame seeds for enhanced texture and appearance.
- Baking and Serving: Bake in preheated oven for 20-25 minutes until dough turns golden and bacon crisps. Remove, cool briefly, and serve with ketchup or mustard for dipping.
Notes
- Choose Quality Meat: Select lean ground beef with 80/20 fat ratio for optimal flavor and juiciness without excessive greasiness.
- Seal Edges Completely: Pinch biscuit edges thoroughly to prevent cheese and filling from leaking during baking, ensuring a neat and intact bomb.
- Control Bacon Crispness: Monitor bacon during final minutes of baking to achieve desired crispness without burning, adjusting oven rack position if needed.
- Customize Dietary Options: Replace biscuit dough with low-carb alternatives like cauliflower dough for gluten-sensitive diets or use turkey bacon for reduced fat content.
- Prep Time: 15 minutes
- Cook Time: 25 minutes
- Category: Lunch, Dinner, Appetizer, Snacks
- Method: Baking
- Cuisine: American
Nutrition
- Serving Size: 7
- Calories: 350
- Sugar: 1 g
- Sodium: 800 mg
- Fat: 24 g
- Saturated Fat: 10 g
- Unsaturated Fat: 12 g
- Trans Fat: 0 g
- Carbohydrates: 20 g
- Fiber: 1 g
- Protein: 17 g
- Cholesterol: 60 mg
Marcus Foley
Food Critic & Kitchen Coach
Expertise
Recipe Testing and Troubleshooting; Time-Saving Kitchen Hacks; Global Flavor Exploration; Engaging Food Writing and Honest Reviews.
Education
Institute of Culinary Education (ICE), New York, NY
Marcus Foley, based in Atlanta, GA, is a friendly food expert who makes cooking fun and simple.
With hands-on training from the Institute of Culinary Education and years of tasting everything from street food to fine dining, he shares easy kitchen hacks, global flavor ideas, and step-by-step recipes that turn kitchen mishaps into delicious surprises.