
Dreamy Reeses Overload Ice Cream Sundae Cake Recipe for Fans
Chocolate lovers spark pure delight with this decadent reeses overload ice cream sundae cake that promises pure indulgence.
Layers of rich chocolate and creamy peanut butter create an irresistible dessert experience.
Every slice delivers a symphony of sweet and salty flavors.
Soft cake meets smooth ice cream in a dreamy combination.
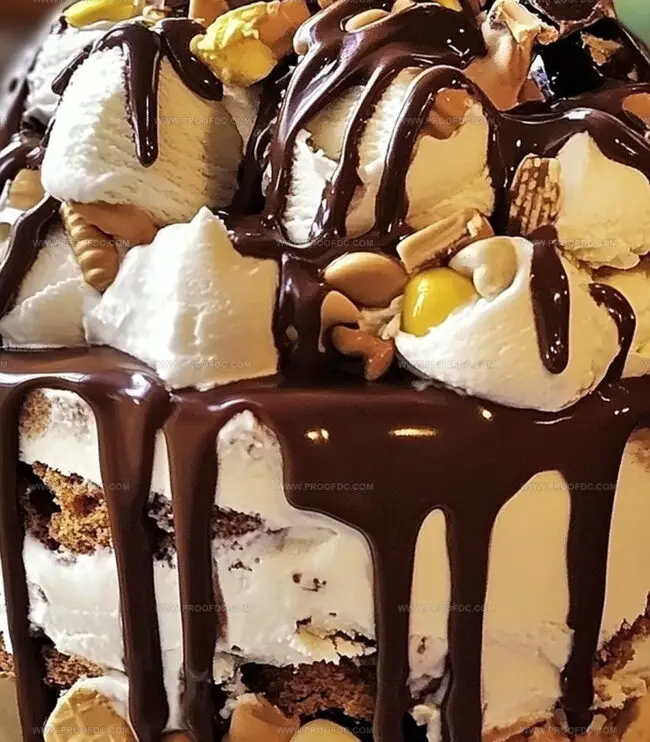
Chocolate drizzles and peanut butter chunks add exciting texture to each heavenly bite.
Crushed candies provide a delightful crunch that elevates this dessert from ordinary to extraordinary.
Prepare to satisfy your most intense chocolate and peanut butter cravings with this showstopping treat.
Quick Recipe Overview

Everything That Goes Into Reeses Overload Ice Cream Sundae Cake
For Crust Base:For Ice Cream and Candy Layers:For Drizzle and Topping:Essential Tools For Reeses Overload Ice Cream Sundae Cake
Easy-To-Follow Instructions For Reeses Overload Ice Cream Sundae Cake
Crush Oreo cookies and blend with melted butter. Press the mixture firmly into a springform pan, creating a solid foundation for the dessert. Chill in the freezer to set the base perfectly.
Soften peanut butter ice cream until spreadable. Carefully spread the ice cream across the Oreo crust. Sprinkle chopped Reeses candies generously over the surface, creating a delightful texture and flavor explosion.
Warm hot fudge sauce and peanut butter until smooth. Drizzle these rich sauces over the ice cream layer, using a spatula to create an even, mouthwatering coating. Cover and place in the freezer to solidify the layers.
Just before serving, crown the dessert with fluffy whipped cream. Artfully arrange halved Reeses candies and additional candy pieces on top. Add an extra swirl of chocolate and peanut butter sauce for maximum indulgence.
Slice the frozen masterpiece with a sharp knife, wiping the blade between cuts to ensure clean, picture-perfect portions. Invite friends and family to enjoy this ultimate chocolate and peanut butter experience.
Fun Variations For Reeses Overload Ice Cream Sundae Cake
Serve Reeses Overload Ice Cream Sundae Cake Cold And Creamy
Best Way To Store Reeses Overload Ice Cream Sundae Cake
Print
Decadent Reeses Overload Ice Cream Sundae Cake Recipe
- Total Time: 4 hours 20 minutes
- Yield: 11 1x
Description
Reeses overload ice cream sundae cake blends chocolate and peanut butter in a delightful dessert experience. Sweet layers of creamy indulgence will tempt and satisfy chocolate enthusiasts craving an unforgettable treat.
Ingredients
- 1.5 quarts (1.4 liters) peanut butter ice cream (or vanilla mixed with peanut butter)
- 24 Oreo cookies, crushed
- 1 cup (240 ml) chopped Reeses Peanut Butter Cups
- ½ cup (120 ml) Reeses Pieces
- ½ cup (120 ml) peanut butter, melted
- ¾ cup (180 ml) hot fudge sauce, warmed
- 4 tbsps unsalted butter, melted
- ½ cup (120 ml) whipped cream
- Extra Reeses Peanut Butter Cups, halved
- Extra Reeses Pieces for garnish
Instructions
- Crust Preparation: Pulverize Oreo cookies and amalgamate with melted butter, pressing the mixture firmly into a springform pan’s base. Refrigerate until the foundation solidifies completely.
- Ice Cream Layer: Allow peanut butter ice cream to soften marginally, then spread evenly across the chilled cookie crust, creating a smooth, uniform surface. Disperse chopped Reeses Peanut Butter Cups and Reeses Pieces generously across the ice cream landscape.
- Sauce Infusion: Gently warm hot fudge and peanut butter sauces, then artfully drizzle and swirl across the decorated ice cream layer, ensuring comprehensive coverage with a spatula.
- Freezing Phase: Envelop the dessert in plastic wrap and transfer to the freezer for a minimum of four hours, allowing flavors to harmonize and texture to set impeccably.
- Final Embellishment: Before serving, adorn with billowy whipped cream, strategically positioning halved Reeses Peanut Butter Cups around the perimeter. Sprinkle additional Reeses Pieces for textural contrast and visual allure. Complete the presentation by cascading complementary streams of hot fudge and peanut butter across the surface.
- Serving Technique: Slice with a knife warmed under hot water, wiping the blade between cuts to ensure pristine, clean-edged portions that showcase the dessert’s intricate layers.
Notes
- Chill Cookies Carefully: Freeze the Oreo cookie base for about 15 minutes to ensure a firm, stable foundation that won’t crumble when slicing.
- Soften Ice Cream Strategically: Let peanut butter ice cream soften at room temperature for 5-10 minutes to achieve a spreadable consistency without becoming too runny.
- Control Sauce Temperatures: Warm hot fudge and peanut butter sauces gently to prevent melting the ice cream layer, using short microwave bursts or a double boiler.
- Clean Cutting Technique: Dip the knife in hot water and wipe dry between each slice to create smooth, precise cuts that showcase the dessert’s beautiful layers.
- Prep Time: 20 minutes
- Cook Time: 4 hours
- Category: Desserts, Snacks
- Method: Mixing
- Cuisine: American
Nutrition
- Serving Size: 11
- Calories: 550
- Sugar: 45 g
- Sodium: 250 mg
- Fat: 30 g
- Saturated Fat: 14 g
- Unsaturated Fat: 12 g
- Trans Fat: 0 g
- Carbohydrates: 60 g
- Fiber: 3 g
- Protein: 10 g
- Cholesterol: 30 mg
Marcus Foley
Food Critic & Kitchen Coach
Expertise
Recipe Testing and Troubleshooting; Time-Saving Kitchen Hacks; Global Flavor Exploration; Engaging Food Writing and Honest Reviews.
Education
Institute of Culinary Education (ICE), New York, NY
Marcus Foley, based in Atlanta, GA, is a friendly food expert who makes cooking fun and simple.
With hands-on training from the Institute of Culinary Education and years of tasting everything from street food to fine dining, he shares easy kitchen hacks, global flavor ideas, and step-by-step recipes that turn kitchen mishaps into delicious surprises.