
Flower Power: The Zingy Blooming Quesadilla Ring Recipe
The culinary world of quesadilla ring surprises home cooks with its stunning circular presentation that turns ordinary ingredients into an extraordinary meal.
Crispy edges and melted cheese create a visual masterpiece that catches everyone’s attention.
Packed with flavor and designed to impress, this recipe delivers a crowd-pleasing appetizer or main course.
Layers of tortillas, savory fillings, and golden-brown exterior make this dish irresistible.
Each slice offers a perfect blend of textures and tastes that will delight your taste buds.
The entire family will love gathering around this delicious ring and enjoying every single bite.
Prepare to experience a Mexican-inspired dish that elevates weeknight dinners from simple to spectacular.
Quick Recipe Overview
All The Ingredients For Blooming Quesadilla Ring
For Base Ingredients:For Seasoning and Flavor Enhancers:For Binding and Topping Ingredients:For Serving Companions:Tools To Make Blooming Quesadilla Ring
How To Build A Blooming Quesadilla Ring
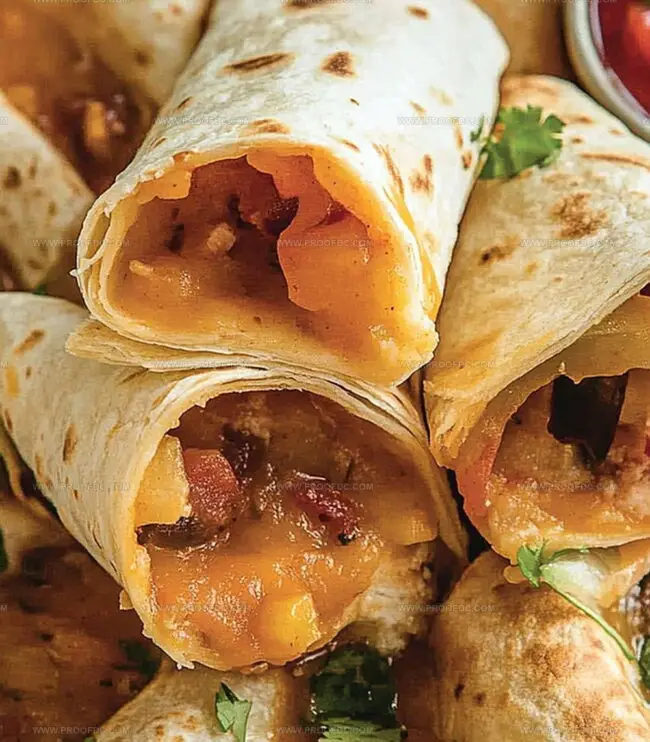
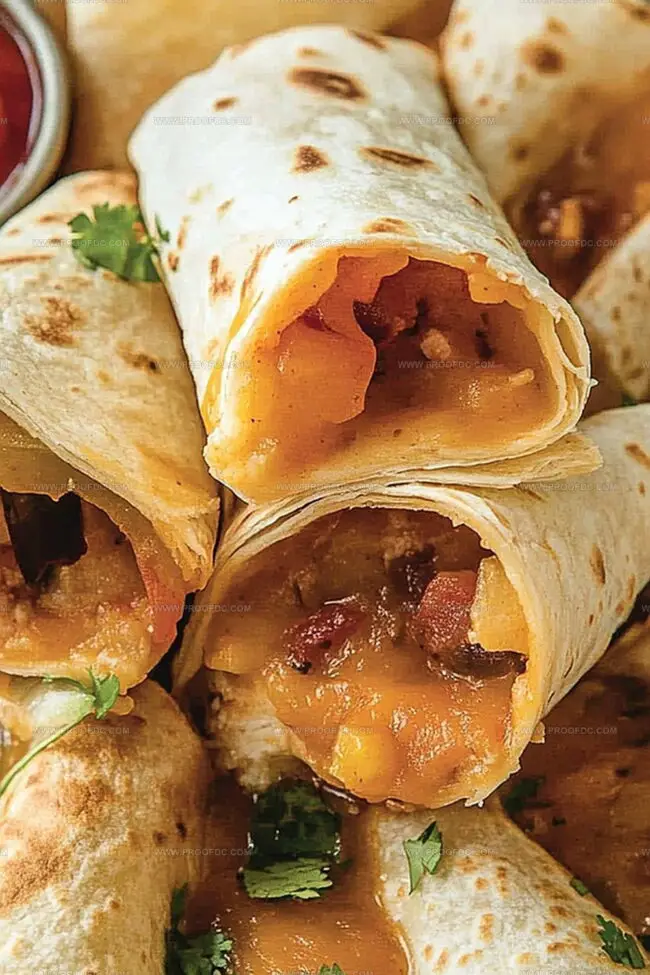
Brown ground beef and onions in a skillet, creating a mouth-watering aroma. Splash in taco seasoning, salsa, and a touch of water, letting the flavors mingle and dance. Stir in cheese until it melts into a gooey, irresistible filling.
Warm the oven to a toasty 375F. Slice tortillas into perfect half-moons and lovingly cradle a spoonful of the beefy mixture in each. Roll each piece into a tempting cone, arranging them in a circular formation around a small bowl. The result? A stunning ring that’s about to become the star of your feast.
Brush the tortilla cones with melted butter, then sprinkle with garlic powder and a whisper of smoked paprika. Slide into the oven and bake until they turn a gorgeous golden brown. Pull out the center bowl and fill with your favorite dip – salsa, guacamole, or cool sour cream. Serve immediately and watch everyone’s eyes light up!
Tips To Shape Your Blooming Quesadilla Ring
How To Serve Blooming Quesadilla Ring Neatly
Smart Storage For Blooming Quesadilla Ring
Print
Crispy Quesadilla Ring Recipe
- Total Time: 35 minutes
- Yield: 9 1x
Description
Mexican-inspired Blooming Quesadilla Ring delights appetizer enthusiasts with its creative circular design and cheesy goodness. Melted cheese, seasoned meat, and crisp tortillas combine for a shareable party sensation you’ll want to devour immediately.
Ingredients
- 1 lb (454 g) ground beef (or shredded chicken)
- 10–12 small flour tortillas (fajita-size)
- 1 ½ cups (360 ml) shredded Mexican blend cheese
- 1 packet taco seasoning (or 2 tbsps homemade taco seasoning)
- ½ cup (120 ml) onion (diced)
- 2 cloves garlic (minced)
- ½ tsp garlic powder
- ½ tsp smoked paprika (optional, for extra flavor)
- ⅓ cup (80 ml) water
- ½ cup (120 ml) salsa
- 2 tbsps (30 milliliters) melted butter (for brushing)
- Sour cream
- Salsa
- Guacamole
Instructions
- Meat Preparation: Sauté ground beef and onions in a skillet until thoroughly browned. Drain excess fat, then incorporate garlic, taco seasoning, water, and salsa. Simmer until the mixture thickens and develops rich, concentrated flavors.
- Assembly: Preheat oven to 375F (190C) and line a baking sheet with parchment. Slice tortillas diagonally, then carefully distribute meat mixture along the curved edge. Sprinkle cheese, roll into cone shapes, ensuring edges are securely sealed.
- Flavor Enhancement: Arrange tortilla cones in a circular pattern, slightly overlapping and surrounding a small central space. Brush exteriors with melted butter, then dust with garlic powder and paprika to elevate the sensory experience.
- Baking and Serving: Bake for 15-20 minutes until the cones transform into crispy, golden masterpieces. Remove from oven and place a bowl of fresh salsa, guacamole, or sour cream in the central cavity, creating an irresistible presentation ready for immediate devouring.
Notes
- Manage Meat Moisture: Drain excess fat completely after browning ground beef to prevent soggy quesadilla bottoms and maintain a crisp, appetizing texture.
- Optimize Tortilla Rolling: Ensure tight, uniform rolling of tortilla triangles to create consistent cone shapes that hold filling securely and cook evenly without unraveling.
- Enhance Flavor Layering: Brush tortillas with garlic-infused butter and sprinkle additional spices before baking to elevate the overall taste profile and create a more complex, aromatic experience.
- Control Baking Precision: Monitor quesadillas closely during the last 5 minutes of cooking to achieve a perfect golden-brown color without burning, adjusting oven rack position if needed for even browning.
- Prep Time: 15 minutes
- Cook Time: 20 minutes
- Category: Lunch, Appetizer, Snacks
- Method: Baking
- Cuisine: Mexican
Nutrition
- Serving Size: 9
- Calories: 310
- Sugar: 2 g
- Sodium: 650 mg
- Fat: 18 g
- Saturated Fat: 10 g
- Unsaturated Fat: 6 g
- Trans Fat: 0 g
- Carbohydrates: 24 g
- Fiber: 1 g
- Protein: 17 g
- Cholesterol: 60 mg
Marcus Foley
Food Critic & Kitchen Coach
Expertise
Recipe Testing and Troubleshooting; Time-Saving Kitchen Hacks; Global Flavor Exploration; Engaging Food Writing and Honest Reviews.
Education
Institute of Culinary Education (ICE), New York, NY
Marcus Foley, based in Atlanta, GA, is a friendly food expert who makes cooking fun and simple.
With hands-on training from the Institute of Culinary Education and years of tasting everything from street food to fine dining, he shares easy kitchen hacks, global flavor ideas, and step-by-step recipes that turn kitchen mishaps into delicious surprises.