Crispy Chinese Honey Garlic Chicken Recipe: Sweet & Sizzling Joy
My kitchen adventures with this crispy Chinese honey garlic chicken always spark curious smiles from dinner guests.
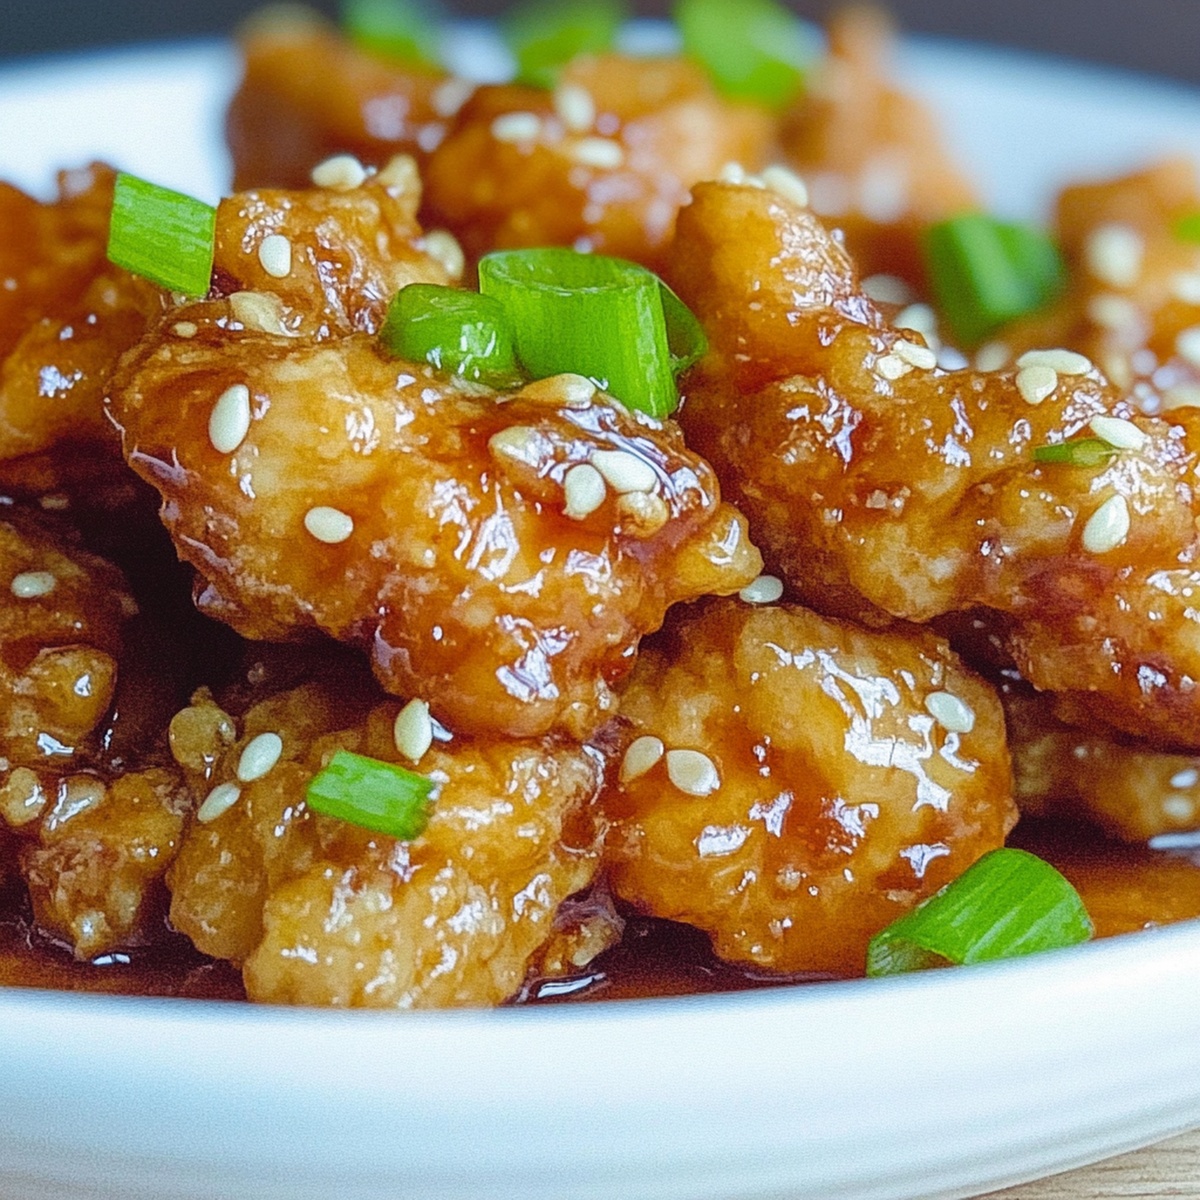
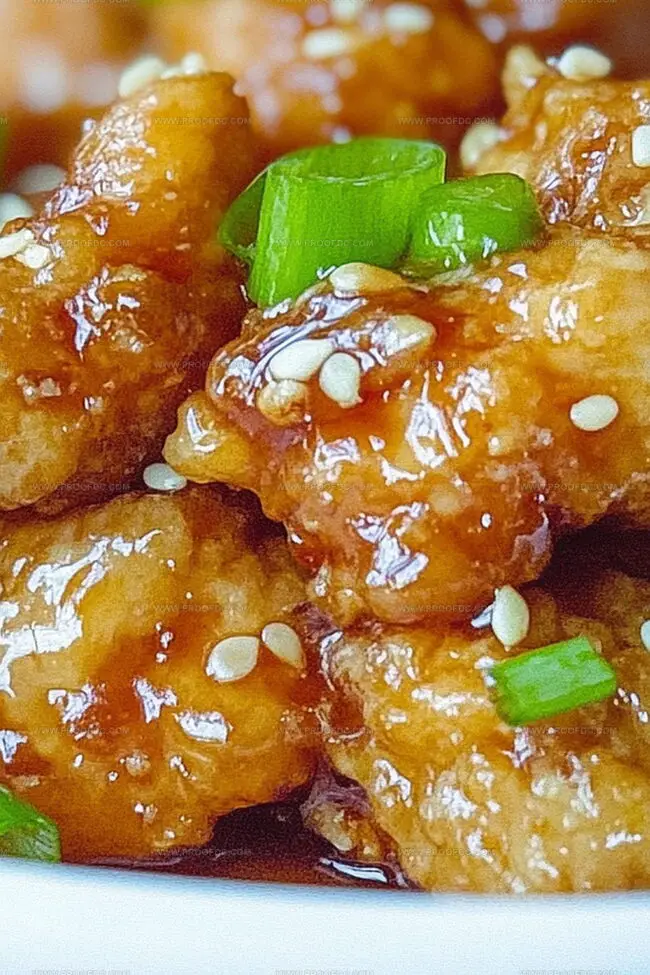
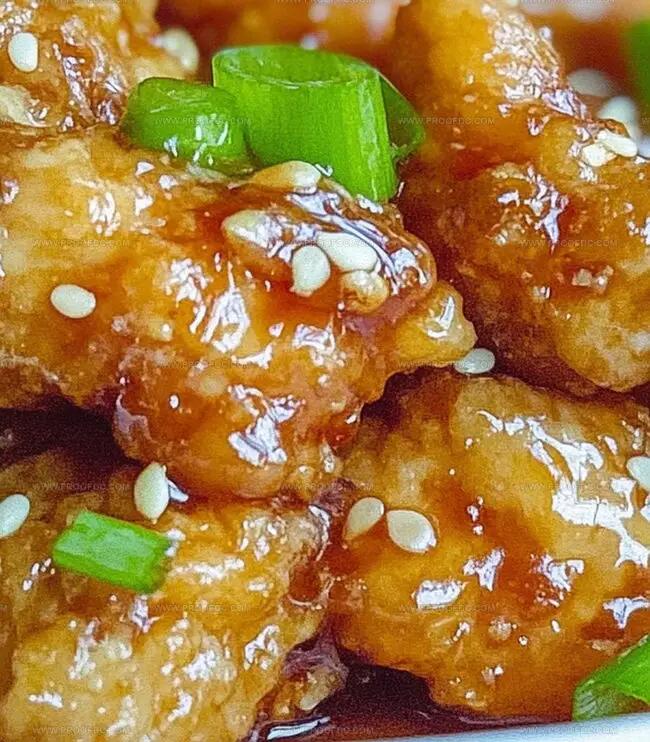
Tender chicken pieces coated in a golden, crackling shell that glistens with sweet-savory sauce.
Fragrant garlic and rich honey create an irresistible glaze that clings perfectly to each crisp morsel.
Restaurant-quality flavors emerge from simple ingredients you probably already have waiting in your pantry.
The magic happens when delicate spices mingle with caramelized honey, transforming ordinary chicken into something extraordinary.
Generous drizzles of sauce make every bite a delightful experience that connects comfort with excitement.
You’ll want to gather everyone around the table and watch their faces light up with the first delicious forkful.
Why Crispy Chinese Honey Garlic Chicken Is So Good
What’s In Crispy Chinese Honey Garlic Chicken
Main Protein:Coating Ingredients:Liquid Binding:Frying Base:Sauce Components:Sauce Thickener:Garnish:How To Cook Crispy Chinese Honey Garlic Chicken
Step 1: Prep the Golden Chicken Coating
Mix your dry ingredients in a wide, shallow bowl:Whisk the eggs in a separate bowl. Dunk each chicken piece into the eggs, then roll thoroughly in the seasoned flour mixture. Tap off any extra coating to ensure a light, crispy finish.
Step 2: Sizzle and Fry
Heat vegetable oil in a deep skillet or wok until it reaches a simmering 350°F. This temperature ensures a perfect golden crunch. Carefully lower chicken pieces into the hot oil, working in small batches to maintain oil temperature. Fry each batch until the exterior turns a beautiful amber-brown and the inside is fully cooked. Use tongs to transfer crispy pieces onto a paper towel-lined plate to drain excess oil.
Step 3: Create Magical Honey Garlic Sauce
In a saucepan, combine:Bring the mixture to a gentle simmer, stirring occasionally. Whisk in a cornstarch slurry to help the sauce thicken and become glossy. Cook until the sauce reaches a smooth, clingy consistency.
Step 4: Coat and Toss
Pour the warm honey garlic sauce over the freshly fried chicken in a large mixing bowl. Use a spatula to gently toss, ensuring each piece gets a luxurious, even coating of the sweet and savory sauce.
Step 5: Serve and Garnish
Transfer the saucy chicken to a beautiful serving platter. Sprinkle with toasted sesame seeds and chopped green onions for a pop of color and extra flavor. Serve immediately alongside steamed jasmine rice or soft noodles and your favorite crisp vegetables.
Tips For Crispy Chinese Honey Garlic Chicken Lovers
Best Way To Store Crispy Chinese Honey Garlic Chicken
What Goes Well With Crispy Chinese Honey Garlic Chicken
Fun Twists For Crispy Chinese Honey Garlic Chicken
Crispy Chinese Honey Garlic Chicken FAQ
The secret is double coating the chicken with a flour and cornstarch mixture, then frying at the right temperature (350F). This creates a golden, crunchy exterior that locks in the chicken’s moisture.
Absolutely! Chicken breast works perfectly. Just ensure you cut it into similar-sized pieces for even cooking and adjust cooking time slightly to prevent drying out.
The sauce balances sweetness from honey with savory soy sauce and tangy rice vinegar. It’s more of a complex flavor profile than just being overly sweet, creating a delicious coating for the crispy chicken.
Not really. You just need a large skillet or wok, a meat thermometer is helpful but optional, and basic kitchen tools like a mixing bowl and saucepan. Most home cooks already have these items.
Print
Crispy Chinese Honey Garlic Chicken Recipe
- Total Time: 40 minutes
- Yield: 4 1x
Description
Crispy Chinese honey garlic chicken delivers intense flavor and irresistible texture from Chinese street food traditions. Crunchy golden bites glazed with sweet-savory sauce bring restaurant-quality comfort directly to home kitchens that you’ll crave again and again.
Ingredients
Proteins:
- 1 lb (450 g) boneless, skinless chicken thighs or breasts, cut into bite-sized pieces
Coating Ingredients:
- ½ cup (65 g) all-purpose flour
- ½ cup (65 g) cornstarch
- ½ teaspoon salt
- ½ teaspoon black pepper
- ½ teaspoon garlic powder
- 2 large eggs, beaten
- Vegetable oil, for frying
Sauce Ingredients:
- ⅓ cup (80 ml) honey
- ¼ cup (60 ml) soy sauce
- 1 tablespoon rice vinegar
- 2 teaspoons sesame oil
- 3 garlic cloves, minced
- 1 tablespoon cornstarch mixed with 2 tablespoons water (slurry)
Garnish:
- Sesame seeds
- Chopped green onions
Instructions
- Create a seasoned coating by blending flour, cornstarch, and aromatic spices in a shallow container. Thoroughly dredge each chicken piece through beaten eggs, then meticulously dust with the seasoned powder, ensuring an even, light distribution.
- Prepare a deep skillet with vegetable oil, heating to an optimal temperature around 350F. Carefully lower chicken pieces into the hot oil, working in small batches to maintain consistent heat and prevent overcrowding.
- Fry chicken segments until they achieve a rich golden-brown exterior and reach complete internal doneness, approximately 45 minutes per batch. Remove pieces and allow excess oil to drain on absorbent paper towels.
- Craft a luxurious sauce by combining honey, soy sauce, rice vinegar, sesame oil, and finely minced garlic in a saucepan. Bring the mixture to a gentle simmer, stirring periodically to develop complex flavors.
- Enhance sauce consistency by incorporating a cornstarch slurry, cooking until the mixture transforms into a glossy, thick glaze that clings beautifully to the crispy chicken.
- Transfer golden-fried chicken into a spacious mixing bowl, then generously drench with the aromatic honey garlic sauce. Gently tumble the pieces to ensure comprehensive and uniform coating.
- Plate the glazed chicken, scattering toasted sesame seeds and freshly chopped green onions as a vibrant garnish. Accompany with steamed rice or tender noodles for a complete culinary experience.
Notes
- Select chicken thighs or breast meat depending on your preferred texture and juiciness, with boneless cuts working best for even cooking and crispy coating.
- Pat chicken pieces completely dry before coating to ensure maximum crispiness and prevent soggy breading from excess moisture.
- Use a thermometer to maintain precise oil temperature around 350F, preventing burning or undercooking when frying chicken in batches.
- Create gluten-free version by substituting all-purpose flour with rice flour or almond flour for equally crunchy exterior.
- Control sauce thickness by adjusting cornstarch slurry – add more for thicker coating or less for lighter glaze on chicken.
- Prep sauce ingredients beforehand to streamline cooking process and prevent potential burning while multitasking.
- Consider baking chicken instead of deep-frying for healthier alternative, using wire rack to maintain crispiness and reduce oil absorption.
- Prep Time: 15 minutes
- Cook Time: 25 minutes
- Category: Dinner, Appetizer
- Method: Frying
- Cuisine: Chinese
Nutrition
- Serving Size: 4
- Calories: 610
- Sugar: 25 g
- Sodium: 800 mg
- Fat: 20 g
- Saturated Fat: 3 g
- Unsaturated Fat: 17 g
- Trans Fat: 0 g
- Carbohydrates: 80 g
- Fiber: 2 g
- Protein: 30 g
- Cholesterol: 150 mg
Jenna Stewart
Head Chef & Recipe Innovator
Expertise
Farm-to-Table Cooking; Seasonal Menu Development; Visual Plating Techniques; Flavor Layering and Simple Prep Hacks.
Education
The Culinary Institute of America, Hyde Park, NY
Jenna Stewart is the inventive spirit behind many of our standout dishes at Pro of Delicious Creations. A proud graduate of The Culinary Institute of America, she built her skills mastering both classic recipes and fresh, modern twists.
Now, Jenna celebrates the beauty of seasonal, local ingredients, often sourced from her garden and nearby markets, to create recipes that are bursting with flavor yet easy to follow. When she’s not experimenting in the kitchen, Jenna loves exploring nature on hikes and discovering new treasures at local co-ops.