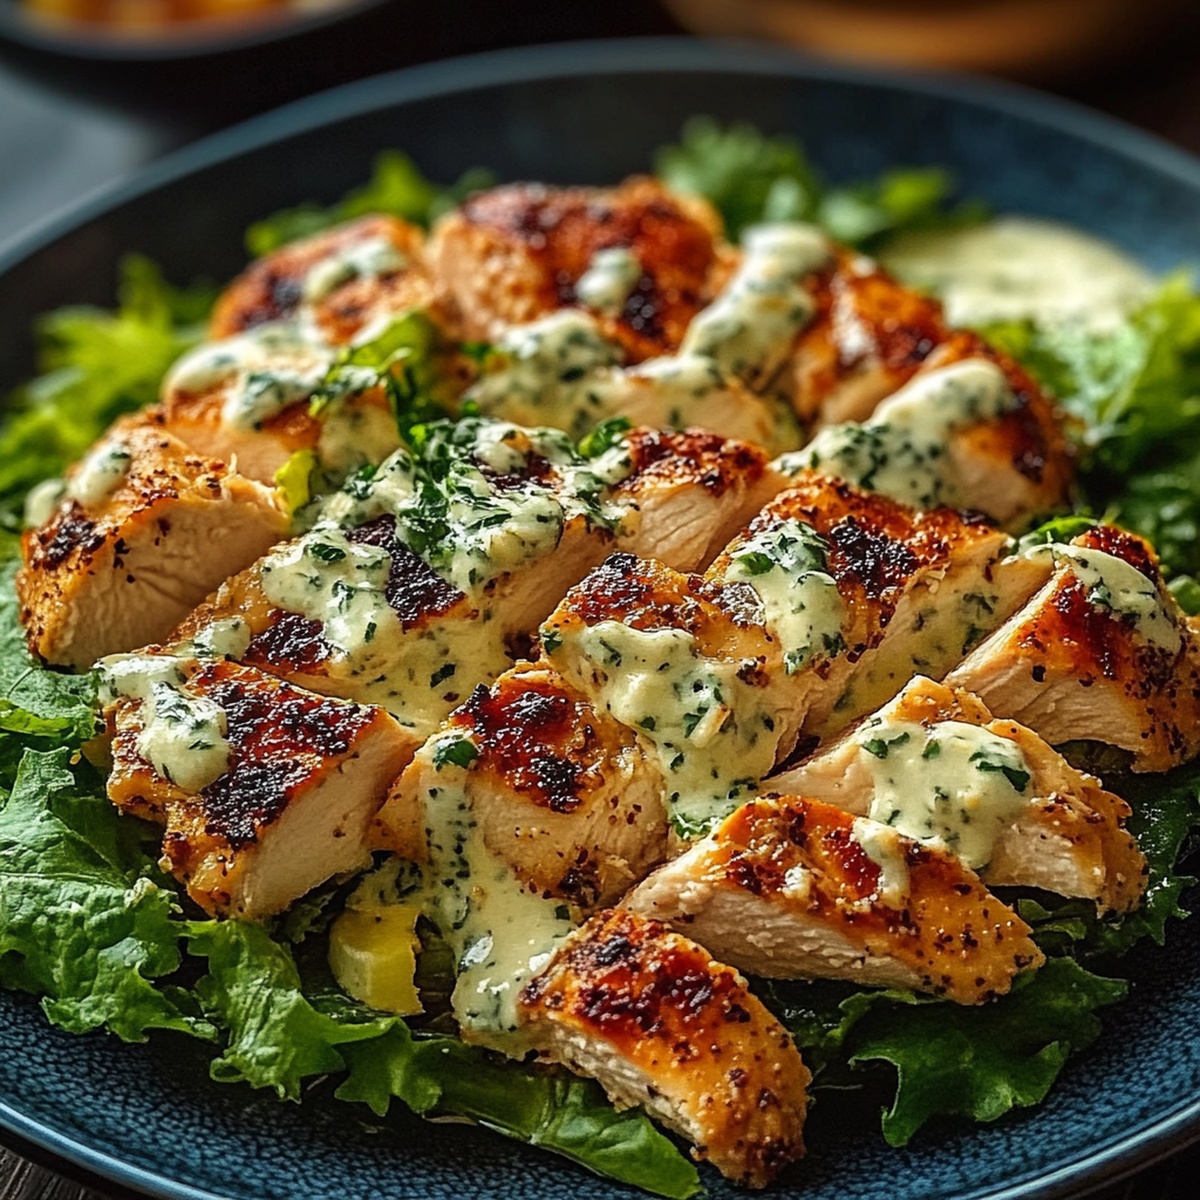
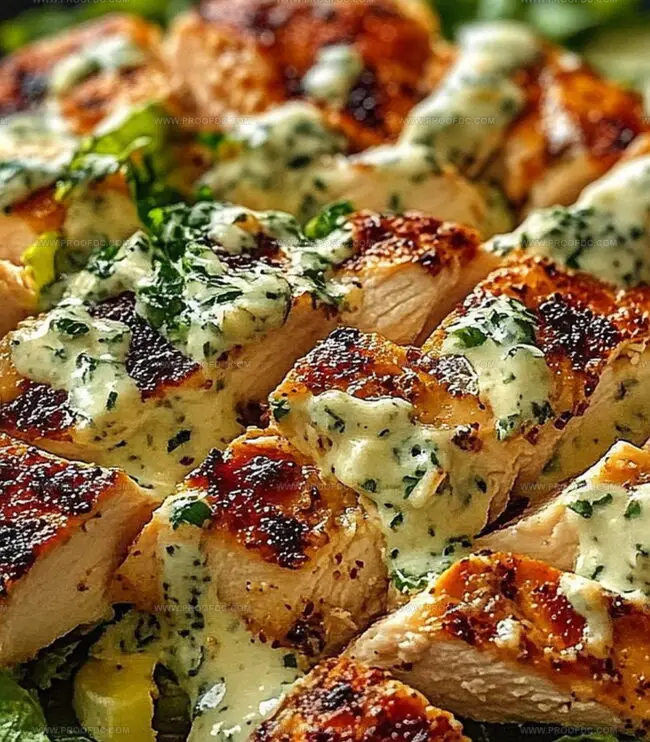
Savory Caesar Chicken Recipe: A Royal Dinner Delight
Weeknight dinners demand something special, and this crispy caesar chicken recipe delivers pure comfort on a plate.
Caesar salad lovers will adore how classic flavors merge with tender, golden-brown chicken.
The breading creates an irresistible crunch that seals in juicy meat with every bite.
Parmesan and garlic combine to form a seasoned coating that transforms ordinary chicken into a restaurant-worthy meal.
Simple ingredients come together quickly, making this dish perfect for busy home cooks seeking maximum flavor.
Each forkful promises a delightful blend of crispy texture and rich, tangy notes.
You’ll want to bookmark this recipe for your next meal rotation.
Quick Recipe Overview

What Goes In Ultimate Caesar Chicken
For Main Protein:For Flavor Enhancers:For Topping and Texture:Cooking Tools For Ultimate Caesar Chicken
Making Ultimate Caesar Chicken Step By Step
Crank the oven to a sizzling 375F and give your baking dish a quick spray of cooking oil to prevent any sticky situations.
Massage your chicken breasts with a sprinkle of salt, pepper, and garlic powder. Whip together Caesar dressing and sour cream to create a creamy magic sauce. Spread half the mixture across the baking dish, nestle your chicken on top, then drench the meat with the remaining sauce.
Rain down parmesan and mozzarella over the chicken. Mix panko breadcrumbs with olive oil and Italian seasoning, then scatter this crispy treasure across the cheesy landscape.
Pop the dish into the oven and bake for 25-30 minutes until the chicken hits 165F. For an extra wow factor, blast it under the broiler for 2-3 minutes to achieve a gorgeous golden crust.
Let the chicken rest for a quick 5 minutes. Sprinkle some fresh parsley on top and serve alongside pasta, roasted potatoes, or a zesty Caesar salad. Dinner is served!
Quick Tips For Ultimate Caesar Chicken
Serving Style For Ultimate Caesar Chicken
How To Store Ultimate Caesar Chicken Well
Print
Festive Cinnamon Roll King Cake Recipe
- Total Time: 2 hours 20 minutes
- Yield: 13 1x
Description
King cake lovers rejoice over this New Orleans cinnamon roll king cake that blends Mardi Gras tradition with sweet indulgence. Festive purple, green, and gold sugars crown this classic Louisiana dessert for memorable celebrations.
Ingredients
- 3.5 cups (440 g) all-purpose flour
- 1 egg
- 1 packet (2.25 tsp) active dry yeast
- 0.25 cups (50 g) granulated sugar
- 0.25 cups (60 ml) unsalted butter, melted
- 0.5 cups (120 ml) warm milk (110°F / 45°C)
- 1 tsp salt
- 1 tsp vanilla extract
- 1 tsp ground cinnamon
- 0.5 cups (115 g) unsalted butter, softened
- 0.5 cups (100 g) brown sugar
- 1 tbsp ground cinnamon
- 1.5 cups (180 g) powdered sugar
- 2 tbsps milk
- 0.5 tsp vanilla extract
- Purple, green, and gold colored sugar (or sprinkles)
- 1 small plastic baby (optional, for tradition!)
Instructions
- Yeast Activation: Whisk yeast into lukewarm milk, allowing the mixture to become frothy and aromatic for 5 minutes.
- Dough Preparation: In a spacious mixing bowl, combine flour, sugar, salt, cinnamon, melted butter, vanilla extract, and egg. Gradually incorporate the activated yeast mixture, kneading until the dough transforms into a silky, elastic consistency.
- First Rising: Cover the dough with a clean kitchen towel, letting it rest in a warm environment until its volume doubles, approximately 1 hour.
- Filling Creation: Blend softened butter with brown sugar and ground cinnamon to create a smooth, spreadable cinnamon filling.
- Dough Shaping: Roll the risen dough into a rectangular shape, spreading the cinnamon mixture evenly across the surface. Carefully roll the dough lengthwise into a tight cylinder, then form it into a circular or oval shape on a prepared baking sheet.
- Second Rising: Allow the shaped cake to become slightly puffy for 30 minutes, sealing the ends by pinching them together.
- Baking Process: Preheat the oven to 350°F (175°C). Bake the cake until it achieves a golden-brown complexion, typically 25-30 minutes.
- Finishing Touches: Cool the cake completely, then prepare a glossy glaze by whisking powdered sugar with milk and vanilla. Drizzle the glaze over the cooled cake and decorate with purple, green, and gold sugars.
- Traditional Embellishment: Optionally, hide a small plastic baby within the cake to continue the cherished Mardi Gras tradition.
Notes
- Master Yeast Activation: Ensure milk is precisely lukewarm (100-110°F) to activate yeast without killing it, creating the perfect frothy foundation.
- Dough Elasticity Technique: Knead thoroughly until dough becomes smooth and stretchy, developing gluten for a soft, pillowy texture that springs back when touched.
- Temperature Control Crucial: Proof dough in a consistently warm, draft-free environment around 80-85°F to guarantee optimal rising and prevent dense, heavy texture.
- Gluten-Free Adaptation: Substitute all-purpose flour with a 1:1 gluten-free blend and add xanthan gum to maintain structural integrity and achieve similar soft, tender results.
- Prep Time: 20 minutes
- Cook Time: 30 minutes
- Category: Breakfast, Desserts
- Method: Baking
- Cuisine: American
Nutrition
- Serving Size: 13
- Calories: 374
- Sugar: 25 g
- Sodium: 186 mg
- Fat: 15 g
- Saturated Fat: 9 g
- Unsaturated Fat: 6 g
- Trans Fat: 0 g
- Carbohydrates: 54 g
- Fiber: 1 g
- Protein: 5 g
- Cholesterol: 33 mg
Marcus Foley
Food Critic & Kitchen Coach
Expertise
Recipe Testing and Troubleshooting; Time-Saving Kitchen Hacks; Global Flavor Exploration; Engaging Food Writing and Honest Reviews.
Education
Institute of Culinary Education (ICE), New York, NY
Marcus Foley, based in Atlanta, GA, is a friendly food expert who makes cooking fun and simple.
With hands-on training from the Institute of Culinary Education and years of tasting everything from street food to fine dining, he shares easy kitchen hacks, global flavor ideas, and step-by-step recipes that turn kitchen mishaps into delicious surprises.