The Ultimate Creamy Crockpot Chicken Spaghetti Recipe You’ll Love
The magic of a creamy crockpot chicken spaghetti that melts in your mouth and fills the kitchen with irresistible aromas.
Comfort food dreams come alive with this simple one-pot wonder that requires minimal effort.
Weeknight dinners suddenly become something special when you can toss ingredients into a slow cooker and walk away.
Busy schedules shouldn’t mean compromising on delicious meals that make everyone smile.
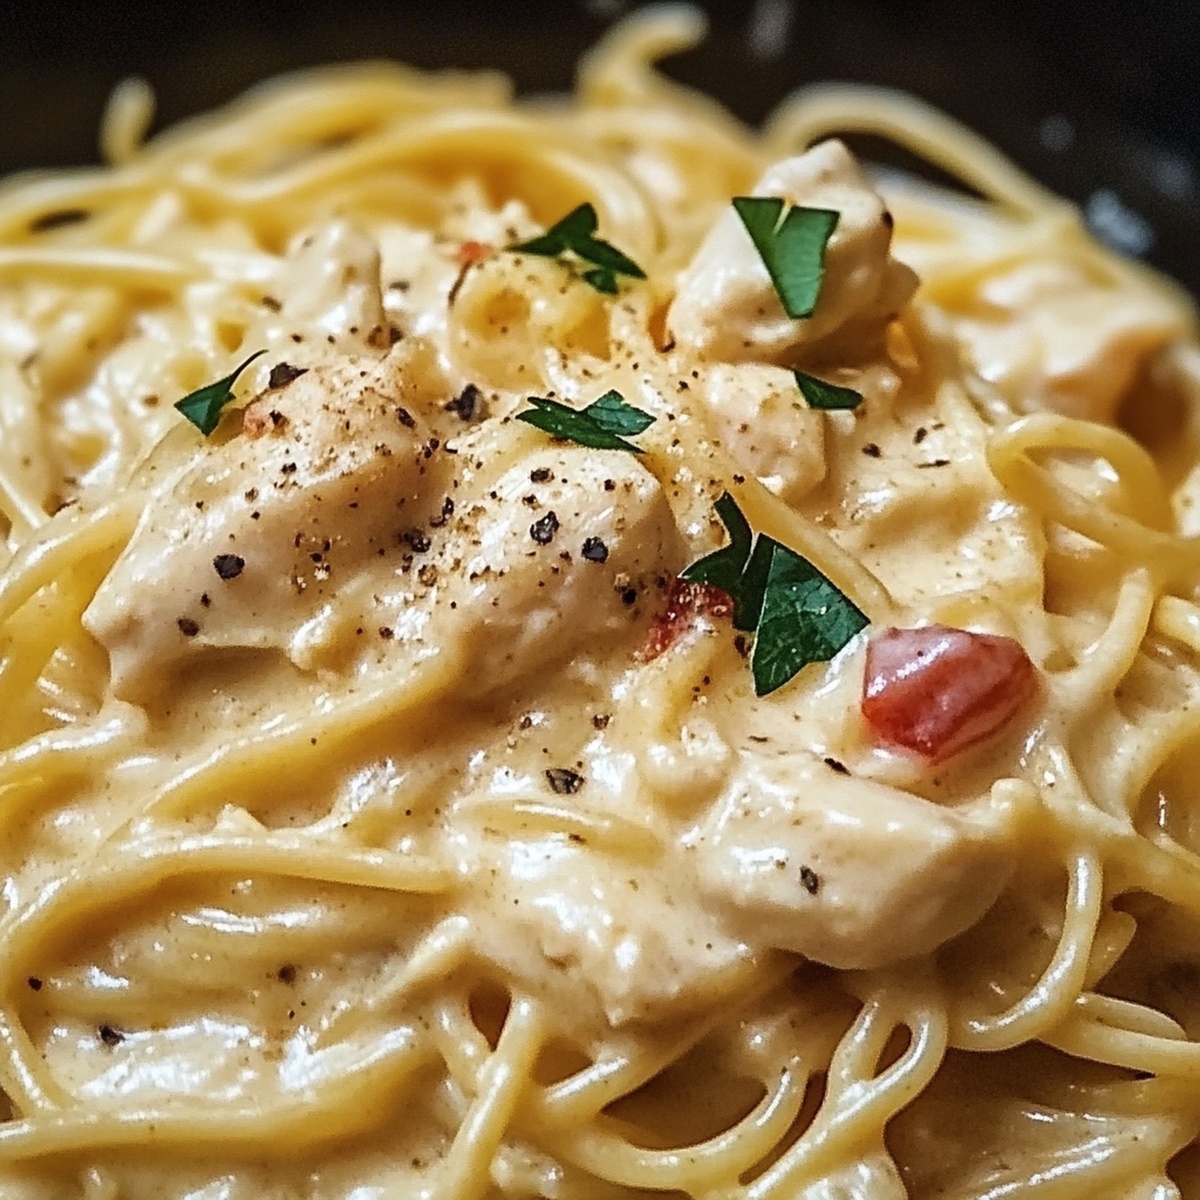
Cheesy, tender chicken mingles with perfectly cooked pasta, creating a dish that feels like a warm hug.
Rich flavors develop slowly, transforming basic ingredients into something extraordinary.
Trust me, you’ll want to savor every single bite of this crowd-pleasing recipe that promises to become a household favorite.
Why Creamy Crockpot Chicken Spaghetti Makes Mealtime Easy

What You’ll Use For Creamy Crockpot Chicken Spaghetti
Protein Base:Sauce Ingredients:Seasoning Blend:Dairy Components:Pasta Base:Steps To Make Creamy Crockpot Chicken Spaghetti

Step 1: Launch the Chicken Preparation
Nestle chicken breasts into the crockpot’s cozy bottom, creating a tender foundation for your culinary adventure.
Step 2: Unleash Flavor Explosion
Gather your flavor warriors:Cascade these ingredients over the chicken, creating a sauce that’ll make taste buds dance.
Step 3: Slow Cook to Perfection
Snap on the crockpot lid and let magic happen. Simmer on low for 6-7 hours or high for 3-4 hours until chicken transforms into fork-tender goodness.
Step 4: Shred Like a Pro
Rescue the chicken from its saucy bath. Using two forks, pull and tear the chicken into delectable shreds. Return the shredded treasure back to the crockpot.
Step 5: Cheese Symphony
Introduce cream cheese and cheddar to the mix. Stir until they melt into a luxurious, creamy blanket that hugs every morsel.
Step 6: Pasta Dive
Plunge cooked spaghetti into the creamy concoction. Toss and twirl until every strand is gloriously coated.
Step 7: Serve and Celebrate
Scoop generous portions onto plates. Crown with extra cheddar if you’re feeling indulgent. Pair with crispy garlic bread or a fresh green salad for a meal that’ll become a family legend.
Tips For Creamy And Flavor-Packed Chicken Spaghetti
How To Store Creamy Crockpot Chicken Spaghetti The Smart Way
Sides That Go With Creamy Crockpot Chicken Spaghetti
New Twists On Creamy Crockpot Chicken Spaghetti
Creamy Crockpot Chicken Spaghetti FAQs
This crockpot version is super easy and hands-off. Unlike traditional stovetop recipes, you just dump ingredients in the slow cooker and let it do the work, which means less hassle and more delicious dinner time.
Absolutely! You can swap in cream of celery or use a homemade white sauce. The key is maintaining a creamy base that will help bind the chicken and pasta together.
Yes! This chicken spaghetti keeps well in the refrigerator for 34 days. It’s perfect for making ahead and enjoying quick, tasty meals throughout the week without spending hours in the kitchen.
The Rotel adds a mild kick, but it’s not overwhelming. If you’re sensitive to heat, you can use regular diced tomatoes instead. The recipe is designed to be family-friendly with just a hint of zesty flavor.
Print
Easy Sweet Condensed Milk Bread Recipe
- Total Time: 2 hours 25 minutes
- Yield: 12 1x
Description
Condensed milk bread brings comfort and warmth from traditional bakeries to your kitchen. Silky smooth texture and delicate sweetness invite you to savor each delightful slice with pure pleasure.
Ingredients
Main Ingredients:
- 3.5 cups (440 g) all-purpose flour
- 1 large egg
- ¼ cup (60 ml) sweetened condensed milk
- ½ cup (120 ml) warm milk
Leavening and Seasoning:
- 1 packet (2.25 teaspoons) instant yeast
- ¼ cup (50 g) granulated sugar
- ½ teaspoon salt
Binding and Enriching Ingredients:
- ¼ cup (60 g) unsalted butter, softened
- ¼ cup (60 ml) warm water
Egg Wash:
- 1 large egg, beaten
- 1 tablespoon water
Instructions
- Create a foundation for the dough by blending dry ingredients in a spacious mixing vessel. Whisk flour, instant yeast, granulated sweetener, and sodium chloride until thoroughly integrated.
- In a separate container, emulsify warm dairy liquid, sweetened condensed milk, room-temperature butter, protein-rich egg, and tepid water until smooth and homogeneous.
- Merge wet and dry components, stirring vigorously with a utensil or manipulating with hands to form a cohesive, slightly tacky mixture.
- Transfer the nascent dough onto a lightly dusted work surface. Engage in rhythmic kneading, working the mass for 8-10 minutes until achieving a silky, resilient texture. Alternatively, utilize a stand mixer with a dough attachment, processing on medium velocity for 5-6 minutes.
- Shape the dough into a compact sphere and nestle it within a greased receptacle. Drape with a moisture-laden cloth or translucent membrane, allowing it to rest in a draft-free, warm environment for 1-1.5 hours until volume doubles.
- Gently deflate the risen dough, expelling trapped atmospheric pockets. Partition into 8-10 uniform segments, rolling each into a compact orb.
- Arrange the dough spheres in a lubricated 9-inch culinary vessel, positioning them in close proximity but not completely merged.
- Conceal the pan with a damp fabric or transparent shield, permitting a secondary fermentation for 30-40 minutes until noticeably puffy.
- Calibrate the thermal cooking apparatus to 350F. Delicately apply an egg emulsion across the dough’s surface to ensure a luminous, amber-toned exterior.
- Position the pan in the preheated environment, allowing transformation for 20-25 minutes. Seek a rich golden hue and confirm doneness by tapping – a hollow resonance indicates readiness.
- Allow thermal relaxation within the original cooking vessel for 10 minutes before transferring to a wire elevation grid.
- Serve at ambient temperature or pleasantly warmed, accompanied by preferred condiments or enjoyed in its pristine state.
Notes
- Swap milk alternatives like almond or oat milk for a dairy-free version, ensuring the liquid temperature remains warm to activate the yeast correctly.
- Add extra flavor by incorporating vanilla extract or cinnamon into the wet ingredients for a subtle aromatic twist that complements the sweetness.
- Experiment with different toppings like sliced almonds, sesame seeds, or pearl sugar before baking to create a unique texture and visual appeal.
- Enhance the bread’s softness by brushing melted butter on top immediately after baking, which helps maintain moisture and creates a tender, glossy surface.
- Prep Time: 10 minutes
- Cook Time: 15 minutes
- Category: Breakfast, Snacks, Desserts
- Method: Baking
- Cuisine: American
Nutrition
- Serving Size: 12
- Calories: 180
- Sugar: 6 g
- Sodium: 100 mg
- Fat: 7 g
- Saturated Fat: 4 g
- Unsaturated Fat: 2 g
- Trans Fat: 0 g
- Carbohydrates: 25 g
- Fiber: 1 g
- Protein: 4 g
- Cholesterol: 40 mg
Jenna Stewart
Head Chef & Recipe Innovator
Expertise
Farm-to-Table Cooking; Seasonal Menu Development; Visual Plating Techniques; Flavor Layering and Simple Prep Hacks.
Education
The Culinary Institute of America, Hyde Park, NY
Jenna Stewart is the inventive spirit behind many of our standout dishes at Pro of Delicious Creations. A proud graduate of The Culinary Institute of America, she built her skills mastering both classic recipes and fresh, modern twists.
Now, Jenna celebrates the beauty of seasonal, local ingredients, often sourced from her garden and nearby markets, to create recipes that are bursting with flavor yet easy to follow. When she’s not experimenting in the kitchen, Jenna loves exploring nature on hikes and discovering new treasures at local co-ops.