
Dreamy Creamy Banana Pudding Cheesecake Bars Recipe
A decadent banana pudding cheesecake bars creation that melts in your mouth with silky smooth perfection.
Memories of grandma’s classic desserts dance alongside modern culinary creativity in this irresistible treat.
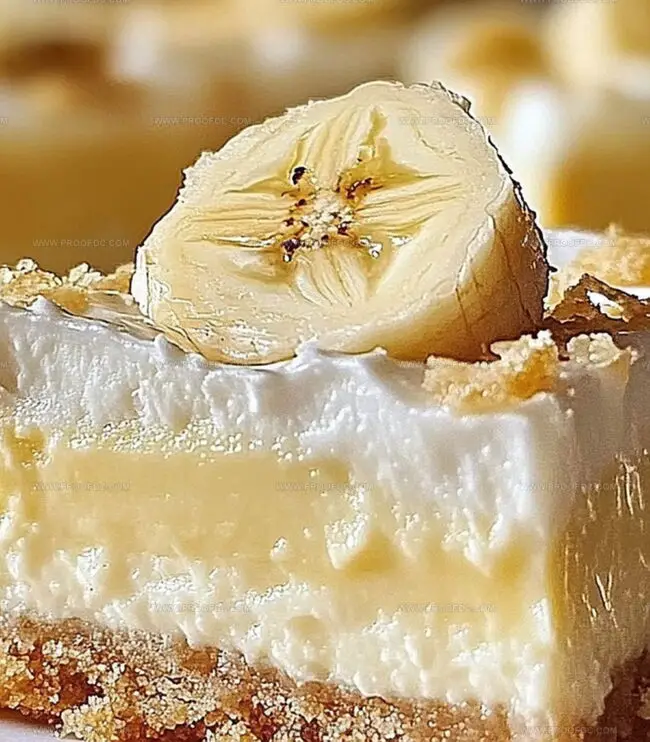
Layers of rich cream cheese blend seamlessly with sweet banana essence, creating a dessert that feels both nostalgic and exciting.
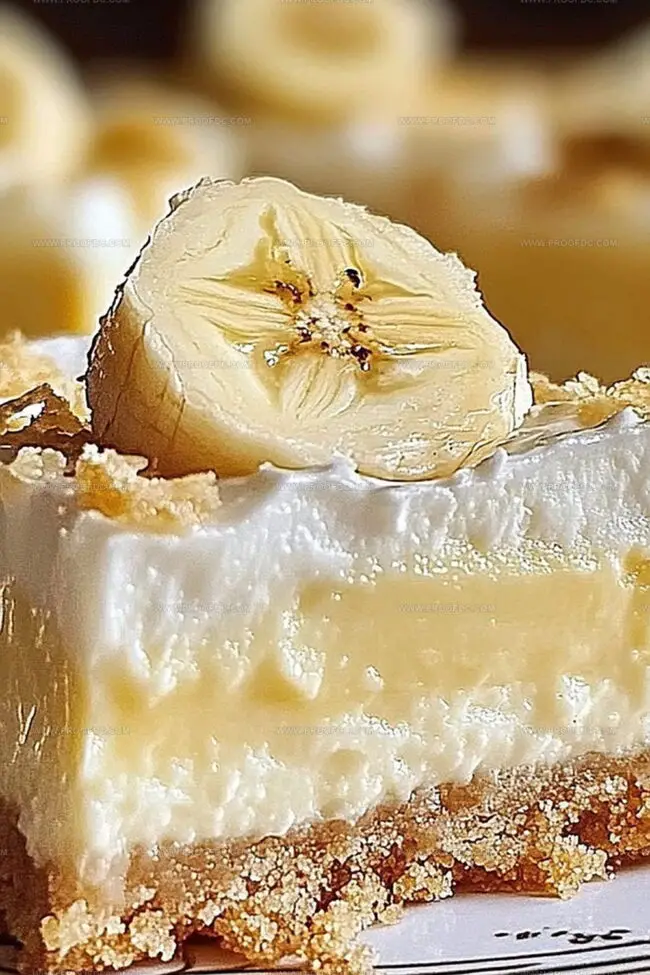
Cutting into these bars and revealing a luscious interior that promises pure indulgence.
Tender vanilla wafer crusts provide a delightful crunch against the velvety filling, making each bite a delectable experience.
Serious dessert lovers will appreciate how elegantly these bars balance comfort and sophistication.
You won’t be able to resist grabbing seconds of this crowd-pleasing delicacy that transforms an ordinary afternoon into a spectacular sweet moment.
Why Creamy Banana Pudding Cheesecake Bars Are So Good
Creamy Banana Pudding Cheesecake Bars Ingredient List
Crust Ingredients:Cheesecake Layer Ingredients:Topping and Finishing Ingredients:How To Whip Up Creamy Banana Pudding Cheesecake Bars
Step 1: Craft the Crumbly Base
Kick off this delightful dessert adventure by warming up your oven to a cozy 350F (175C). Grab a 9×9-inch baking dish and line it with parchment paper, letting the edges hang over for easy lifting later.
Combine these ingredients in a bowl, pressing the mixture down firmly into the dish. Pop it in the oven for 8-10 minutes until it looks golden. Let it cool down completely while you prep the next layer.
Step 2: Whip Up the Cheesecake Magic
Grab your mixer and get ready to create something incredible!
Beat the cream cheese and sugar until they become smooth and dreamy. Add eggs one by one, mixing gently. Mash those bananas and stir them in with the vanilla extract. Pour this luscious mixture over the cooled crust, spreading it evenly. Bake for 25-30 minutes until the center looks just set. Let it cool completely.
Step 3: Create the Banana Pudding Dream
Time to add some creamy goodness!
Whisk the pudding mix and milk together until it thickens up nicely. Fold in the whipped topping until smooth as silk. Carefully spread this layer over the cooled cheesecake.
Step 4: Chill and Embellish
Slide the dish into the refrigerator and let it rest for at least 4 hours. When you’re ready to serve, go wild with toppings:Sprinkle these goodies on top to create a dessert that’ll make everyone’s eyes light up!
Tips For Creamy Banana Pudding Cheesecake Bars That Wow
Store And Reheat Creamy Banana Pudding Cheesecake Bars Right
Great Pairings For Creamy Banana Pudding Cheesecake Bars
Change Up Creamy Banana Pudding Cheesecake Bars With These
Answers About Creamy Banana Pudding Cheesecake Bars
These bars combine the creamy richness of cheesecake with the classic comfort of banana pudding, creating a delightful dessert that blends two beloved treats into one irresistible recipe.
Yes! Ripe, well-mashed bananas work best. Make sure they’re very soft and thoroughly mashed to ensure a smooth cheesecake texture and even banana flavor throughout the layer.
Not at all! Just a 9×9-inch baking dish, mixing bowls, and standard baking tools are all you’ll need. The recipe is beginner-friendly and doesn’t require any complicated kitchen gadgets.
The cheesecake is done when the center is just set and slightly jiggly. It shouldn’t look wet or liquid, but should have a soft, custard-like consistency when gently shaken.
Print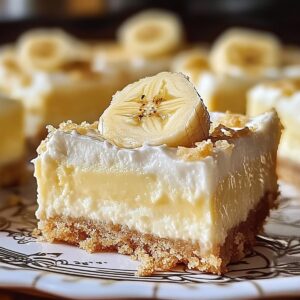
Creamy Banana Pudding Cheesecake Bars Recipe
- Total Time: 4 hours 50 minutes
- Yield: 12 1x
Description
Indulgent Banana Pudding Cheesecake Bars blend Southern comfort with creamy cheesecake decadence, marrying classic dessert flavors in one irresistible treat. Silky layers and rich textures promise a delightful escape that will transport you to a world of sweet, nostalgic bliss.
Ingredients
Main Ingredients:
- 16 ounces (453 grams) cream cheese, softened
- ½ cup mashed ripe bananas (about 1 medium banana)
- 2 large eggs
- ½ cup granulated sugar
Crust Ingredients:
- 2 cups vanilla wafer crumbs (about 50 wafers)
- ½ cup unsalted butter, melted
Topping and Filling Ingredients:
- 1 package (3.4 ounces/96 grams) instant banana pudding mix
- 1 ¾ cups cold milk
- 1 cup whipped topping (like Cool Whip)
- 1 teaspoon vanilla extract
- Sliced bananas
- Crushed vanilla wafers
Instructions
- Create a sturdy foundation by combining crushed vanilla wafers with melted butter, pressing the mixture into a parchment-lined baking dish. Gently toast the crust in a preheated oven until it turns a delicate golden hue, then allow it to cool completely.
- In a spacious mixing bowl, whip cream cheese and sugar until achieving a velvety smooth consistency. Incorporate eggs gradually, ensuring each is fully integrated before adding the next. Fold in ripe, velvety mashed bananas and aromatic vanilla extract.
- Carefully pour the luxurious cheesecake batter over the cooled crust, spreading it evenly with a gentle touch. Bake until the center sets with a subtle jiggle, indicating perfect doneness.
- Craft the luscious banana pudding layer by whisking pudding mix with cold milk until it reaches a thick, creamy texture. Gently fold in fluffy whipped topping to create a silky, cloud-like mixture.
- Lavish the cooled cheesecake with the pudding layer, spreading it with precision to create a uniform surface.
- Refrigerate the dessert for several hours, allowing the layers to meld and set into a harmonious masterpiece.
- Just before serving, embellish with dollops of whipped cream, delicate banana slices, and a sprinkle of crushed vanilla wafers for a stunning presentation that promises to delight the senses.
Notes
- Softening cream cheese at room temperature ensures a smooth, lump-free cheesecake layer that blends perfectly with banana flavors.
- Avoid overmixing the cheesecake batter to prevent air bubbles and a cracked surface, which can happen when eggs are incorporated too vigorously.
- Use very ripe, almost brown bananas for maximum sweetness and intense banana flavor that will elevate the entire dessert.
- For a gluten-free version, swap vanilla wafer crumbs with almond flour or gluten-free graham cracker crumbs to maintain the crunchy base texture.
- Prep Time: 20 minutes
- Cook Time: 30 minutes
- Category: Desserts, Snacks
- Method: Baking
- Cuisine: American
Nutrition
- Serving Size: 12
- Calories: 300
- Sugar: 15 g
- Sodium: 210 mg
- Fat: 16 g
- Saturated Fat: 9 g
- Unsaturated Fat: 5 g
- Trans Fat: 0 g
- Carbohydrates: 36 g
- Fiber: 1 g
- Protein: 4 g
- Cholesterol: 55 mg
Jenna Stewart
Head Chef & Recipe Innovator
Expertise
Farm-to-Table Cooking; Seasonal Menu Development; Visual Plating Techniques; Flavor Layering and Simple Prep Hacks.
Education
The Culinary Institute of America, Hyde Park, NY
Jenna Stewart is the inventive spirit behind many of our standout dishes at Pro of Delicious Creations. A proud graduate of The Culinary Institute of America, she built her skills mastering both classic recipes and fresh, modern twists.
Now, Jenna celebrates the beauty of seasonal, local ingredients, often sourced from her garden and nearby markets, to create recipes that are bursting with flavor yet easy to follow. When she’s not experimenting in the kitchen, Jenna loves exploring nature on hikes and discovering new treasures at local co-ops.