Magical Christmas Hot Cocoa Bombs Recipe for Cozy Holidays
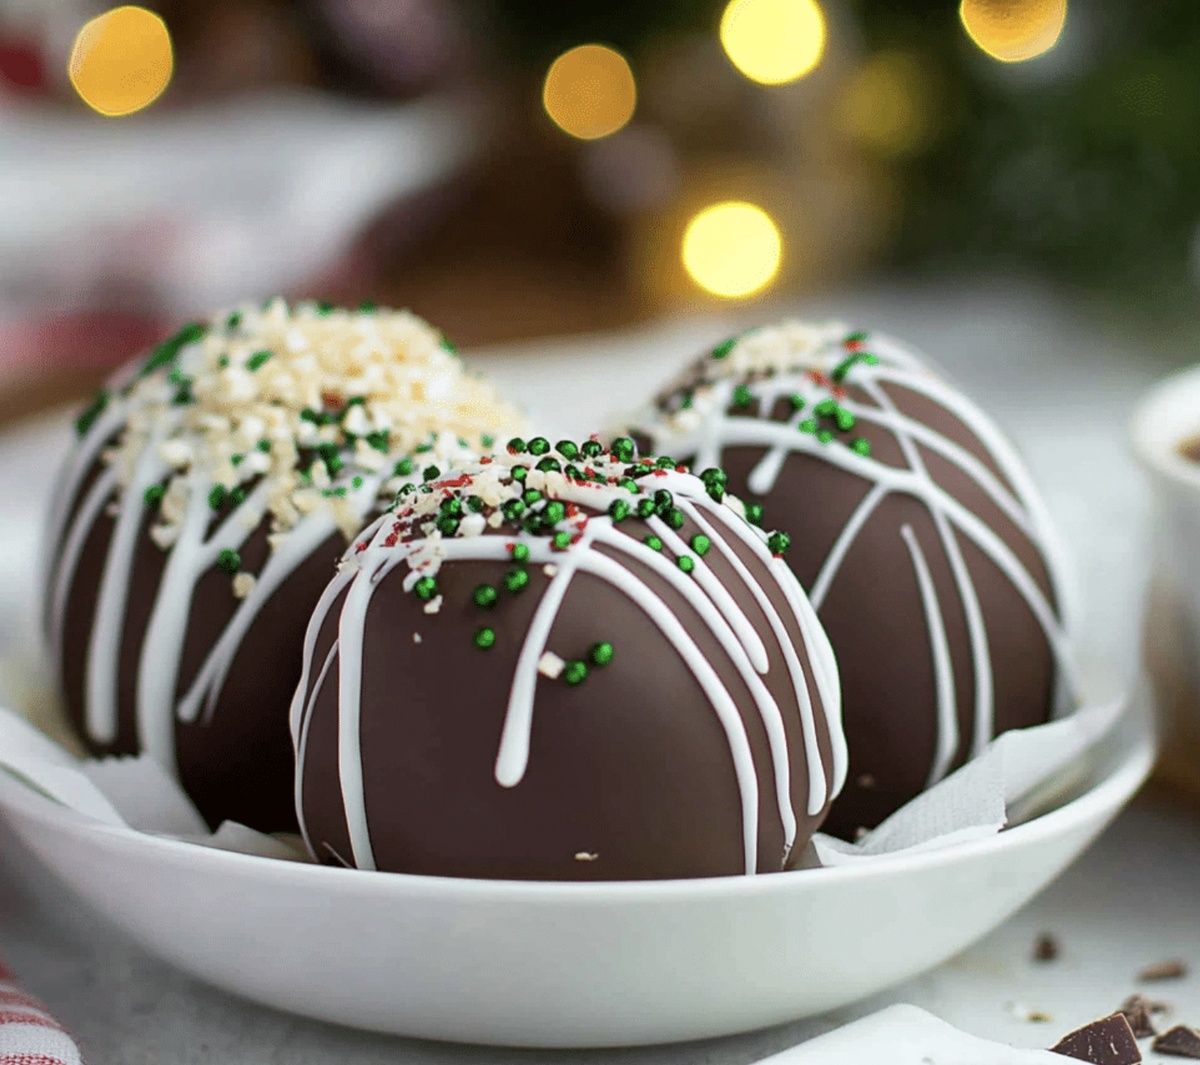
Magical Christmas hot cocoa bombs send winter chills packing with a delightful twist on classic comfort drinks.
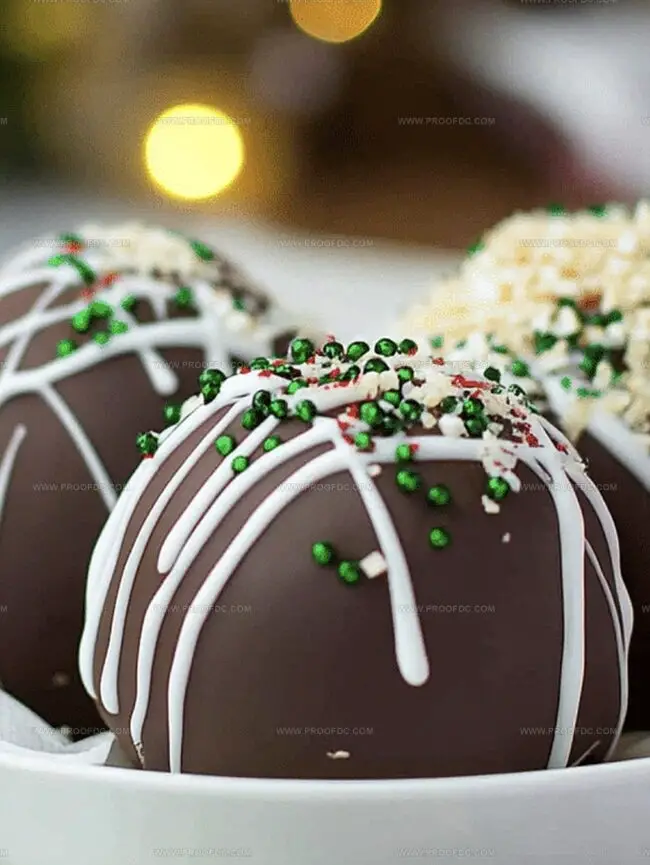
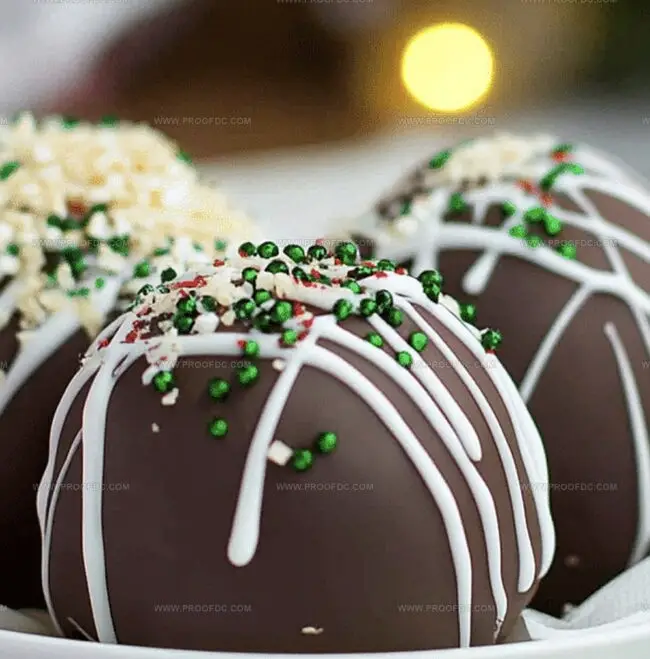
Cracking open a chocolate sphere that releases marshmallows and rich cocoa with a theatrical flourish.
Sweet chocolate shells hold secret ingredients waiting to dance in warm milk.
Chocolate spheres crafted by hand promise a moment of pure winter joy.
Each cocoa bomb brings playful surprise and comfort to cold afternoons.
Guests and kids will marvel at this festive treat that transforms ordinary drinking moments into something extraordinary.
One sip transforms an average day into a celebration of seasonal magic.
Fun Things About Christmas Hot Cocoa Bombs
Everything You Need For Christmas Hot Cocoa Bombs
Chocolate Base:Hot Cocoa Filling:Decorative Elements:How To Make Christmas Hot Cocoa Bombs From Scratch
Step 1: Melt the Chocolate
Chop your chocolate and microwave in 20‑second bursts, stirring until it’s fully melted and silky.
Step 2: Form Chocolate Shells
Spoon melted chocolate into each cavity of a silicone mold, brushing to coat evenly. Chill 10–15 minutes, add a second layer, and chill again until firm.
Step 3: Unmold Carefully
Gently pop the set shells out of the mold, handling them with care to avoid cracks.
Step 4: Fill with Cocoa Mix
Place hot cocoa powder, a few mini marshmallows, and festive sprinkles into half of the shells.
Step 5: Seal the Bombs
Warm a plate briefly, press the rim of an empty shell against it to melt the edge, then attach to a filled shell. Press gently and seal any gaps with a little extra melted chocolate.
Step 6: Decorate the Exterior
Drizzle with white chocolate, sprinkle candy‑cane bits or edible glitter, and let decorations set completely in the fridge.
Step 7: Serve the Cocoa Bombs
Place one bomb in a mug, pour hot milk over it, watch it burst open, stir, and enjoy your festive hot chocolate.
Smart Tips For Christmas Hot Cocoa Bombs
How To Store And Warm Up Christmas Hot Cocoa Bombs
What Matches Well With Christmas Hot Cocoa Bombs
Creative Spins On Christmas Hot Cocoa Bombs
Top Questions On Christmas Hot Cocoa Bombs Answered
These festive treats combine melted chocolate shells, hot cocoa mix, and holiday sprinkles into a magical mug experience. When hot milk is poured over, the chocolate shell dramatically melts, releasing marshmallows and cocoa mix for a delightful winter surprise.
You’ll need a silicone half-sphere mold, which helps create perfect round chocolate shells. A microwave for melting chocolate, a small brush or spoon, and some basic baking tools are essential. These molds are widely available online and in baking supply stores.
Absolutely! You can switch up the chocolate type (dark, milk, white), add different fillings like crushed peppermint, swap sprinkles, or use themed decorations. The key is keeping the basic chocolate shell technique consistent while letting your creativity shine.
While they look impressive, hot cocoa bombs are moderately easy with some patience. The most challenging part is creating smooth chocolate shells and handling them carefully. Practice makes perfect, and even if a few crack, they’ll still taste delicious!
Print
Christmas Hot Cocoa Bombs Recipe
- Total Time: 1 hour
- Yield: 6 1x
Description
Magical Christmas Hot Cocoa Bombs deliver festive winter warmth with chocolate shells packed with rich cocoa mix and marshmallow surprises. Melting these delightful spheres into steaming milk creates an indulgent holiday moment for cherished gatherings.
Ingredients
Main Ingredients:
- 12 ounces (340 grams) semi-sweet or milk chocolate, finely chopped (or chocolate wafers)
- 1 cup (120 grams) hot cocoa mix
Decorative Ingredients:
- ½ cup (50 grams) mini marshmallows
- ¼ cup (40 grams) holiday sprinkles (optional)
- ½ cup (85 grams) white chocolate, melted
- Extra sprinkles
- Crushed candy canes
- Edible glitter
Instructions
- Carefully chop the chocolate into fine, uniform pieces, ensuring smooth melting in the microwave-safe bowl. Heat in brief 20-second intervals, stirring thoroughly between each session to achieve a glossy, completely liquefied consistency.
- Use a silicone mold, meticulously coating each cavity with the melted chocolate. Apply the first layer generously, using a brush or spoon to create an even, uniform interior shell. Refrigerate for 10-15 minutes until the chocolate solidifies completely.
- Repeat the chocolate coating process, creating a second protective layer to enhance shell durability. Chill again to guarantee structural integrity.
- Delicately extract the chocolate shells from the mold, handling with extreme precision to prevent unexpected cracking or breakage.
- Distribute hot cocoa mix, miniature marshmallows, and festive holiday sprinkles into half of the prepared chocolate shells.
- Gently warm a plate using microwave or hot water. Carefully melt the rim of an empty shell by briefly touching the plate, creating a smooth, adhesive surface for sealing.
- Swiftly join the filled and empty shells, pressing gently to create a seamless bond. Smooth any visible gaps using additional melted chocolate for a polished finish.
- Embellish the cocoa bombs with drizzled white chocolate, then garnish with festive decorations like crushed candy canes or shimmering edible glitter. Allow decorations to set completely.
- When ready to serve, place a prepared cocoa bomb in a mug and slowly pour hot milk over it. Observe the magical melting process and stir until thoroughly combined.
Notes
- Choose high-quality chocolate with at least 60% cocoa for rich, smooth melting and superior flavor depth.
- Keep chocolate at room temperature and chop finely to ensure even melting without burning or seizing.
- Work in a cool kitchen environment to prevent chocolate from melting too quickly during shell creation.
- Use a food-safe paintbrush for precise and even chocolate shell coating inside silicone molds.
- Refrigerate chocolate shells between coatings to create sturdy, thick walls that won’t crack easily.
- Clean silicone molds thoroughly before use to prevent any residue from affecting chocolate’s appearance.
- Experiment with different hot cocoa mix flavors like peppermint, salted caramel, or dark chocolate for variety.
- Store completed cocoa bombs in an airtight container at cool room temperature for up to two weeks.
- Consider dairy-free alternatives by using plant-based milk and vegan chocolate for inclusive enjoyment.
- Add a pinch of sea salt or cinnamon to the hot cocoa mix for an unexpected flavor enhancement.
- Prep Time: 30 minutes
- Cook Time: 30 minutes
- Category: Drinks, Snacks, Desserts
- Method: Mixing
- Cuisine: American
Nutrition
- Serving Size: 6
- Calories: 310
- Sugar: 38 g
- Sodium: 100 mg
- Fat: 15 g
- Saturated Fat: 9 g
- Unsaturated Fat: 4 g
- Trans Fat: 0 g
- Carbohydrates: 43 g
- Fiber: 1 g
- Protein: 3 g
- Cholesterol: 10 mg
Jenna Stewart
Head Chef & Recipe Innovator
Expertise
Farm-to-Table Cooking; Seasonal Menu Development; Visual Plating Techniques; Flavor Layering and Simple Prep Hacks.
Education
The Culinary Institute of America, Hyde Park, NY
Jenna Stewart is the inventive spirit behind many of our standout dishes at Pro of Delicious Creations. A proud graduate of The Culinary Institute of America, she built her skills mastering both classic recipes and fresh, modern twists.
Now, Jenna celebrates the beauty of seasonal, local ingredients, often sourced from her garden and nearby markets, to create recipes that are bursting with flavor yet easy to follow. When she’s not experimenting in the kitchen, Jenna loves exploring nature on hikes and discovering new treasures at local co-ops.