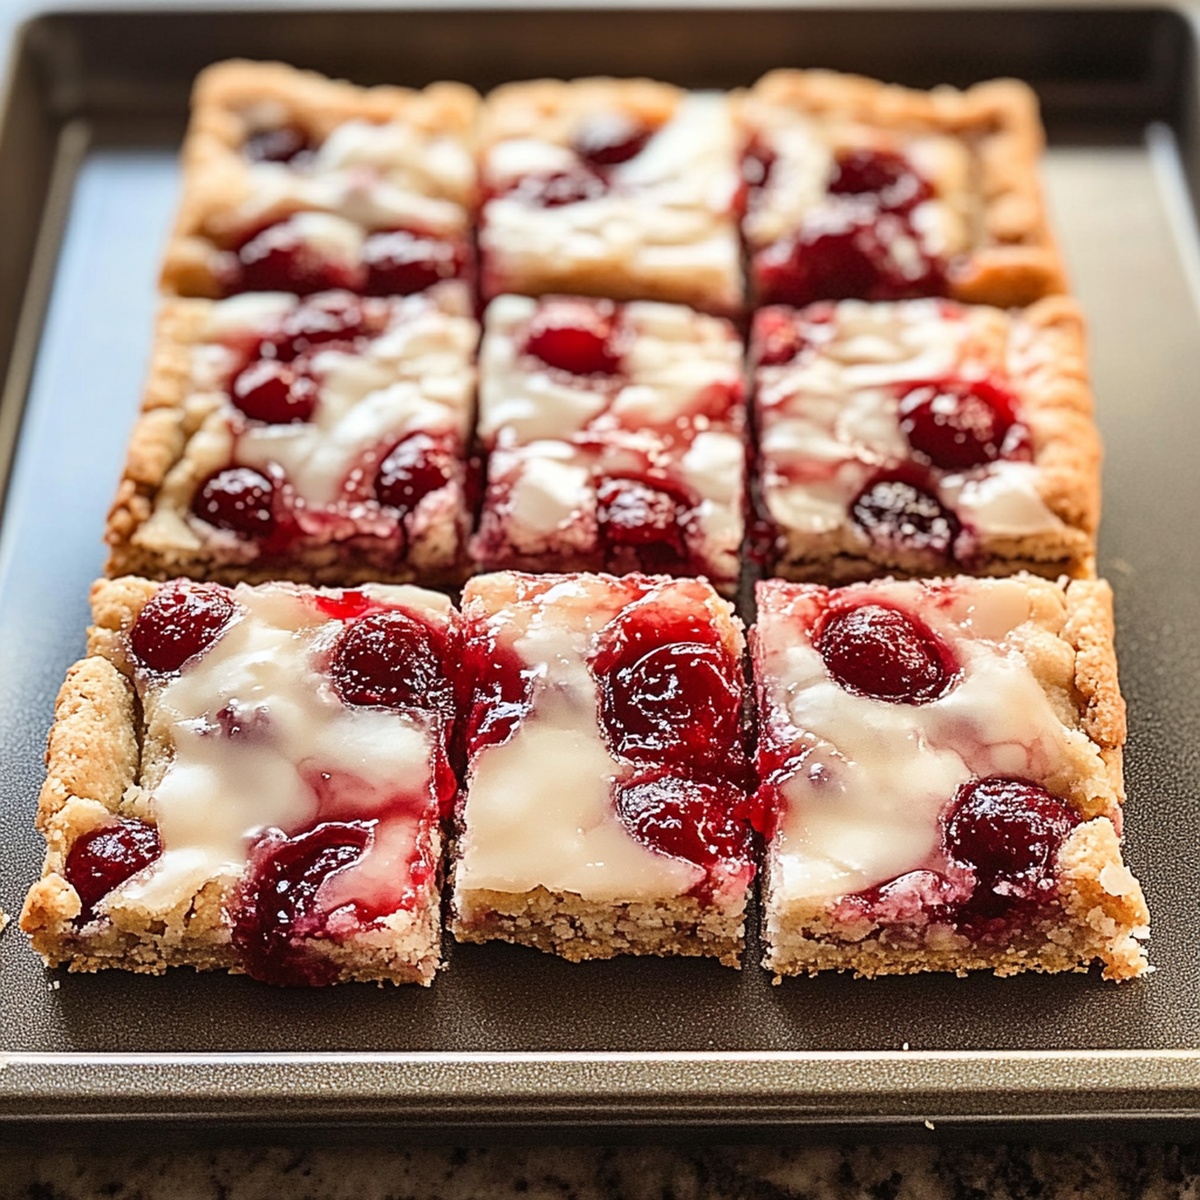
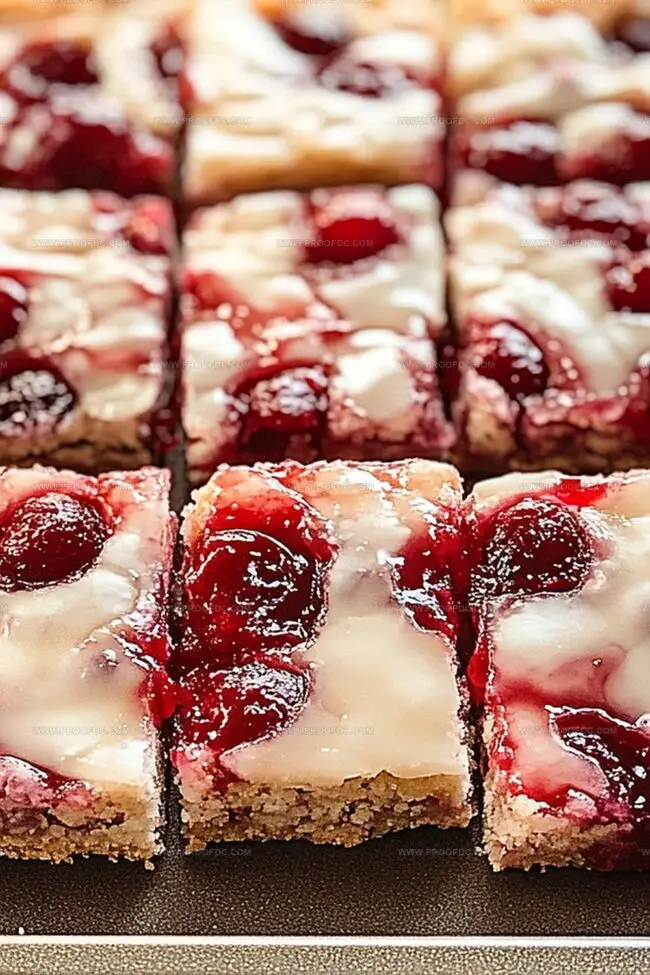
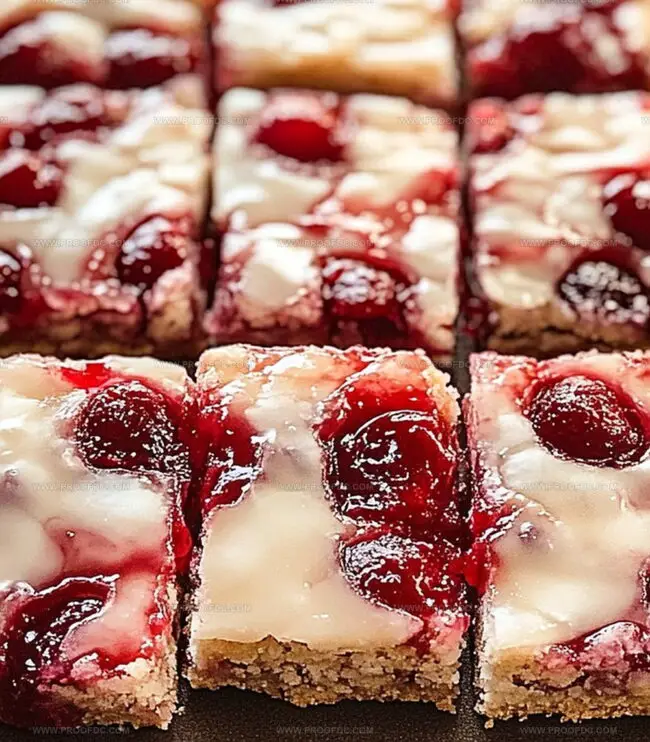
Festive Christmas Cherry Bars Recipe: A Sweet Holiday Treat
Sweet memories often bloom from unexpected Christmas cherry bars that capture the essence of holiday gatherings.
My grandmother first shared this delightful recipe during cozy winter afternoons.
Festive kitchens buzz with excitement when these delectable treats emerge from warm ovens.
Tart cherries nestled between buttery layers create a magical combination that sparks instant happiness.
Rich, crumbly textures and bright fruit flavors dance together in each delicious bite.
Serving these mouthwatering bars to loved ones, watching their faces light up with pure joy.
You’ll want to savor every single crumb of this irresistible seasonal delight.
Why Everyone Raves About Christmas Cherry Bars
What You Need For Christmas Cherry Bars
Base Ingredients:Fruit Filling:Topping Ingredients:Notes:How To Bake Christmas Cherry Bars At Home
Step 1: Warm Up The Oven
Crank up your oven to a toasty 350 degrees Fahrenheit. Grab a 9×13-inch baking dish and line it with parchment paper, letting the edges hang over like a cozy blanket. This trick will make lifting out your bars super easy later.
Step 2: Craft The Buttery Base
Grab a mixing bowl and beat softened butter with sugar until they become a fluffy cloud of deliciousness. Slowly fold in:Press this heavenly mixture into your prepared pan, creating an even layer that looks like a golden canvas. Pop it in the oven and bake until the edges turn a delicate golden brown, about 15 minutes.
Step 3: Spread The Cherry Magic
Grab your cherry pie filling and give it a little personality boost with a splash of almond extract. Gently spread this vibrant mixture over your perfectly baked crust, covering every inch with ruby-red goodness.
Step 4: Create A Crumbly Masterpiece
In another bowl, mix together:Use your fingers to create delightful crumbly clusters. Sprinkle this magical topping across the cherry layer like a winter snowfall.
Step 5: Bake To Perfection
Slide the pan back into the oven and let it dance for 25-30 minutes. Watch for the topping to transform into a golden-brown wonderland of deliciousness.
Step 6: Cool And Slice
Let your creation rest and cool completely in the pan. Use those handy parchment paper edges to lift out the entire batch. Slice into squares that will make everyone’s eyes light up with joy.
Helpful Tips For Christmas Cherry Bars
How To Store And Reheat Christmas Cherry Bars
Best Pairings With Christmas Cherry Bars
Fun Variations Of Christmas Cherry Bars
Common Questions On Christmas Cherry Bars
These bars combine a buttery shortbread crust with sweet cherry filling and a crumbly topping, creating a perfect balance of textures and flavors that’s perfect for holiday gatherings.
It’s best to stick with canned cherry pie filling for this recipe, as fresh cherries might release too much liquid and make the bars soggy. The prepared filling ensures consistent results.
Look for a golden-brown crumb topping and slightly set cherry filling. The edges should be lightly golden, and the bars should look firm when you gently shake the pan.
Absolutely! You can prepare these bars a day or two in advance and store them at room temperature. They actually taste even better as the flavors meld together overnight.
Print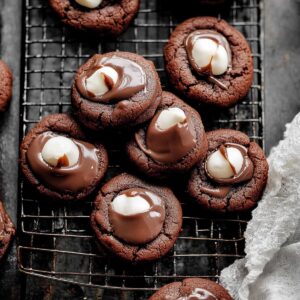
Marshmallow-Surprise Hot Cocoa Cookies Recipe
- Total Time: 40 minutes
- Yield: 12 1x
Description
Sweet marshmallow-surprise hot cocoa cookies blend winter comfort with chocolate magic. Gooey centers and rich cocoa notes create an irresistible treat you’ll crave on chilly afternoons.
Ingredients
Main Ingredients:
- ½ cup (115 g) unsalted butter, softened
- 1 cup (125 g) all-purpose flour
- ½ cup (45 g) unsweetened cocoa powder
- 12 large marshmallows
Sweeteners and Binding Ingredients:
- ½ cup (100 g) granulated sugar
- ½ cup (100 g) light brown sugar, packed
- 1 large egg
- 1 teaspoon vanilla extract
- ¼ cup (60 ml) milk
Finishing and Flavor Enhancers:
- 1 teaspoon baking soda
- ¼ teaspoon salt
- ½ cup (85 g) semi-sweet chocolate chips
- 1 teaspoon coconut oil or vegetable oil
- Sprinkles
Instructions
- Prepare the baking workspace by positioning oven racks in the middle and preheating to 350F (175C). Cover two baking sheets with parchment paper.
- Create a fluffy butter mixture by thoroughly creaming softened butter with granulated and brown sugars until the texture becomes light and airy. Incorporate egg and vanilla extract, blending until completely smooth.
- Develop the dry ingredients base by whisking flour, cocoa powder, baking soda, and salt in a separate mixing bowl. Carefully fold the dry mixture into the butter blend, ensuring gentle integration.
- Gradually introduce milk to the cookie dough, stirring until the consistency becomes uniform and glossy. Use a tablespoon to drop even portions of dough onto prepared baking sheets, maintaining approximately two inches between each cookie.
- Bake the initial cookie batch for eight minutes, watching for slightly set edges while maintaining soft centers. Remove from oven and delicately nestle a marshmallow half into each cookie’s center.
- Return cookies to the oven and continue baking for an additional two to three minutes, allowing marshmallows to puff and soften elegantly. Remove and let cookies rest on the baking sheet for five minutes.
- Transfer cookies to a wire cooling rack, allowing them to reach room temperature completely.
- Melt chocolate chips using short microwave intervals, stirring between each session to prevent burning. Incorporate coconut oil to achieve a smooth, drizzling consistency.
- Once cookies have cooled, artfully drizzle melted chocolate across the surface. Optional: Sprinkle decorative garnishes like festive sprinkles for additional visual appeal.
- Allow chocolate drizzle to set for approximately fifteen minutes. Serve alongside a steaming mug of hot cocoa, creating a delightful seasonal indulgence.
Notes
- Use room temperature butter and egg to ensure smooth, even mixing of the cookie dough.
- Chill the dough for 30 minutes before scooping to prevent spreading and create thicker cookies.
- Measure cocoa powder accurately by spooning it into the measuring cup and leveling with a knife to avoid dry, crumbly texture.
- Choose large, fresh marshmallows for the best puffing and melting effect during baking.
- Opt for high-quality dark or milk chocolate for the drizzle to enhance the rich flavor profile.
- Customize cookies by adding a pinch of espresso powder to intensify the chocolate taste.
- Create gluten-free version by substituting all-purpose flour with a 1:1 gluten-free baking blend.
- Store cookies in an airtight container at room temperature for up to 3 days to maintain freshness.
- Experiment with different marshmallow flavors like vanilla, strawberry, or coconut for unique variations.
- Prevent chocolate drizzle from cracking by adding a teaspoon of coconut oil to create a smooth, glossy finish.
- Prep Time: 1012 minutes
- Cook Time: 15 minutes
- Category: Desserts, Snacks
- Method: Baking
- Cuisine: American
Nutrition
- Serving Size: 12
- Calories: 179
- Sugar: 14 g
- Sodium: 70 mg
- Fat: 7 g
- Saturated Fat: 4 g
- Unsaturated Fat: 2 g
- Trans Fat: 0 g
- Carbohydrates: 25 g
- Fiber: 1 g
- Protein: 2 g
- Cholesterol: 18 mg
Jenna Stewart
Head Chef & Recipe Innovator
Expertise
Farm-to-Table Cooking; Seasonal Menu Development; Visual Plating Techniques; Flavor Layering and Simple Prep Hacks.
Education
The Culinary Institute of America, Hyde Park, NY
Jenna Stewart is the inventive spirit behind many of our standout dishes at Pro of Delicious Creations. A proud graduate of The Culinary Institute of America, she built her skills mastering both classic recipes and fresh, modern twists.
Now, Jenna celebrates the beauty of seasonal, local ingredients, often sourced from her garden and nearby markets, to create recipes that are bursting with flavor yet easy to follow. When she’s not experimenting in the kitchen, Jenna loves exploring nature on hikes and discovering new treasures at local co-ops.