
Magical Christmas Butter Cookies Recipe for Holiday Joy
Every holiday season brings memories of warm, golden Christmas butter cookies that melt on your tongue.
These delicate treats connect us to cherished childhood moments.
Sweet butter forms the heart of this classic recipe, creating a rich and comforting flavor profile.
Grandmothers worldwide have perfected these simple yet magical cookies through generations.
Each batch tells a story of love and tradition passed down carefully.
The simple ingredients promise a nostalgic experience that sparks joy.
Sharing these delightful morsels with loved ones around a twinkling tree.
Let’s bake something special that will become your new favorite holiday tradition.
Why Christmas Butter Cookies Are A Must-Bake
What You’ll Need For Christmas Butter Cookies
Main Ingredients:
Butter and Sugar:Dry Ingredients:Flavor Enhancers:Optional Decorative Ingredients:How To Bake Christmas Butter Cookies At Home
Step 1: Warm Up the Oven
Crank up your oven to a cozy 350F (175C). Grab your baking sheets and give them a comfy lining with parchment paper or silicone mats.
Step 2: Whip Up the Butter Mixture
In a spacious mixing bowl, grab your electric mixer and transform the softened butter and powdered sugar into a dreamy, cloud-like blend. Beat them together until they’re light, fluffy, and looking irresistible.
Step 3: Splash in Some Vanilla Magic
Pour in the vanilla extract and mix until it’s completely merged with the buttery goodness.
Step 4: Create the Cookie Dough
Gradually fold in the sifted flour and salt. Use your mixer on low speed, watching the mixture transform into a soft, delectable dough. Don’t overmix – keep it gentle!
Step 5: Shape Your Cookie Adventure
Choose your cookie style:
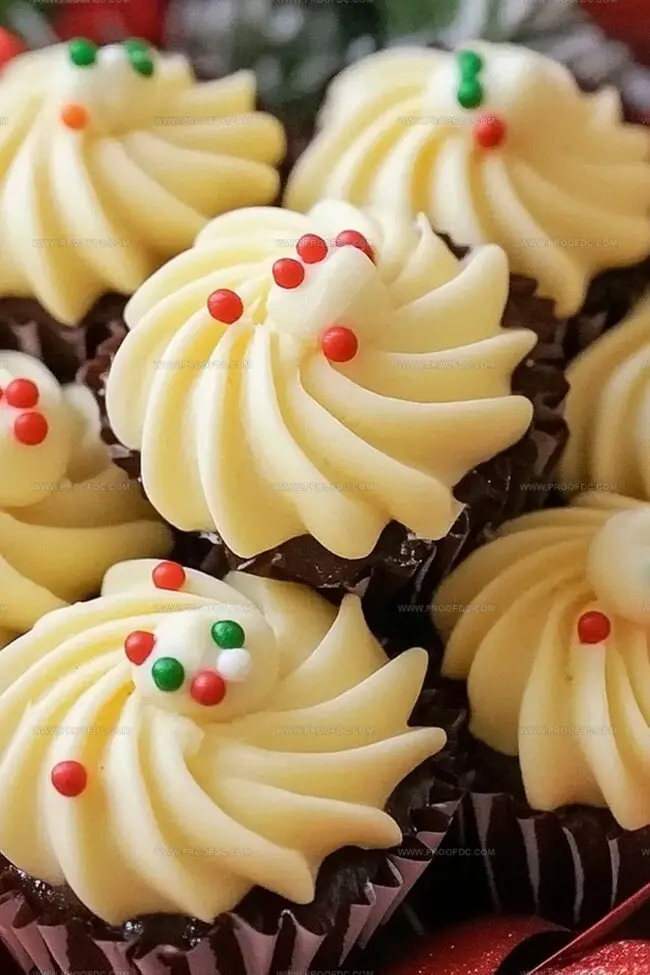
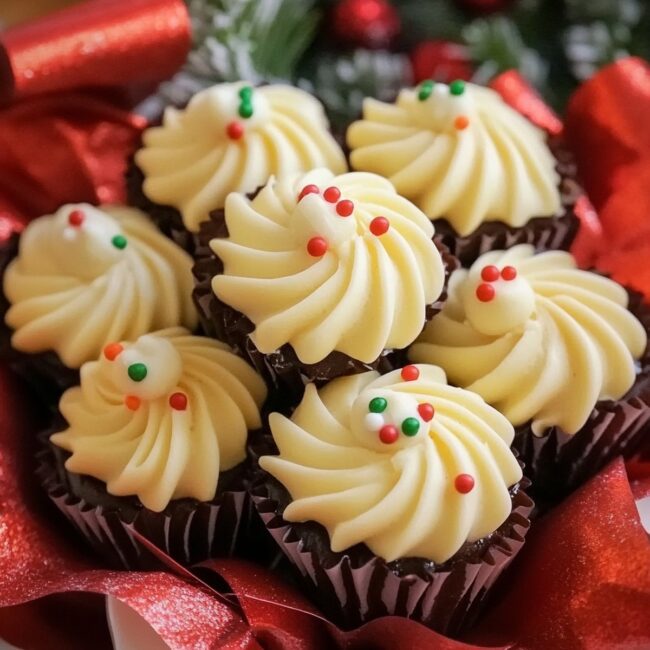
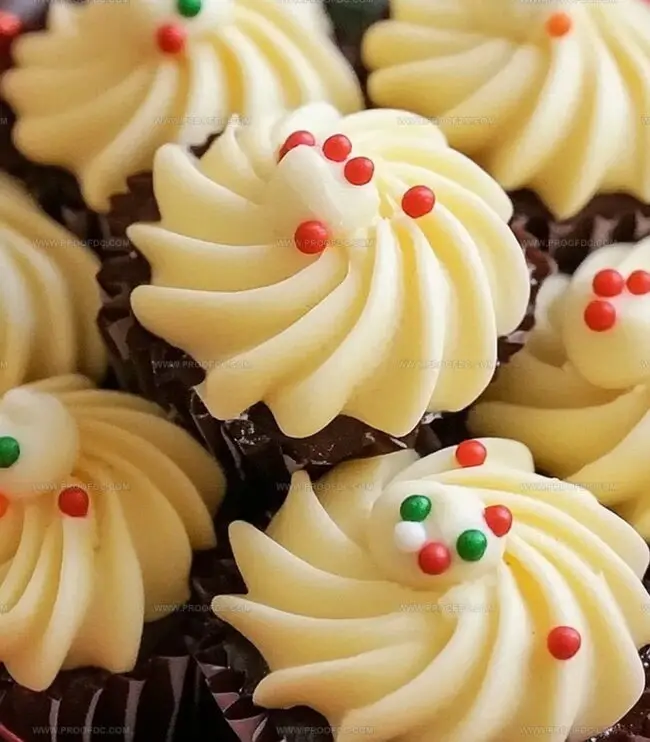
Drop Cookies:Rolled Cookies:Piped Cookies:Step 6: Add Some Festive Flair
Sprinkle your cookies with:Step 7: Bake to Golden Perfection
Slide the baking sheets into the oven. Bake for 10-12 minutes until the edges turn a gorgeous golden brown. Let the cookies rest on the baking sheet for 5 minutes, then transfer to a wire rack for complete cooling.
Step 8: Optional Glamorous Finish
Once cooled, dress up your cookies with:Simple Tips For Christmas Butter Cookies
How To Store And Reheat Christmas Butter Cookies
Perfect Pairings For Christmas Butter Cookies
New Takes On Christmas Butter Cookies
FAQs About Christmas Butter Cookies
These butter cookies are a classic holiday treat that’s easy to make and incredibly versatile. You can drop, roll, or pipe them, making them perfect for any Christmas celebration or cookie exchange.
Absolutely! You can prepare the dough in advance and refrigerate it for 2-3 days before baking. This is great for planning ahead during the busy holiday season.
Not really! While a piping bag with a star tip can create fancy shapes, you can easily make these cookies with just basic kitchen tools like a mixing bowl, baking sheet, and a glass for flattening drop cookies.
The key is to use softened butter and not overwork the dough. Mix until just combined, and be careful not to overbake. Watch for lightly golden edges, which indicate the cookies are done.
Print
Christmas Butter Cookies Recipe
- Total Time: 30 minutes
- Yield: 24 1x
Description
Festive Christmas butter cookies bring joy to holiday gatherings with their delicate, melt-in-your-mouth texture. Buttery goodness and sweet memories combine in these simple yet irresistible treats you’ll cherish and share with loved ones.
Ingredients
Main Ingredients:
- 2 cups (250 g) all-purpose flour
- 1 cup (225 g) unsalted butter, softened
- 1 cup (100 g) powdered sugar, sifted
Flavoring and Seasoning:
- 1 teaspoon vanilla extract
- ¼ teaspoon salt
Decoration:
- Holiday sprinkles
- Colored sugar
- Royal icing (optional)
Instructions
- Prepare the baking workspace by positioning the oven rack in the center and heating to 350F (175C). Cover baking sheets with parchment paper, ensuring a smooth, non-stick surface.
- In a spacious mixing bowl, whip softened butter and powdered sugar together until the mixture becomes airy and pale, creating a smooth, creamy texture that takes approximately 2-3 minutes.
- Introduce vanilla extract to the butter mixture, stirring thoroughly to distribute the aromatic flavor evenly throughout the dough.
- Gently fold sifted flour and salt into the creamy base, using low-speed mixing to prevent overmixing and maintain a delicate, tender cookie texture.
- Choose your preferred cookie style: drop method involves scooping rounded tablespoons onto prepared sheets and gently flattening; rolled technique requires chilling dough for 30 minutes before rolling to 1/4-inch thickness and cutting festive shapes; piping approach uses a star-tipped bag to create elegant rosettes and swirls directly on the baking surface.
- Embellish cookie surfaces with holiday sprinkles, sparkling colored sugar, or decorative elements that enhance the Christmas spirit.
- Slide trays into the preheated oven and bake until cookie edges transform into a delicate golden hue, typically 10-12 minutes. Allow cookies to rest on the baking sheet for 5 minutes before transferring to a cooling rack.
- After complete cooling, elevate the cookie presentation by drizzling with royal icing or melted chocolate, adding a sophisticated and festive final touch to your Christmas treats.
Notes
- Butter temperature matters significantly for achieving the perfect cookie texture, so let softened butter should be at room temperature but not melty.
- Chilling the dough helps prevent spreading and maintains crisp cookie shapes, especially for cut-out designs.
- For gluten-free variations, substitute all-purpose flour with a 1:1 gluten-free baking blend to maintain similar texture and taste.
- Reduce sugar content by 25% if you prefer less sweetness, which works well without compromising the cookie’s delicate structure.
- Prep Time: 15 minutes
- Cook Time: 15 minutes
- Category: Desserts, Snacks
- Method: Baking
- Cuisine: American
Nutrition
- Serving Size: 24
- Calories: 120
- Sugar: 5 g
- Sodium: 50 mg
- Fat: 8 g
- Saturated Fat: 5 g
- Unsaturated Fat: 3 g
- Trans Fat: 0 g
- Carbohydrates: 12 g
- Fiber: 0 g
- Protein: 1 g
- Cholesterol: 30 mg
Jenna Stewart
Head Chef & Recipe Innovator
Expertise
Farm-to-Table Cooking; Seasonal Menu Development; Visual Plating Techniques; Flavor Layering and Simple Prep Hacks.
Education
The Culinary Institute of America, Hyde Park, NY
Jenna Stewart is the inventive spirit behind many of our standout dishes at Pro of Delicious Creations. A proud graduate of The Culinary Institute of America, she built her skills mastering both classic recipes and fresh, modern twists.
Now, Jenna celebrates the beauty of seasonal, local ingredients, often sourced from her garden and nearby markets, to create recipes that are bursting with flavor yet easy to follow. When she’s not experimenting in the kitchen, Jenna loves exploring nature on hikes and discovering new treasures at local co-ops.