
Festive Chocolate Peppermint Cookie Cups Recipe for Joy
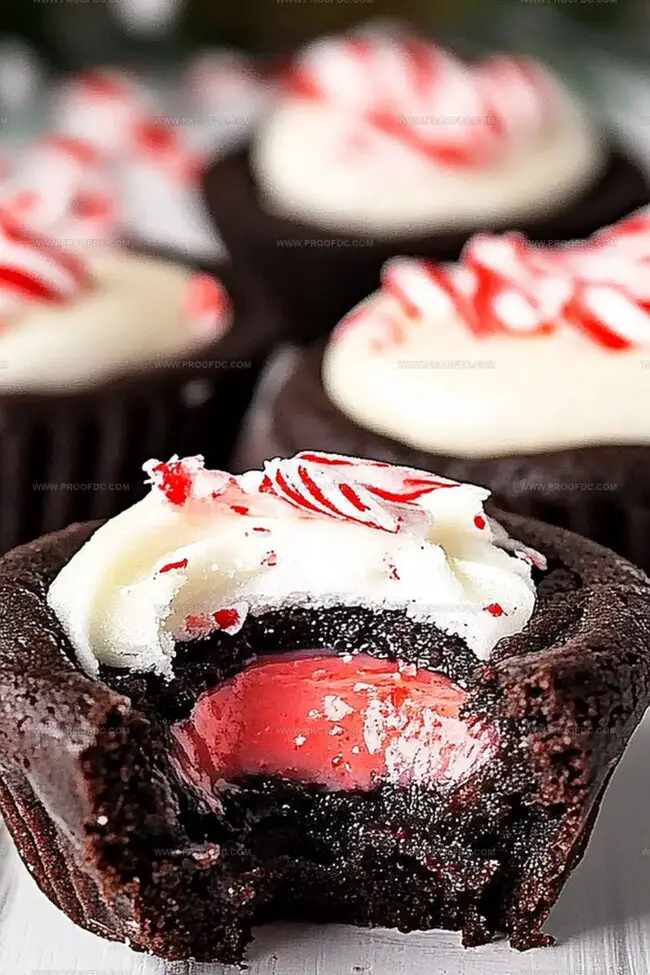
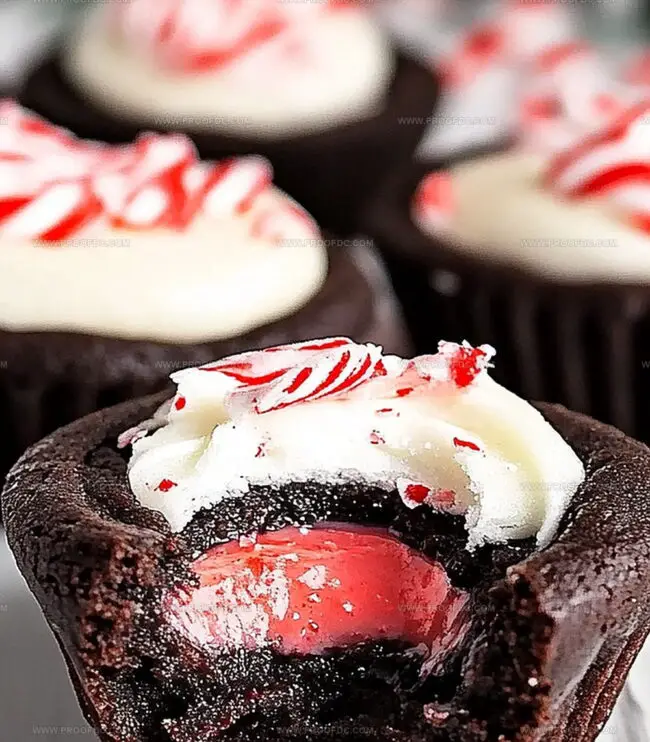
Unwrapping a delightful chocolate peppermint cookie cup that melts in your mouth with pure bliss.
Tiny dessert dreams come alive through this magical combination of rich chocolate and cool peppermint flavors.
Sweet moments of indulgence await you in these adorable bite-sized treats.
Each miniature cup promises a delectable journey through smooth chocolate and refreshing mint landscapes.
Winter celebrations or casual weekend gatherings can sparkle with these charming little delicacies.
Crisp cookie bases cradle creamy chocolate centers that invite playful taste adventures.
Brace yourself for an irresistible dessert experience that will make everyone at the table ask for seconds.
Why Chocolate Peppermint Cookie Cups Are A Sweet Surprise
Everything Needed For Chocolate Peppermint Cookie Cups
Base Ingredients:Flavor Enhancers:Decoration Ingredients:Additional Notes:How To Make Chocolate Peppermint Cookie Cups At Home
Step 1: Warm Up The Oven
Crank your oven to a toasty 350F (175C). Grab a mini muffin tin and give it a generous spray with nonstick baking magic or brush it with a light layer of butter.
Step 2: Whip Up The Cookie Dough
In a spacious mixing bowl, beat:Blend until the mixture looks fluffy and light. Crack in an egg, then splash in vanilla and peppermint extracts. Mix until everything plays nicely together.
In another bowl, whisk together:Slowly fold the dry ingredients into the wet mixture, stirring until a beautiful chocolate dough emerges.
Step 3: Shape And Bake The Cookies
Roll the dough into adorable one-inch balls. Nestle each ball into a muffin tin well. Send them into the oven for 8-10 minutes until the edges look perfectly set.
Once out of the oven, grab a teaspoon and gently press a little well into the center of each warm cookie. Let them chill in the pan for 5 minutes, then transfer to a cooling rack.
Step 4: Create The Chocolate Peppermint Filling
In a microwave-safe bowl, combine:Zap in 20-second bursts, stirring between each interval, until the chocolate transforms into a silky smooth river. Stir in a dash of peppermint extract for that festive kick.
Step 5: Dress Up The Cookie Cups
Spoon the luscious chocolate peppermint filling into each cookie cup’s center. Sprinkle crushed candy canes on top while the filling is still warm and inviting.
Step 6: Final Touch
Let the cookie cups sit and set at room temperature. For faster results, pop them in the refrigerator for 15-20 minutes. Get ready to impress everyone with these decadent treats!
Tips To Perfect Chocolate Peppermint Cookie Cups
How To Store Chocolate Peppermint Cookie Cups Neatly
What Goes Well With Chocolate Peppermint Cookie Cups
Ways To Switch Up Chocolate Peppermint Cookie Cups
Chocolate Peppermint Cookie Cups FAQs
These cookie cups combine rich chocolate cookies with a creamy peppermint chocolate filling and a festive candy cane topping, creating a perfect blend of sweet and minty flavors that’s both delicious and visually appealing.
Yes! You can prepare the cookie cups a day in advance. Store them in an airtight container at room temperature, and add the chocolate filling just before serving to keep the cookies crisp and fresh.
You’ll need a mini muffin tin and a way to create wells in the cookies, like the back of a teaspoon or small measuring spoon. The recipe is simple and doesn’t require any complicated kitchen tools.
Absolutely! These Chocolate Peppermint Cookie Cups are perfect for holiday gatherings. They’re bite-sized, look impressive, and have a festive flavor that everyone loves. They’re sure to be a hit at any Christmas or winter celebration.
Print
Chocolate Peppermint Cookie Cups Recipe
- Total Time: 30 minutes
- Yield: 12 1x
Description
Rich chocolate cookie cups embrace peppermint’s cool elegance in this delightful holiday dessert. Creamy filling nestled in chocolate shells creates irresistible sweet bites that melt perfectly on palates, delivering festive cheer with each delectable mouthful.
Ingredients
Primary Ingredients:
- 1 ¼ cups (156 grams) all-purpose flour
- ⅓ cup (35 grams) unsweetened cocoa powder
- ½ cup (113 grams) unsalted butter, softened
Sugars:
- ½ cup (100 grams) granulated sugar
- ¼ cup (50 grams) brown sugar
Flavor and Binding Ingredients:
- 1 large egg
- 1 teaspoon vanilla extract
- ½ teaspoon peppermint extract
- ½ teaspoon baking soda
- ¼ teaspoon salt
Filling and Topping:
- ½ cup (85 grams) semi-sweet or dark chocolate chips
- ¼ cup (60 milliliters) heavy cream
- ½ teaspoon peppermint extract
- Crushed candy canes or peppermint candies
Instructions
- Prepare the baking environment by heating the oven to 350F (175C) and coating a mini muffin tin with nonstick spray.
- Create the cookie base by blending softened butter with granulated and brown sugars until airy and light. Incorporate egg, vanilla, and peppermint extracts, mixing thoroughly.
- Sift together flour, cocoa powder, baking soda, and salt in a separate container. Gradually fold dry ingredients into the wet mixture, forming a cohesive dough.
- Craft small spherical portions of dough, placing each carefully into the prepared muffin wells. Bake until edges appear firm and set, approximately 8-10 minutes.
- While cookies are still warm, gently press a small indentation into the center of each using the rounded back of a spoon, creating a delicate cup shape.
- Allow cookie bases to cool briefly in the pan, then transfer to a wire rack for complete cooling.
- Melt chocolate chips with heavy cream in short microwave intervals, stirring between each to ensure smooth consistency. Infuse with peppermint extract.
- Carefully fill each cookie cup with the glossy chocolate mixture, ensuring even distribution.
- Immediately sprinkle crushed candy canes over the warm filling, allowing them to slightly adhere.
- Let the chocolate filling stabilize at room temperature or expedite setting by chilling in the refrigerator for 15-20 minutes before serving.
Notes
- Ensure butter is softened at room temperature for smooth, even mixing of cookie dough.
- Use high-quality cocoa powder for rich, intense chocolate flavor in the cookie base.
- Press cookie wells gently to avoid breaking the delicate cookie cups during shaping.
- Crush candy canes just before sprinkling to maintain their crisp texture and vibrant color.
- For gluten-free option, substitute all-purpose flour with almond or gluten-free baking blend.
- Dairy-free alternative: Replace butter with coconut oil and use dairy-free chocolate chips.
- Control chocolate filling consistency by adjusting cream amount for desired thickness.
- Store cookie cups in an airtight container at room temperature for up to 3 days.
- Create mini dessert variations by using different extracts like orange or almond.
- Chill filling faster by placing cookie cups in the freezer for 10 minutes instead of refrigerating.
- Prep Time: 20 minutes
- Cook Time: 10 minutes
- Category: Desserts, Snacks
- Method: Baking
- Cuisine: American
Nutrition
- Serving Size: 12
- Calories: 200
- Sugar: 10 g
- Sodium: 100 mg
- Fat: 10 g
- Saturated Fat: 6 g
- Unsaturated Fat: 4 g
- Trans Fat: 0 g
- Carbohydrates: 26 g
- Fiber: 1 g
- Protein: 2 g
- Cholesterol: 25 mg
Jenna Stewart
Head Chef & Recipe Innovator
Expertise
Farm-to-Table Cooking; Seasonal Menu Development; Visual Plating Techniques; Flavor Layering and Simple Prep Hacks.
Education
The Culinary Institute of America, Hyde Park, NY
Jenna Stewart is the inventive spirit behind many of our standout dishes at Pro of Delicious Creations. A proud graduate of The Culinary Institute of America, she built her skills mastering both classic recipes and fresh, modern twists.
Now, Jenna celebrates the beauty of seasonal, local ingredients, often sourced from her garden and nearby markets, to create recipes that are bursting with flavor yet easy to follow. When she’s not experimenting in the kitchen, Jenna loves exploring nature on hikes and discovering new treasures at local co-ops.