
Irresistible Chocolate Chip Ice Cream Sandwiches Recipe
Yourself unwrapping a delightful chocolate chip ice cream sandwich on a scorching summer afternoon.
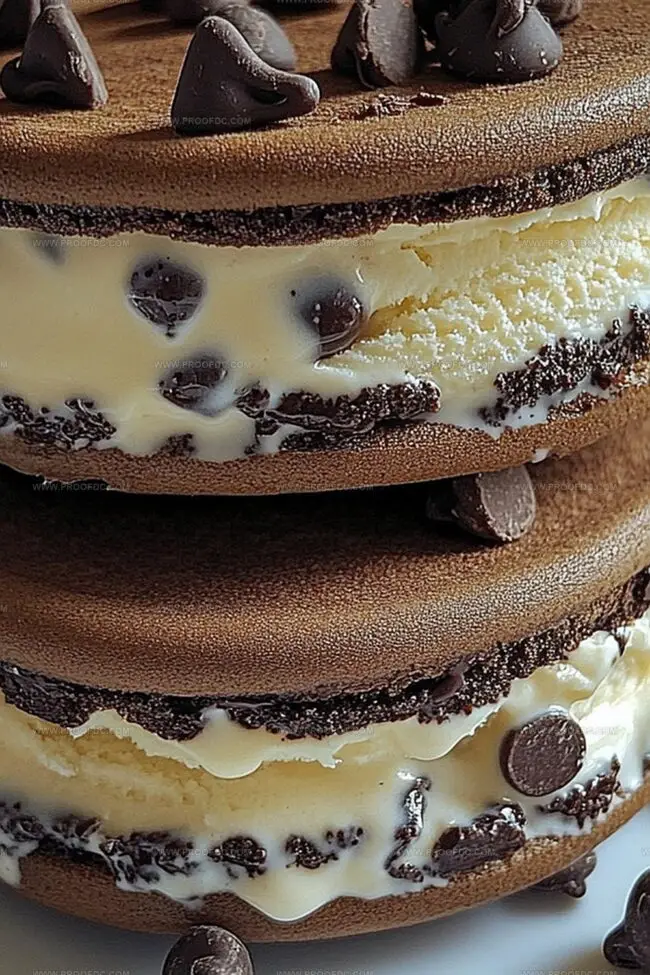
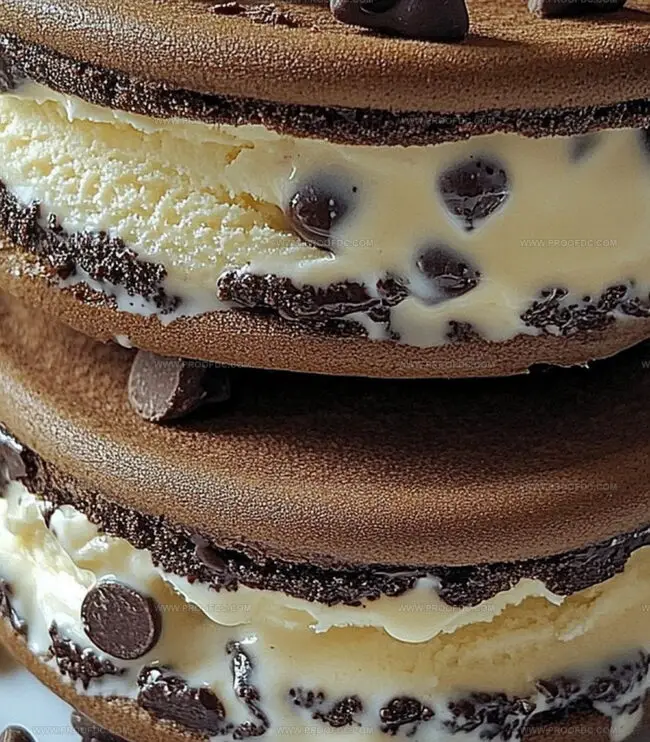
Creamy vanilla ice cream nestles between two perfectly crisp chocolate chip cookies, creating a dessert that screams pure indulgence.
Sweet memories flood back from childhood picnics and backyard gatherings.
Each bite promises a nostalgic journey through layers of rich, cool goodness.
Soft cookie edges cradle the smooth, chilled center in a delectable embrace.
Texture and temperature dance together in this classic treat that never disappoints.
Let’s craft this simple yet magical dessert that will make everyone at your table smile with pure delight.
What Makes Chocolate Chip Ice Cream Sandwiches So Fun
What’s Inside Chocolate Chip Ice Cream Sandwiches
Baking Base:Sweeteners and Binding:Fat and Mix-ins:Simple Steps For Chocolate Chip Ice Cream Sandwiches
Step 1: Prepare Baking Setup
Warm up the oven to 350°F. Cover two baking sheets with parchment paper, creating a perfect non-stick surface for your cookies.
Step 2: Create Creamy Cookie Base
In a spacious mixing bowl, blend:Whip these ingredients using a hand mixer or stand mixer. Aim for a light, fluffy texture that takes about 2-3 minutes of mixing.
Step 3: Incorporate Wet Ingredients
Gently add eggs one at a time, ensuring each is fully mixed before the next. Pour in vanilla extract, stirring until the mixture looks smooth and inviting.
Step 4: Combine Dry Ingredients
In a separate bowl, whisk together:Slowly fold the dry mixture into the wet ingredients. Mix until just combined. Sprinkle chocolate chips throughout the dough, distributing them evenly.
Step 5: Shape Cookie Dough
Scoop out rounded portions of dough, each about two tablespoons. Place them on the prepared baking sheets, leaving around two inches between each cookie to allow for spreading.
Step 6: Bake to Perfection
Slide the baking sheets into the preheated oven. Bake for 10-12 minutes until the cookie edges turn a beautiful golden brown while maintaining soft centers.
Step 7: Cool and Rest Cookies
Let the cookies rest on the baking sheets for five minutes. Transfer them to a wire cooling rack, allowing them to reach room temperature completely.
Step 8: Assemble Ice Cream Sandwiches
Once cookies are cool, select your favorite ice cream. Scoop a generous amount between two cookies, pressing gently to create a perfect sandwich.
Step 9: Freeze and Enjoy
Wrap each sandwich in plastic wrap or wax paper. Place in the freezer for at least an hour to set. Enjoy your homemade ice cream sandwiches whenever a sweet craving hits!
Tips For Making Chocolate Chip Ice Cream Sandwiches
Keep Chocolate Chip Ice Cream Sandwiches Fresh
Good Matches For Chocolate Chip Ice Cream Sandwiches
Tweak Your Chocolate Chip Ice Cream Sandwiches
FAQ About Chocolate Chip Ice Cream Sandwiches
The cookies are slightly soft in the center and have a chewy texture, which creates the ideal base for holding ice cream. Their sturdy structure prevents crumbling when sandwiched with cold ice cream.
Absolutely! You can experiment with semi-sweet, milk, dark, or even white chocolate chips. Each type will bring a unique flavor profile to your cookies.
Using a 2-tablespoon scoop helps create uniform cookies that are perfectly sized for making neat, balanced ice cream sandwiches. This ensures each sandwich looks professional and is easy to eat.
Overmixing can develop too much gluten, making the cookies tough instead of soft and chewy. Mix just until the ingredients are combined to maintain the cookies’ tender texture.
Print
Chocolate Chip Ice Cream Sandwiches Recipe
- Total Time: 1 hour 42 minutes
- Yield: 12 1x
Description
Cool summer days find their perfect match with Chocolate Chip Ice Cream Sandwiches, blending homemade cookies and creamy vanilla ice cream. Crisp chocolate-studded edges and smooth frozen centers create delightful handheld treats you’ll crave all season long.
Ingredients
Main Ingredients:
- 3 cups (375 g / 13.2 ounces) all-purpose flour
- 2 cups (350 g / 12.3 ounces) semi-sweet chocolate chips
- 1 cup (230 g / 8.1 ounces) unsalted butter, softened
- 1 cup (200 g / 7 ounces) granulated sugar
- 1 cup (220 g / 7.8 ounces) brown sugar, packed
Binding Ingredients:
- 2 large eggs
- 2 teaspoons vanilla extract
- 1 teaspoon baking soda
- ½ teaspoon salt
Filling Ingredient:
- 1 quart (4 cups / 960 milliliters) vanilla ice cream or your favorite flavor
Instructions
- Prepare the oven environment by heating to 350F (175C) and arranging parchment-lined baking sheets to ensure smooth cookie preparation.
- Cream butter and sugars using an electric mixer, whipping until the mixture becomes airy and pale, creating a smooth foundation for the cookie dough.
- Incorporate eggs individually, blending thoroughly after each addition to maintain a consistent texture, then introduce vanilla extract for enhanced flavor complexity.
- Combine dry ingredients in a separate vessel, gently sifting flour, baking soda, and salt to eliminate potential lumps and ensure even distribution.
- Merge wet and dry ingredients, stirring minimally to prevent overmixing, then gently fold chocolate chips throughout the dough for delightful chocolate pockets.
- Portion cookie dough using a tablespoon measure, strategically placing rounds on prepared sheets with sufficient spacing to allow proper spreading during baking.
- Bake cookies until golden brown around edges while maintaining a soft center, approximately 10-12 minutes, which ensures a tender, chewy texture.
- Allow cookies to rest momentarily on baking sheets, promoting slight firming, then transfer to a cooling rack to reach room temperature completely.
- Once cookies are fully cooled, sandwich premium ice cream between two complementary cookie halves, creating a decadent frozen treat perfect for summer indulgence.
Notes
- Customize cookie size by using different scoop measurements for smaller or larger ice cream sandwiches.
- Chill cookie dough for 30 minutes before baking to prevent excessive spreading and create thicker, chewier cookies.
- Experiment with different chocolate chip varieties like dark, milk, or semi-sweet to personalize flavor profile.
- Allow cookies to cool completely before assembling sandwiches to prevent ice cream from melting too quickly.
- Prep Time: 30 minutes
- Cook Time: 12 minutes
- Category: Desserts, Snacks
- Method: Baking
- Cuisine: American
Nutrition
- Serving Size: 12
- Calories: 410
- Sugar: 28 g
- Sodium: 150 mg
- Fat: 20 g
- Saturated Fat: 12 g
- Unsaturated Fat: 8 g
- Trans Fat: 0 g
- Carbohydrates: 52 g
- Fiber: 1 g
- Protein: 4 g
- Cholesterol: 60 mg
Jenna Stewart
Head Chef & Recipe Innovator
Expertise
Farm-to-Table Cooking; Seasonal Menu Development; Visual Plating Techniques; Flavor Layering and Simple Prep Hacks.
Education
The Culinary Institute of America, Hyde Park, NY
Jenna Stewart is the inventive spirit behind many of our standout dishes at Pro of Delicious Creations. A proud graduate of The Culinary Institute of America, she built her skills mastering both classic recipes and fresh, modern twists.
Now, Jenna celebrates the beauty of seasonal, local ingredients, often sourced from her garden and nearby markets, to create recipes that are bursting with flavor yet easy to follow. When she’s not experimenting in the kitchen, Jenna loves exploring nature on hikes and discovering new treasures at local co-ops.