Irresistible Chocolate Chip Cookie Dough Bars Recipe
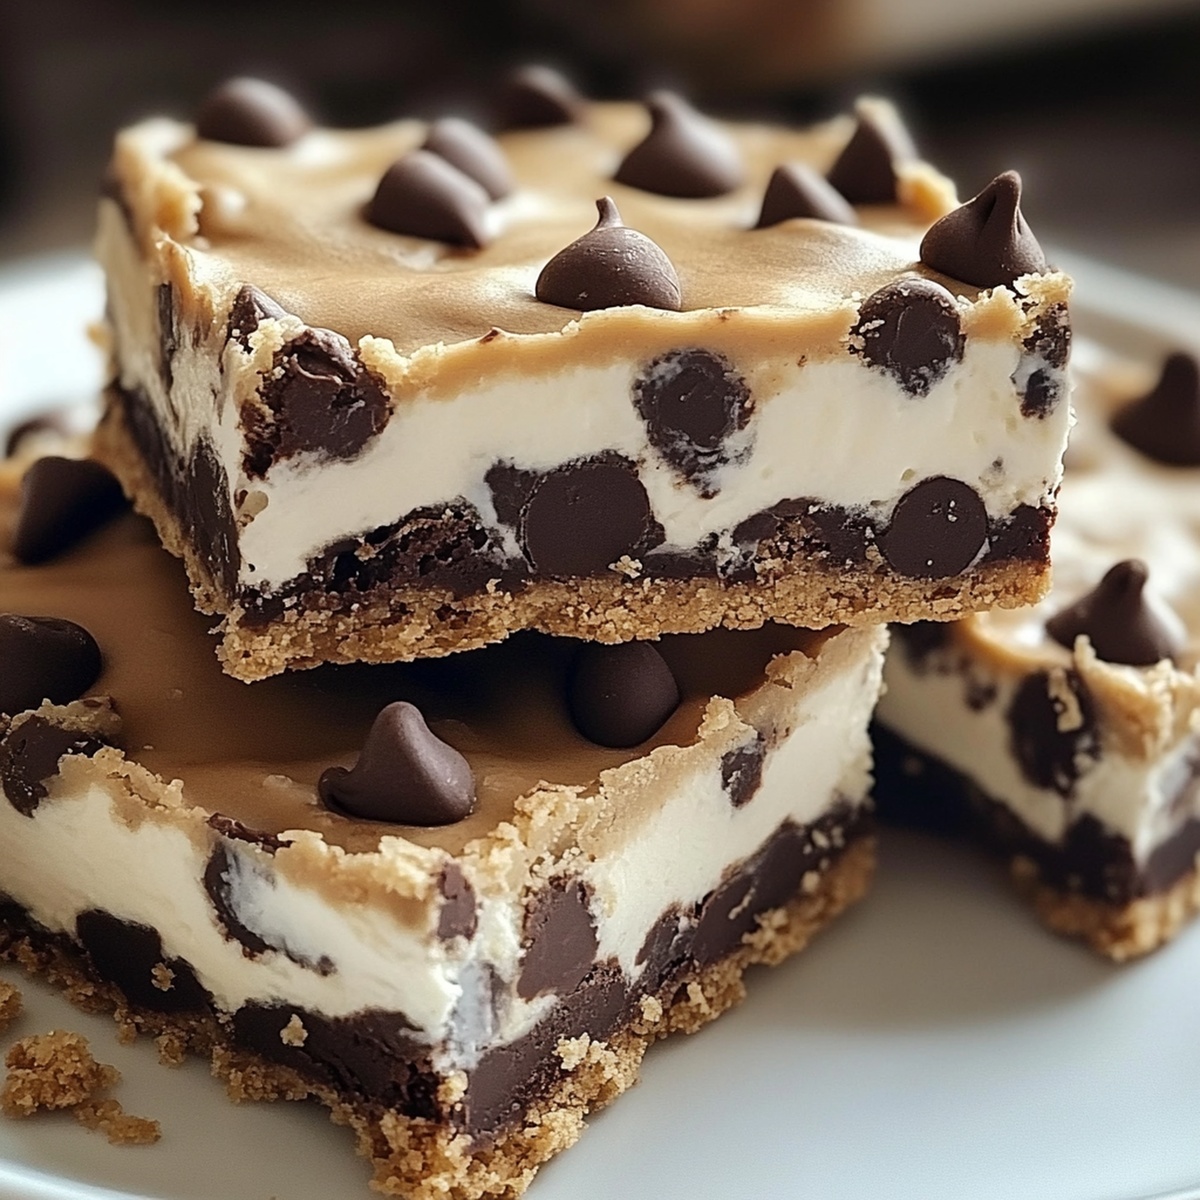
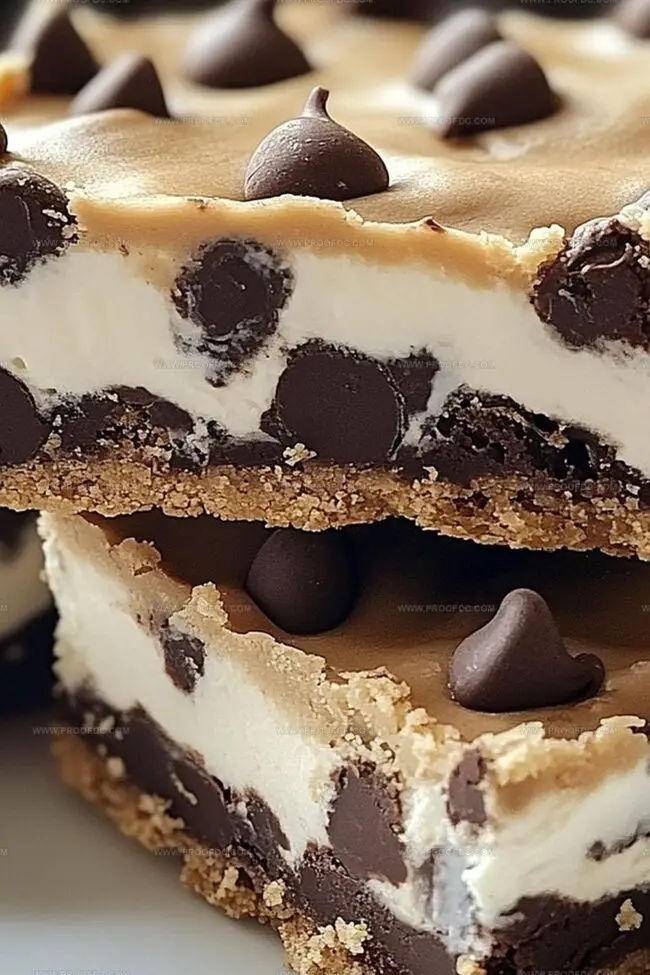
Biting into decadent chocolate chip cookie dough bars that melt perfectly on your tongue.
Sweet dreams become reality with this no-bake treat that skips traditional baking steps.
Creamy textures blend effortlessly, creating a dessert everyone craves instantly.
Rich chocolate chunks nestle through silky smooth layers of unbaked goodness.
Each bite promises pure indulgence without complicated kitchen techniques.
Quick preparation means you can whip up these bars in minutes.
Grab a cool glass of milk and dive right into this irresistible confection that’ll make your taste buds dance with joy.
Why Chocolate Chip Cookie Dough Bars Are A Sweet Crowd Pleaser
What You’ll Need For Chocolate Chip Cookie Dough Bars
Base Ingredients:Chocolate Components:Binding and Seasoning:Preparation Note: Use room temperature ingredients for best mixing results, and choose high-quality chocolate for a superior taste experience.
How To Make Chocolate Chip Cookie Dough Bars In No Time

Step 1: Transform Raw Flour
Spread flour on a baking sheet. Slide into an oven preheated to 350 degrees Fahrenheit. Bake for 5-7 minutes until flour reaches a safe temperature. Allow to cool completely at room temperature.
Step 2: Whip Up Creamy Dough Base
Grab a large mixing bowl. Combine:Blend until the mixture looks light and fluffy. Pour in milk and vanilla extract. Gently fold in heat-treated flour and salt. Mix thoroughly. Sprinkle mini chocolate chips into the dough and stir until evenly distributed.
Step 3: Create Cookie Dough Layer
Grab an 8-inch square baking dish. Line with parchment paper. Carefully press cookie dough into the dish, creating an even layer. Place in refrigerator and chill for minimum 30 minutes.
Step 4: Craft Chocolate Topping
Select a microwave-safe bowl. Add:Microwave in short 30-second bursts, stirring between each interval. Continue until chocolate looks smooth and glossy. Pour melted chocolate over chilled cookie dough. Spread evenly using a spatula.
Step 5: Chill and Slice
Return dish to refrigerator. Allow chocolate to set completely, approximately 1-2 hours. Using a sharp knife, slice into delectable squares or bars.
Step 6: Serve and Store
Enjoy bars chilled or at room temperature. Keep leftovers in an airtight container inside refrigerator. Consume within one week for maximum deliciousness.
Quick Tips For Chocolate Chip Cookie Dough Bars
Storing And Reheating Chocolate Chip Cookie Dough Bars The Right Way
Tasty Pairings For Chocolate Chip Cookie Dough Bars
Flavor Ideas For Chocolate Chip Cookie Dough Bars
FAQs For Chocolate Chip Cookie Dough Bars Lovers
Heat-treating flour eliminates potential harmful bacteria like E. coli, making it safe to consume raw in no-bake desserts like these cookie dough bars.
Yes, you can use regular chocolate chips, but mini chips distribute more evenly throughout the dough and provide a better texture in no-bake recipes.
Coconut oil or butter helps create a smoother, shinier chocolate layer that sets nicely and prevents the chocolate from becoming too hard when chilled, making it easier to bite into.
This recipe contains dairy (butter, milk) and might have gluten (flour). Always check ingredient labels and consider substitutions if you have specific dietary restrictions or allergies.
Print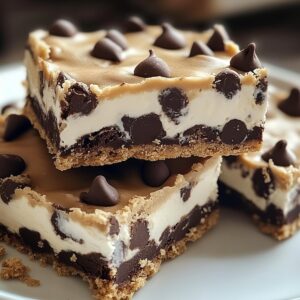
Chocolate Chip Cookie Dough Bars Recipe
- Total Time: 2 hours 20 minutes
- Yield: 16 1x
Description
Sweet indulgence meets nostalgia in these chocolate chip cookie dough bars, crafted without eggs for safe snacking. Creamy, rich layers promise pure dessert bliss that transports you straight to childhood memories of mixing batter and licking spoons.
Ingredients
Main Ingredients:
- ½ cup (115 g) unsalted butter, softened
- ½ cup (100 g) brown sugar, packed
- ¼ cup (50 g) granulated sugar
- 1 ¼ cups (160 g) all-purpose flour, heat-treated
- ¾ cup (135 g) mini chocolate chips
- 1 cup (200 g) semi-sweet chocolate chips
Liquid Ingredients:
- 2 tablespoons milk (or heavy cream)
- 1 teaspoon vanilla extract
Seasoning and Additional Ingredients:
- ¼ teaspoon salt
- 1 tablespoon coconut oil or butter
Instructions
- Fortify the Flour Fortress:
Transform raw flour into an edible safe zone by dispersing it across a baking sheet. Roast at 350F (175C) for 5-7 minutes, ensuring internal temperature reaches 165F (74C). Allow complete cooling before proceeding.
- Craft the Creamy Dough Foundation:
Whip softened butter with brown and granulated sugars until achieving a cloud-like texture. Incorporate milk and vanilla, blending until harmonious. Gradually introduce heat-treated flour and salt, mixing thoroughly. Gently fold mini chocolate chips throughout the mixture.
- Construct the Dough Canvas:
Drape a parchment paper blanket inside an 8×8-inch baking vessel. Firmly press cookie dough into an even, smooth landscape. Refrigerate for a minimum of 30 minutes to solidify the base.
- Unleash Chocolate Cascade:
Melt semi-sweet chocolate chips with coconut oil in microwave-safe container. Utilize 30-second intervals, stirring between each cycle until achieving silky consistency. Pour molten chocolate across chilled dough, creating uniform coverage.
- Set and Slice:
Return the creation to refrigerator, allowing 1-2 hours for complete chocolate solidification. Wield a razor-sharp knife to segment into precise bars or squares.
- Preserve and Present:
Serve directly from refrigeration or allow gentle warming to room temperature. Safeguard remaining delicacies in sealed container within refrigerator for up to one week.
Notes
- Heat-treat flour to eliminate potential bacterial risks, ensuring a safe and delicious no-bake dessert experience.
- Use room temperature ingredients for smoother mixing and better integration of cookie dough components.
- Consider swapping chocolate chips with alternative mix-ins like dried fruit, nuts, or sprinkles for personalized flavor variations.
- Opt for gluten-free flour and dairy-free chocolate to create an inclusive treat suitable for different dietary needs.
- Prep Time: 20 minutes
- Cook Time: 2 hours
- Category: Desserts, Snacks
- Method: Mixing
- Cuisine: American
Nutrition
- Serving Size: 16
- Calories: 210
- Sugar: 15 g
- Sodium: 70 mg
- Fat: 12 g
- Saturated Fat: 7 g
- Unsaturated Fat: 4 g
- Trans Fat: 0 g
- Carbohydrates: 24 g
- Fiber: 1 g
- Protein: 2 g
- Cholesterol: 20 mg
Jenna Stewart
Head Chef & Recipe Innovator
Expertise
Farm-to-Table Cooking; Seasonal Menu Development; Visual Plating Techniques; Flavor Layering and Simple Prep Hacks.
Education
The Culinary Institute of America, Hyde Park, NY
Jenna Stewart is the inventive spirit behind many of our standout dishes at Pro of Delicious Creations. A proud graduate of The Culinary Institute of America, she built her skills mastering both classic recipes and fresh, modern twists.
Now, Jenna celebrates the beauty of seasonal, local ingredients, often sourced from her garden and nearby markets, to create recipes that are bursting with flavor yet easy to follow. When she’s not experimenting in the kitchen, Jenna loves exploring nature on hikes and discovering new treasures at local co-ops.