Golden Chi-Chi’s Baked Chicken Chimichangas Recipe You’ll Adore
Yourself craving a crispy, flavor-packed Chi-Chi’s baked chicken chimichanga that dances between comfort and excitement.
Mexican-inspired dishes always spark joy in my kitchen.
Golden, crunchy tortillas filled with tender, seasoned chicken that practically sing with zest.
This recipe brings restaurant-style magic right to your dinner table without complicated steps.
Each bite promises a delightful blend of textures and spices that’ll make you feel like a culinary pro.
Simple ingredients transform into something spectacular with just a little kitchen creativity.
You’ll want to bookmark this crowd-pleasing recipe that turns an ordinary meal into a celebration.
Reasons To Try Chi-Chis Baked Chicken Chimichangas
What You Need For Chi-Chis Baked Chicken Chimichangas
Protein Base:Seasoning Blend:Wrapper and Finishing Ingredients:How To Make Chi-Chis Baked Chicken Chimichangas

Step 1: Fire Up The Oven
Get your oven roaring hot at 400F (200C). Grab a baking sheet and cover it with parchment paper or a silicone mat to prevent sticking.
Step 2: Create Flavor Explosion
Grab a mixing bowl and toss in these delicious ingredients:Mix everything until the ingredients dance together in perfect harmony.
Step 3: Wrap Your Flavor Treasure
Lay out a soft tortilla and spoon a generous pile of your magical chicken mixture right in the center. Fold the sides in like you’re wrapping a delicious present, then roll it tightly into a compact burrito shape. Place each chimichanga seam-side down on your prepared baking sheet, making sure they don’t touch.
Step 4: Transform into Golden Delights
Brush the tops of your chimichangas with melted butter or give them a light spray of cooking oil. This will help them turn a beautiful golden brown. Slide the baking sheet into the hot oven and bake for 20-25 minutes until they’re crispy and look absolutely irresistible.
Step 5: Unleash The Feast
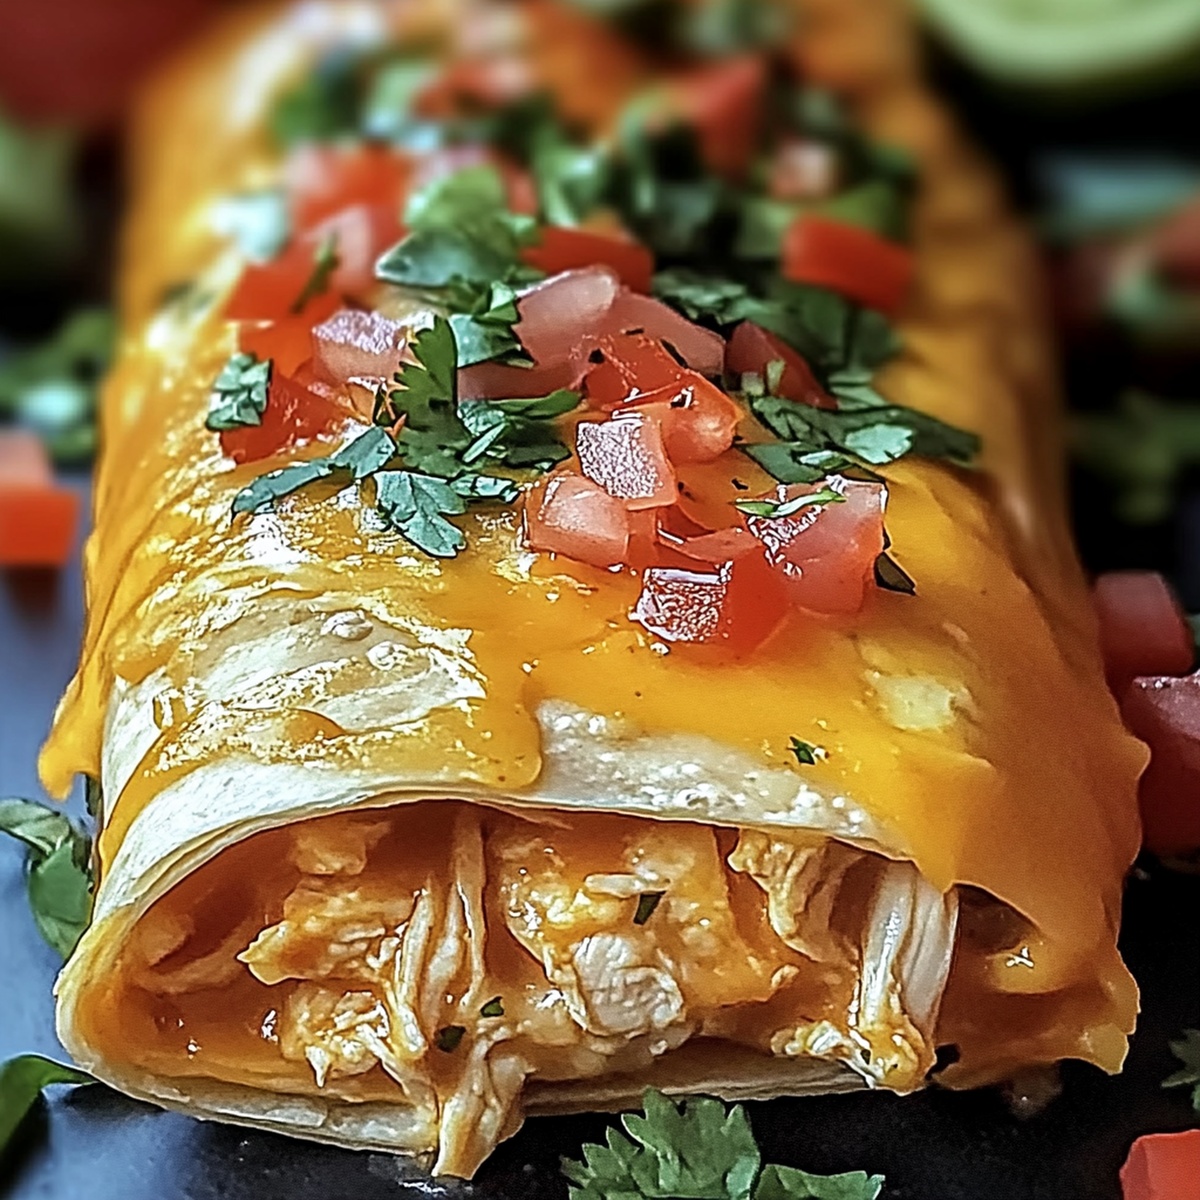
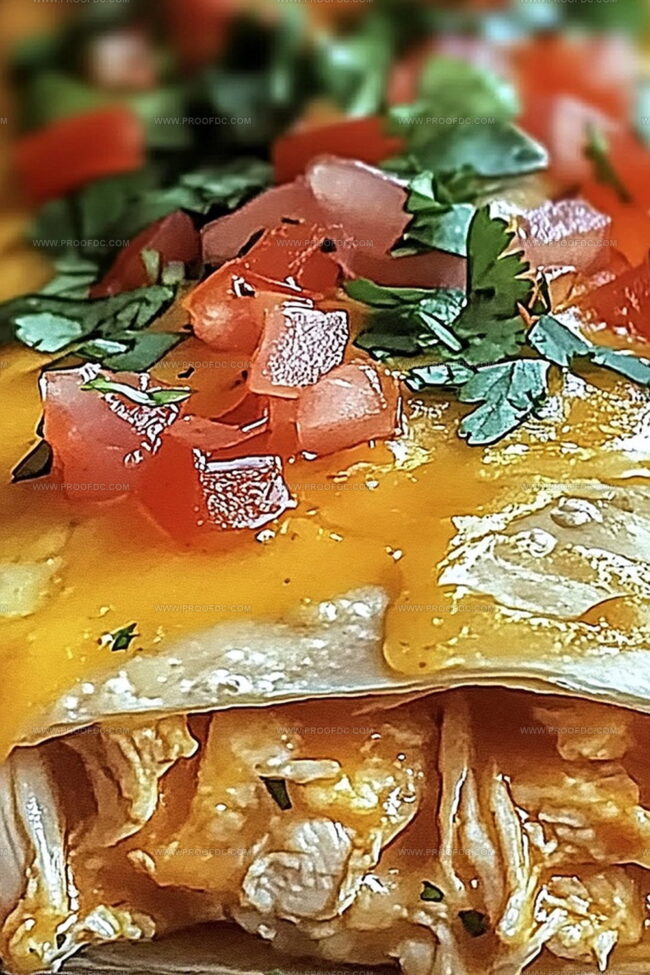
Pull out your crispy chimichangas and dress them up with your favorite toppings:Serve immediately and watch everyone’s eyes light up with excitement!
Smart Tips For Chi-Chis Baked Chicken Chimichangas
Store And Warm Up Chi-Chis Baked Chicken Chimichangas
Serve Chi-Chis Baked Chicken Chimichangas With These
Fun Twists On Chi-Chis Baked Chicken Chimichangas
Common Questions About Chi-Chis Baked Chicken Chimichangas
These chimichangas are baked instead of deep-fried, making them a healthier alternative that’s just as crispy and delicious. You’ll get all the flavor with less oil and fewer calories.
Absolutely! Rotisserie chicken is a great time-saver and adds extra flavor to the chimichangas. Simply shred the meat and use it as a quick substitute for freshly cooked chicken.
Yes! These chimichangas can be assembled ahead of time and refrigerated before baking. You can also freeze them unbaked for a convenient make-ahead meal that’s ready to pop in the oven whenever you’re hungry.
Use gluten-free tortillas and ensure all your spices and seasonings are certified gluten-free. The rest of the recipe remains the same, so it’s easy to adapt for gluten-sensitive diets.
Print
Chi-Chis Baked Chicken Chimichangas Recipe
- Total Time: 40 minutes
- Yield: 6 1x
Description
Crispy, golden Chi-Chi’s Baked Chicken Chimichangas promise a Mexican-inspired feast without deep-frying guilt. Packed with tender chicken, melted cheese, and zesty seasonings, these chimichangas deliver restaurant-quality flavor straight from your kitchen.
Ingredients
Main Protein and Cheese:
- 2 cups cooked shredded chicken (rotisserie)
- 1 cup shredded cheddar cheese
- ½ cup shredded monterey jack cheese
Spices and Flavor Enhancers:
- ½ cup sour cream
- ¼ cup diced green chilies (canned)
- 1 teaspoon ground cumin
- 1 teaspoon chili powder
- ½ teaspoon garlic powder
- ½ teaspoon onion powder
- Salt and pepper to taste
Wrapping and Cooking:
- 6 large flour tortillas
- 2 tablespoons (30 milliliters) melted butter or cooking spray
Optional Serving Accompaniments:
- Salsa
- Guacamole
- Sour cream
- Shredded lettuce
- Diced tomatoes
Instructions
- Warm the culinary workspace by heating the oven to a toasty 400F (200C). Create a non-stick surface on a baking sheet using parchment paper or a silicone mat.
- Craft the flavor-packed filling by thoroughly blending shredded chicken, cheddar and Monterey Jack cheeses, sour cream, green chilies, cumin, chili powder, garlic powder, onion powder, salt, and pepper in a spacious mixing bowl until ingredients harmonize completely.
- Transform tortillas into delectable parcels by positioning each flat, depositing a generous chicken mixture in the center. Expertly fold the sides inward, then roll tightly into a compact burrito-like configuration. Position each chimichanga with the sealed edge facing downward on the prepared baking sheet.
- Enhance the exterior by delicately brushing or misting the chimichanga tops with melted butter, ensuring a golden, crisp finish. Slide the baking sheet into the preheated oven and roast for 20-25 minutes until the exterior achieves a beautiful bronzed appearance.
- Present the piping hot chimichangas adorned with vibrant accompaniments like zesty salsa, creamy guacamole, tangy sour cream, crisp shredded lettuce, and fresh diced tomatoes for a complete flavor experience.
Notes
- Choose lean chicken breast for a healthier protein option that keeps the dish light and nutritious.
- Swap flour tortillas with whole wheat or low-carb tortillas to make the recipe more diet-friendly and increase fiber content.
- Experiment with different cheese blends like pepper jack or queso fresco for unique flavor variations that keep the dish exciting.
- Prepare the filling in advance and refrigerate for up to 24 hours, allowing flavors to meld and making meal prep easier during busy weeks.
- Prep Time: 15 minutes
- Cook Time: 25 minutes
- Category: Dinner, Snacks
- Method: Baking
- Cuisine: Mexican
Nutrition
- Serving Size: 6
- Calories: 420
- Sugar: 2 g
- Sodium: 600 mg
- Fat: 20 g
- Saturated Fat: 10 g
- Unsaturated Fat: 8 g
- Trans Fat: 0 g
- Carbohydrates: 38 g
- Fiber: 2 g
- Protein: 26 g
- Cholesterol: 80 mg
Jenna Stewart
Head Chef & Recipe Innovator
Expertise
Farm-to-Table Cooking; Seasonal Menu Development; Visual Plating Techniques; Flavor Layering and Simple Prep Hacks.
Education
The Culinary Institute of America, Hyde Park, NY
Jenna Stewart is the inventive spirit behind many of our standout dishes at Pro of Delicious Creations. A proud graduate of The Culinary Institute of America, she built her skills mastering both classic recipes and fresh, modern twists.
Now, Jenna celebrates the beauty of seasonal, local ingredients, often sourced from her garden and nearby markets, to create recipes that are bursting with flavor yet easy to follow. When she’s not experimenting in the kitchen, Jenna loves exploring nature on hikes and discovering new treasures at local co-ops.