Irresistible Cherry Pie Bombs Recipe: Tiny Sweet Explosions
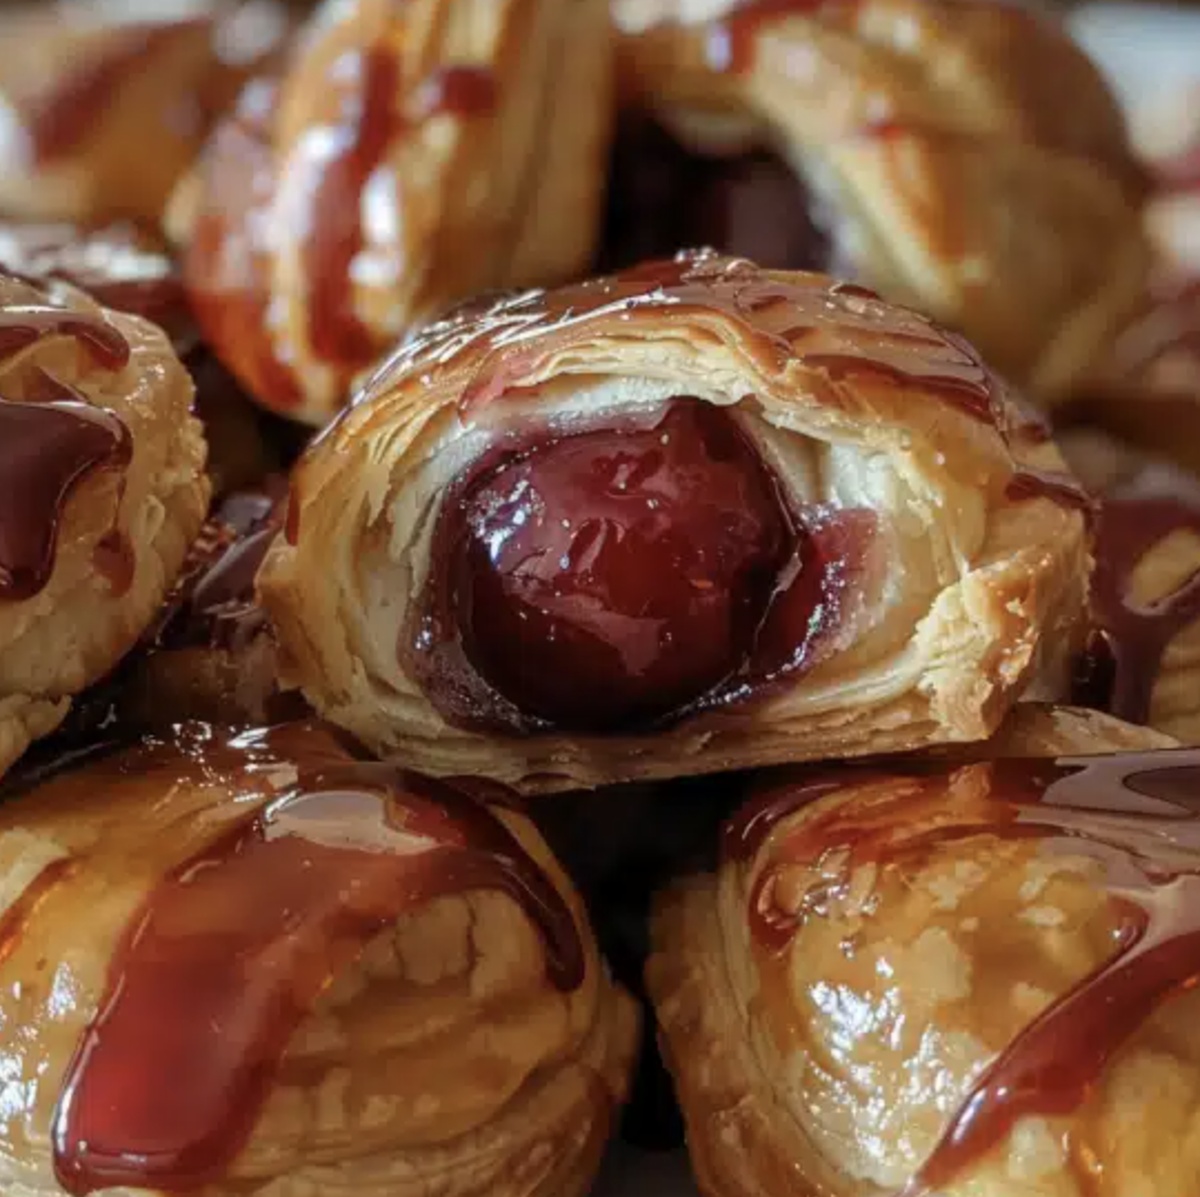
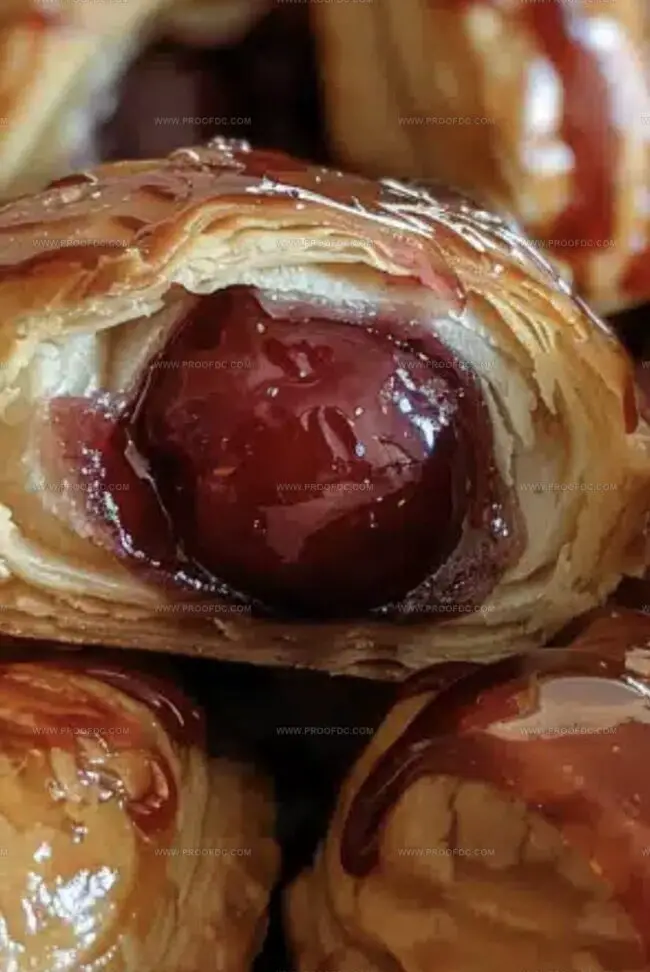
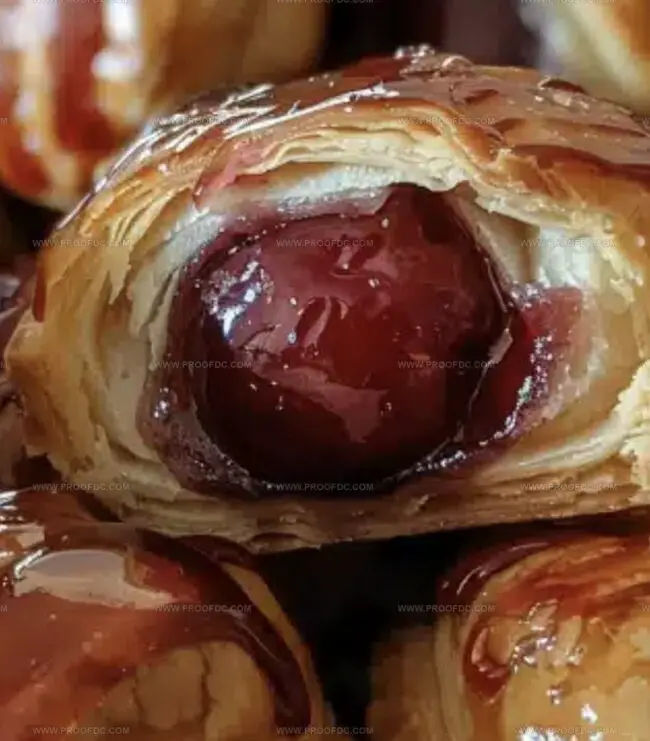
Sinking your teeth into a delightful cherry pie bombs that burst with sweet, tangy goodness.
These miniature desserts pack an incredible punch of flavor in every single bite.
Small pastry pockets cradle succulent cherries waiting to surprise you with their juicy center.
Crispy golden crusts promise a delectable contrast against the soft, warm filling.
Whipping up these treats takes less time than you might expect, with simple ingredients readily available in most kitchens.
Homemade desserts always create special moments of joy and connection around the table.
You’ll want to grab your apron and start baking these irresistible little treasures right away.
Why Cherry Pie Bombs Are A Sweet Surprise
Everything Needed For Cherry Pie Bombs
Main Ingredients:
Dough Base:Filling:Glaze:Cooking and Finishing:Optional Modifications:Baking Notes:Steps To Bake Cherry Pie Bombs Fast
Step 1: Separate Biscuit Layers
Open the biscuit package and gently pull each biscuit into two thin, delicate rounds. Using your fingertips, carefully stretch each round to create a larger, flatter circle about 4 inches wide. Work carefully to avoid tearing the dough.
Step 2: Fill With Cherry Goodness
Place fresh cherry pie filling in the center of each dough circle. Gather the edges of the dough, tenderly pulling them up and around the filling. Pinch the edges together firmly to create a perfectly sealed ball. Make sure the dough is evenly distributed to prevent any filling leaks during cooking.
Step 3: Prepare For Air Frying
Grab a pastry brush and coat the entire surface of each pie bomb with melted butter. This will help create a beautiful golden-brown exterior. Lightly spray your air fryer basket with nonstick cooking spray to prevent sticking.
Step 4: Cook To Perfection
Set your air fryer to 330 degrees Fahrenheit. Carefully place the pie bombs in the basket, leaving space between each one. Cook for 7-8 minutes, watching closely to achieve a gorgeous golden-brown color.
Step 5: Create Silky Glaze
In a mixing bowl, combine:Whisk until the mixture becomes smooth and glossy. Adjust the milk quantity to reach your desired glaze consistency – it should be thick enough to cling to the pie bombs but thin enough to drizzle.
Step 6: Glaze And Finish
Remove the pie bombs from the air fryer and let them cool slightly. Dunk each bomb into the glaze, ensuring a complete and even coating. Place them on a wire rack to allow excess glaze to drip off and set.
Step 7: Serve And Enjoy
Wait until the glaze firms up slightly. These cherry pie bombs are delicious when served warm or at room temperature. Perfect for a sweet treat that’ll make everyone smile!
Tips To Make Cherry Pie Bombs Even Better
How To Store And Reheat Cherry Pie Bombs The Easy Way
What To Serve With Cherry Pie Bombs
Cherry Pie Bombs Variations That Pop
Cherry Pie Bombs FAQs In One Place
These delightful treats got their name because they “explode” with cherry flavor when you bite into them. The compact, handheld design makes them a fun and exciting dessert that bursts with sweet filling.
Absolutely! Blueberry, apple, peach, or even chocolate filling work wonderfully. The recipe is super flexible, so feel free to experiment with your favorite fruit or sweet filling.
An air fryer is ideal, but you can also bake these in a traditional oven at 375F for about 12-15 minutes. Just watch them closely to prevent burning and ensure they get that beautiful golden color.
While they’re delicious warm, these pie bombs taste great at room temperature too. The glaze sets nicely, making them perfect for a grab-and-go sweet treat or a casual dessert that everyone will love.
Print
Cherry Pie Bombs Recipe
- Total Time: 23 minutes
- Yield: 8 1x
Description
Sweet cherry pie bombs deliver an explosive dessert experience that combines classic American pastry charm with modern culinary creativity. Pastry pockets packed with luscious cherries promise delightful indulgence for dessert enthusiasts craving a delectable treat.
Ingredients
Main Ingredients:
- 1 can (8-count) refrigerated biscuits (Pillsbury Grand biscuits)
- 1 cup (255 g) cherry pie filling
- ½ cup (113 g) unsalted butter, melted
Glaze Ingredients:
- 2 cups (250 g) confectioners sugar
- 3–4 tablespoons whole milk, room temperature
Instructions
- Carefully separate refrigerated biscuits into delicate, thin rounds. Gently stretch each piece into a uniform circular shape, ensuring consistent thickness for optimal texture.
- Dollop a generous spoonful of vibrant cherry pie filling precisely in the center of each dough circle. Carefully fold the edges inward, meticulously sealing the filling inside by pinching and crimping the dough into perfect spherical parcels.
- Lovingly coat the exterior of each pie bomb with a thin layer of melted butter, creating a golden, glossy surface. Prepare the air fryer by preheating to 330F and lightly misting the basket with non-stick spray to prevent sticking.
- Arrange the prepared bombs in the air fryer basket, maintaining adequate spacing to ensure even circulation of hot air. Cook for approximately 7-8 minutes, rotating midway to achieve an uniform, rich amber-brown coloration.
- While the bombs are cooking, whisk confectioners sugar and milk together in a smooth, silky glaze. Adjust the liquid incrementally to reach the ideal drizzling consistency that will cascade elegantly over the pastries.
- Once golden and crisp, transfer the pie bombs to a cooling rack. While still warm, delicately immerse each bomb into the prepared glaze, allowing excess to gracefully drip away.
- Let the glazed bombs rest until the coating sets into a beautiful, glossy finish. Serve immediately to capture the perfect blend of crisp exterior and luscious cherry filling.
Notes
- Select soft, high-quality biscuit dough to ensure a tender and flaky exterior that complements the sweet cherry filling.
- Keep the biscuit layers thin and even to prevent thick, doughy centers and ensure consistent cooking throughout the pie bomb.
- Use room temperature pie filling to help prevent tearing the delicate biscuit dough during sealing and shaping.
- Pinch the edges firmly when forming the pie bombs to prevent filling from leaking during air frying, creating a neat, sealed pocket.
- Brush butter generously but lightly to achieve a golden, crispy exterior without making the dough greasy or soggy.
- Space pie bombs properly in the air fryer basket to allow hot air circulation, ensuring even browning and crisp texture.
- Adjust glaze thickness by adding milk gradually – a thicker glaze clings better, while a thinner one creates a lighter, more delicate coating.
- Let glaze set completely before serving to achieve a smooth, professional-looking finish that won’t drip or run.
- Store leftover pie bombs in an airtight container at room temperature for up to two days, reheating briefly in the air fryer to restore crispness.
- Prep Time: 15 minutes
- Cook Time: 8 minutes
- Category: Desserts, Snacks
- Method: Frying
- Cuisine: American
Nutrition
- Serving Size: 8
- Calories: 300
- Sugar: 20 g
- Sodium: 350 mg
- Fat: 18 g
- Saturated Fat: 10 g
- Unsaturated Fat: 8 g
- Trans Fat: 0 g
- Carbohydrates: 35 g
- Fiber: 1 g
- Protein: 3 g
- Cholesterol: 40 mg
Jenna Stewart
Head Chef & Recipe Innovator
Expertise
Farm-to-Table Cooking; Seasonal Menu Development; Visual Plating Techniques; Flavor Layering and Simple Prep Hacks.
Education
The Culinary Institute of America, Hyde Park, NY
Jenna Stewart is the inventive spirit behind many of our standout dishes at Pro of Delicious Creations. A proud graduate of The Culinary Institute of America, she built her skills mastering both classic recipes and fresh, modern twists.
Now, Jenna celebrates the beauty of seasonal, local ingredients, often sourced from her garden and nearby markets, to create recipes that are bursting with flavor yet easy to follow. When she’s not experimenting in the kitchen, Jenna loves exploring nature on hikes and discovering new treasures at local co-ops.