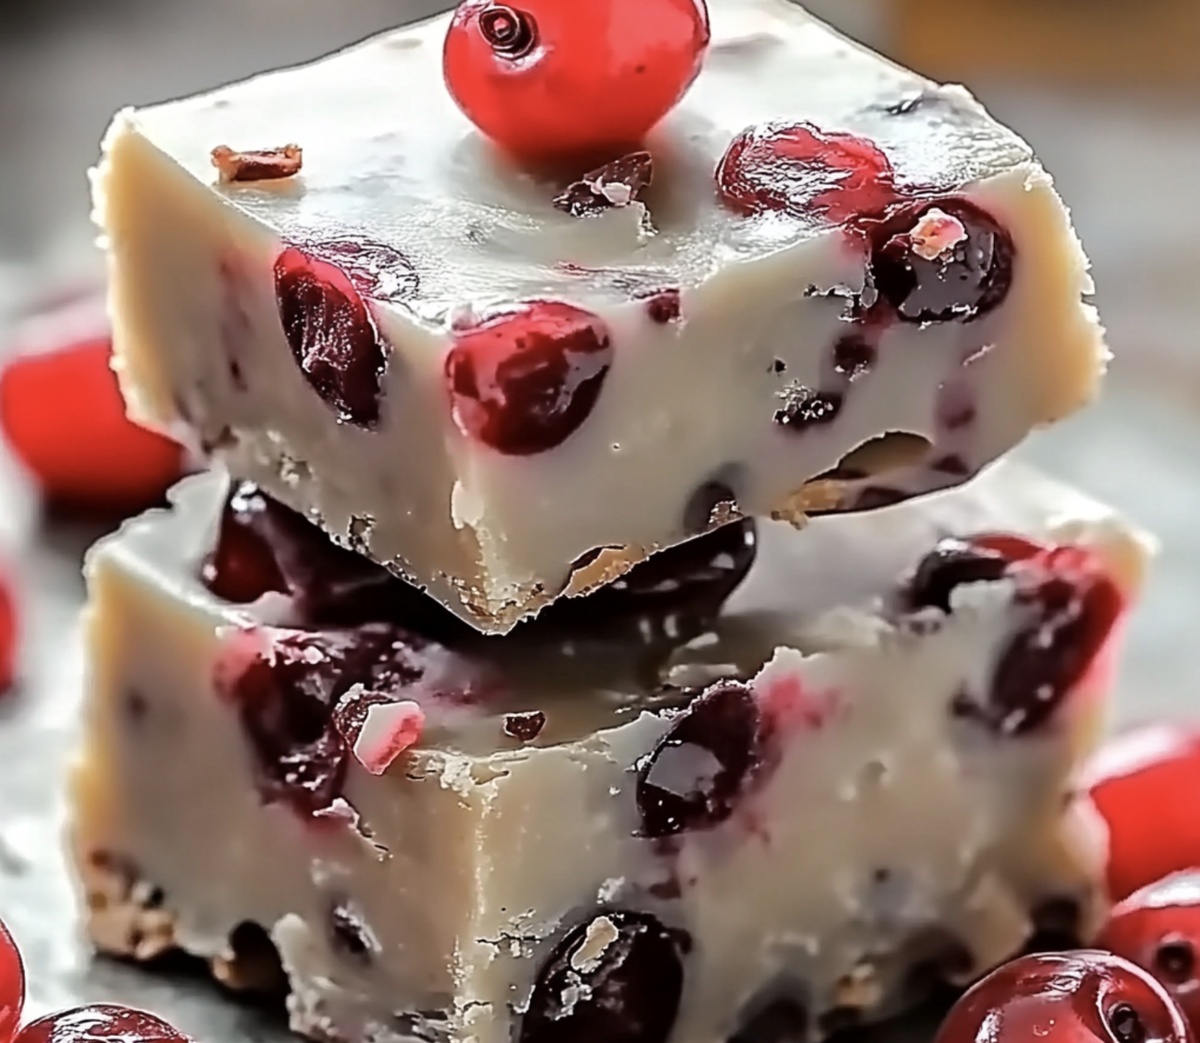
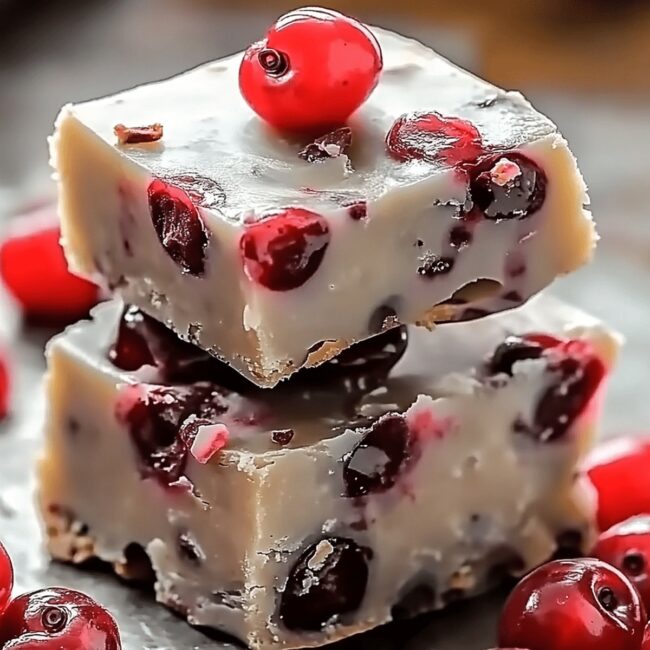
The Most Scrumptious Cherry Garcia Fudge Recipe Ever Made
Ice cream lovers adore this cherry garcia fudge that combines creamy textures with sweet nostalgia.
Ben & jerry’s inspired treats always spark excitement in my kitchen.
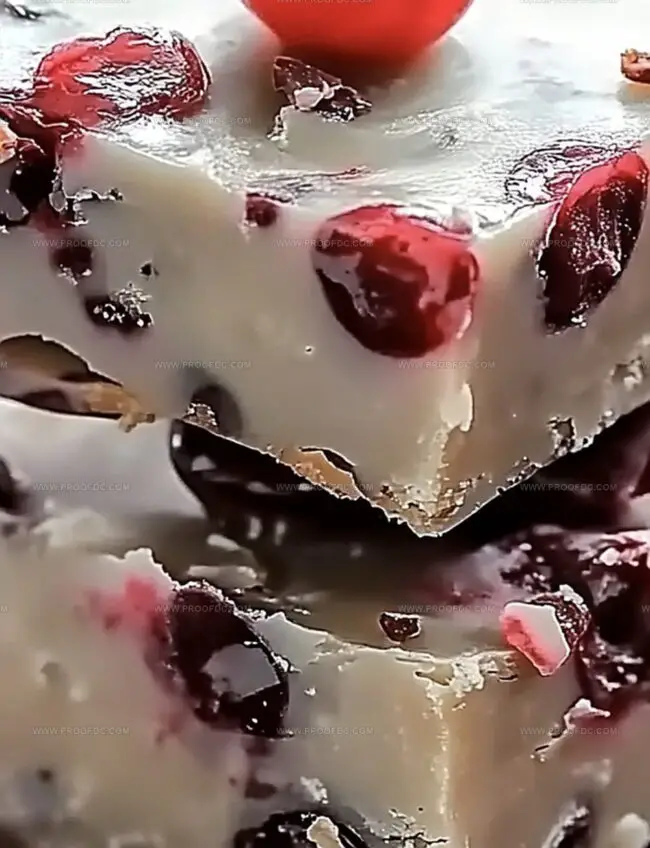
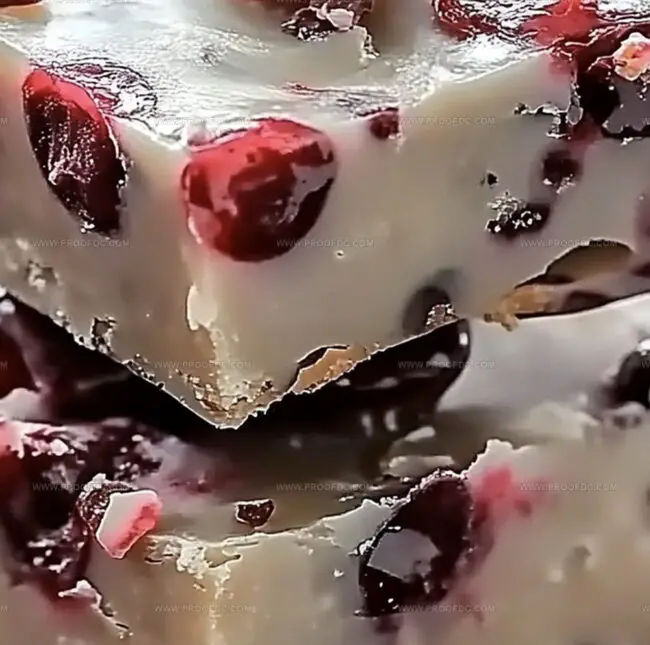
Rich chocolate swirls dance alongside bright red cherries in each delectable bite.
Smooth fudge layers complement tart fruity notes perfectly.
Homemade desserts like this feel special and indulgent without complicated techniques.
Quick mixing and minimal ingredients mean you can whip up this decadent recipe in minutes.
Serving these irresistible squares that promise to delight every chocolate and cherry enthusiast at your next gathering.
Why Cherry Garcia Fudge Feels Like a Dessert Dream
Everything in Cherry Garcia Fudge
Base Ingredients:Fruit Ingredients:Chocolate Ingredients:Preparation Ingredients:Easy Instructions for Cherry Garcia Fudge
Step 1: Prepare Cherries
Drain maraschino cherries completely and slice them into tiny bits. Spread chopped cherries between paper towel layers and press softly to remove extra liquid. This helps maintain the fudge’s perfect texture.
Step 2: Create Smooth Chocolate Base
In a medium saucepan over low heat, blend:Stir constantly until ingredients transform into a silky, glossy mixture.
Step 3: Blend Delicious Additions
Remove saucepan from heat. Tenderly fold in:Mix gently to distribute evenly without breaking chocolate chips.
Step 4: Transfer Fudge Mixture
Line a 9×13-inch baking pan with parchment paper, allowing extra edges for easy lifting. Pour fudge mixture into pan and spread smoothly using a spatula.
Step 5: Decorate Fudge Surface
Scatter remaining:Softly press toppings into fudge surface so they stick perfectly.
Step 6: Chill and Set
Let fudge cool at room temperature. Refrigerate for minimum 4 hours until completely solid.
Step 7: Slice and Enjoy
Lift fudge from pan using parchment paper. Place on cutting board and slice into delightful squares. Serve immediately or store for later indulgence.
Pro Tips for the Smoothest Cherry Garcia Fudge
Save Cherry Garcia Fudge for Later the Right Way
Toppings and Sips That Match Cherry Garcia Fudge
Flavor Upgrades for Cherry Garcia Fudge
FAQs for Cherry Garcia Fudge Lovers
Removing excess moisture prevents the fudge from becoming too soft and watery, ensuring a perfect texture and preventing soggy spots in your dessert.
Yes, you can use regular chocolate chips, but mini chips distribute more evenly and create a more consistent flavor throughout the fudge. Roughly chop larger chips if needed.
The gelatin powder is optional but adds an extra burst of cherry flavor. If you don’t have it, the fudge will still taste delicious with the maraschino cherries and white chocolate base.
The fudge can be stored in an airtight container in the refrigerator for up to 7 days. For best taste and texture, let it sit at room temperature for a few minutes before serving.
Print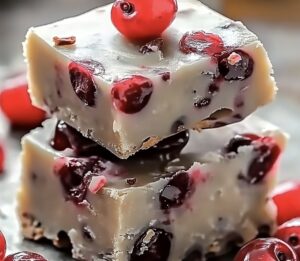
Cherry Garcia Fudge Recipe
- Total Time: 4 hours 20 minutes
- Yield: 12 1x
Description
Indulgent cherry garcia fudge brings Italian-inspired sweetness to classic dessert tables with rich chocolate and cherry swirls. Creamy layers and intense flavors make this irresistible treat perfect for sharing at gatherings or enjoying solo with a cold glass of milk.
Ingredients
Main Ingredients:
- 3 cups (540 g / 19 ounces) white chocolate chips
- 2 ½ cups (457 g / 16 ounces) mini semi-sweet chocolate chips
- 2 ½ cups (485 g / 17 ounces) maraschino cherries, drained and chopped
Dairy and Binding Ingredients:
- 1 can (14 ounces / 397 g) sweetened condensed milk
- 4 tablespoons (58 g / 2 ounces) unsalted butter
Optional Flavor Enhancer:
- 2 tablespoons cherry-flavored gelatin powder
Instructions
- Carefully drain maraschino cherries and mince into tiny fragments. Absorb excess liquid by pressing between paper towel layers to maintain the fudge’s structural integrity.
- Select a medium saucepan and meld white chocolate chips, sweetened condensed milk, butter, and optional cherry-flavored gelatin over gentle heat. Continuously stir until the mixture transforms into a silky, homogeneous liquid.
- Extinguish the heat source and tenderly incorporate two-thirds of the chopped cherries and mini chocolate chips. Fold with precision to distribute ingredients evenly without compromising chip integrity.
- Prepare a rectangular baking vessel by lining with parchment paper, ensuring extended edges for effortless extraction. Cascade the molten fudge mixture into the pan, meticulously smoothing the surface with a flexible spatula.
- Crown the fudge’s surface with remaining cherry fragments and chocolate chips. Delicately press the garnishes to create a harmonious connection with the underlying layer.
- Allow the confection to stabilize at ambient temperature, then transfer to refrigeration for a minimum of four hours. The cooling process will solidify the fudge into a firm, sliceable delicacy.
- Utilize parchment paper handles to elevate the set fudge from its container. Position on a cutting surface and segment into uniform squares using a sharp blade. Serve immediately or preserve for future indulgence.
Notes
- Pat cherries completely dry to prevent moisture ruining the fudge’s texture, ensuring a firm and creamy consistency.
- Melt ingredients slowly and gently to avoid scorching white chocolate, which can become grainy and affect the smooth finish.
- Use room temperature ingredients for even melting and smoother incorporation, creating a more uniform fudge texture.
- Experiment with alternative flavor variations by swapping cherry gelatin for other fruit powders or extracts, allowing creative customization.
- Prep Time: 20 minutes
- Cook Time: 4 hours
- Category: Desserts, Snacks
- Method: Mixing
- Cuisine: American
Nutrition
- Serving Size: 12
- Calories: 321
- Sugar: 30g
- Sodium: 75mg
- Fat: 16g
- Saturated Fat: 10g
- Unsaturated Fat: 4g
- Trans Fat: 0g
- Carbohydrates: 43g
- Fiber: 1g
- Protein: 2g
- Cholesterol: 31mg
Jenna Stewart
Head Chef & Recipe Innovator
Expertise
Farm-to-Table Cooking; Seasonal Menu Development; Visual Plating Techniques; Flavor Layering and Simple Prep Hacks.
Education
The Culinary Institute of America, Hyde Park, NY
Jenna Stewart is the inventive spirit behind many of our standout dishes at Pro of Delicious Creations. A proud graduate of The Culinary Institute of America, she built her skills mastering both classic recipes and fresh, modern twists.
Now, Jenna celebrates the beauty of seasonal, local ingredients, often sourced from her garden and nearby markets, to create recipes that are bursting with flavor yet easy to follow. When she’s not experimenting in the kitchen, Jenna loves exploring nature on hikes and discovering new treasures at local co-ops.