
Heavenly Caramelitas Recipe: Gooey Sweet Bars For Any Occasion
Sinking your teeth into a gooey caramelitas bar that melts with rich, buttery goodness.
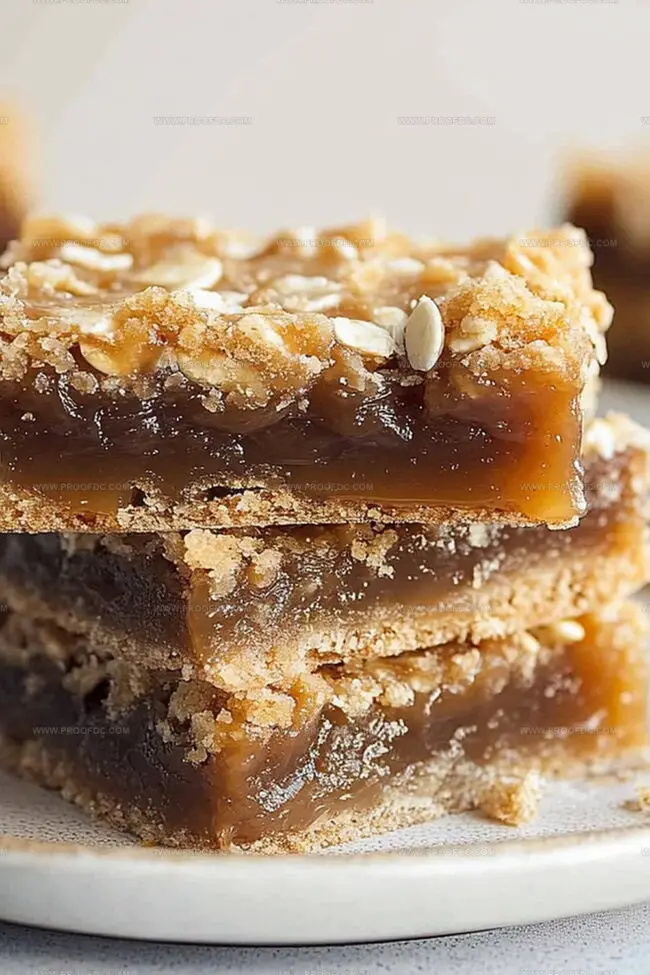
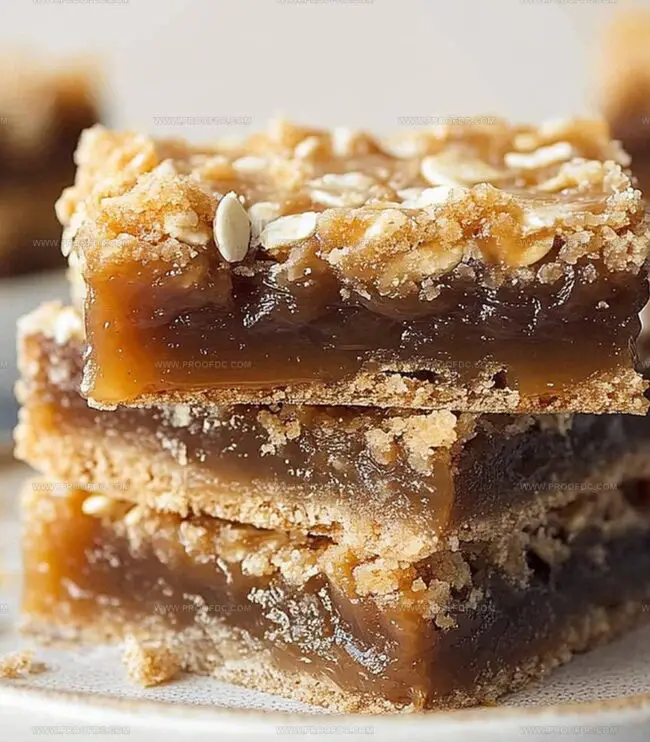
These decadent treats combine layers of chocolate and caramel between crisp oatmeal cookie crusts.
Nobody can resist their incredible charm and sweet complexity.
Memories of childhood desserts flood back with each delightful bite.
The magic happens when simple ingredients blend into something extraordinary.
Chocolate lovers and sweet enthusiasts will absolutely adore this irresistible recipe that promises pure indulgence.
Grab a napkin and get ready to experience pure dessert bliss.
Why Caramelitas Are Rich, Chewy, And Irresistible
What Goes Into Making Caramelitas
Crust and Topping Ingredients:Filling Ingredients:Optional Flavor Enhancers:How To Bake Caramelitas Step By Step
Step 1: Prepare Baking Station
Warm up your oven to a cozy 350°F. Grab a 9×13-inch baking pan and give it a light butter massage. Drape parchment paper inside, letting the edges hang over like a soft blanket for easy bar removal.
Step 2: Create Crumbly Oat Base
Blend together:Mix until the mixture looks like delightful sandy crumbs. Press about two-thirds of this magical mixture into the prepared pan, creating a sturdy foundation for your caramel dream.
Step 3: Bake Initial Layer
Slide the pan into the heated oven and bake until the edges turn a gorgeous golden brown, roughly 10-12 minutes. The kitchen will start smelling like a warm, sweet paradise.
Step 4: Sprinkle Chocolate Magic
Once the base emerges from the oven, generously scatter chocolate chips across the entire surface. The residual heat will start melting them into a smooth, glossy layer.
Step 5: Drizzle Caramel Goodness
Pour rich, gooey caramel sauce evenly over the chocolate-covered base. Make sure every inch gets a luxurious caramel coating.
Step 6: Add Remaining Crumb Topping
Sprinkle the remaining oat crumb mixture over the caramel, creating a beautiful, rustic top layer.
Step 7: Final Baking Moment
Return the pan to the oven and bake until the top turns a delightful golden brown and the caramel bubbles softly, about 15-18 minutes.
Step 8: Cool and Set
Remove from the oven and let the caramelitas cool completely in the pan. The cooling process helps them set and become perfectly sliceable.
Step 9: Slice and Serve
Using the parchment paper edges, lift the entire creation out of the pan. Slice into squares and watch everyone’s eyes light up with pure joy.
Tips To Get Caramelitas Just Right
Store And Reheat Caramelitas Without Losing Texture
What Goes Well With Caramelitas
Fun Flavors To Add To Caramelitas
Caramelitas FAQs You’ll Want To See
These decadent bars combine a buttery oatmeal cookie base with rich caramel and chocolate, creating an irresistible treat that’s both gooey and crunchy.
Absolutely! Homemade caramel sauce can elevate the flavor and give your Caramelitas a more personalized touch. Just ensure it’s thick enough to spread evenly.
Not at all! This recipe is straightforward and requires basic baking skills. The layering process is simple, and the results are impressive, making it perfect for bakers of all levels.
Use parchment paper and grease the pan well. Also, allow the bars to cool completely before cutting to help the caramel set and make slicing easier.
Print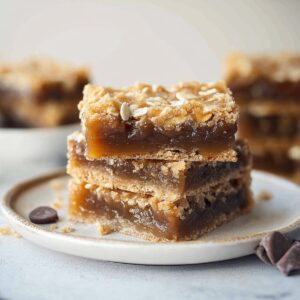
Caramelitas Recipe
- Total Time: 45 minutes
- Yield: 16 1x
Description
Irresistible chocolate and caramel meld perfectly in these Caramelitas, creating a heavenly dessert that blends rich layers of buttery oats, smooth chocolate, and gooey caramel. Dessert enthusiasts will savor each indulgent bite of this classic midwestern treat.
Ingredients
Main Ingredients:
- 1 cup (225 g/8 ounces) unsalted butter, melted
- 1 ½ cups (190 g/6.7 ounces) all-purpose flour
- 1 ½ cups (120 g/4.2 ounces) old-fashioned rolled oats
- 1 ½ cups (265 g/9.3 ounces) semi-sweet chocolate chips
- 1 cup (300 g/10.6 ounces) caramel sauce or dulce de leche
Sweet and Flavor Enhancers:
- 1 cup (200 g/7 ounces) packed brown sugar
- 1 teaspoon vanilla extract
- 3 tablespoons (45 ml/1.5 fluid ounces) heavy cream
Binding and Seasoning Ingredients:
- 1 teaspoon baking soda
- ¼ teaspoon salt
- ½ cup (75 g/2.6 ounces) chopped pecans or walnuts (optional)
Instructions
- Warmly usher the oven to a toasty 350°F (175°C), creating an ideal baking environment for your decadent treat.
- Lovingly prepare the baking vessel by generously coating it with a silky layer of grease, then tenderly drape parchment paper across its surface, ensuring graceful edges extend beyond the pan’s boundaries for effortless extraction.
- Create a luxurious foundation by layering two-thirds of the crumbly oat mixture, pressing it firmly and evenly into the pan’s landscape, establishing a sturdy base for the impending flavor symphony.
- Dispatch the prepared crust into the preheated oven’s embrace, allowing it to transform and set for approximately 10 minutes, developing a gentle golden hue and promising crisp texture.
- While the crust bakes, assemble your caramel companions: summon chocolate morsels and rich caramel sauce, preparing them for their starring roles in this culinary performance.
- Once the crust emerges with its delicate bronze complexion, generously cascade chocolate chips across its entire surface, creating a glistening blanket of potential deliciousness.
- Drizzle the caramel sauce with artistic precision, ensuring complete and even coverage over the chocolate landscape, promising pockets of sweet, flowing decadence.
- Crown the creation with the remaining oat mixture, sprinkling it delicately yet deliberately to create a rustic, textured topping.
- Return the assembled masterpiece to the oven’s warm sanctuary, allowing it to bake for an additional 15-18 minutes until the top achieves a golden, enticing complexion.
- Carefully extract the pan, permitting the caramelitas to cool completely within the pan, which allows the layers to set and harmonize their flavors.
- Utilizing the parchment paper’s extended edges, gently lift the entire creation from the pan and transfer to a cutting surface.
- Slice into precise squares, revealing the mesmerizing layers of oats, chocolate, and caramel, ready to enchant eager palates.
Notes
- Choose a high-quality chocolate with at least 60% cocoa for richer, more complex flavor depths.
- Always let the caramel layer cool slightly before adding chocolate to prevent immediate melting and maintain distinct layers.
- Chill the bars for 30 minutes after baking to help them set perfectly and create clean, crisp cuts when slicing.
- Use old-fashioned rolled oats instead of quick oats for better texture and a more substantial, nutty base in your caramelitas.
- Prep Time: 15 minutes
- Cook Time: 25-30 minutes
- Category: Desserts, Snacks
- Method: Baking
- Cuisine: American
Nutrition
- Serving Size: 16
- Calories: 382
- Sugar: 24 g
- Sodium: 81 mg
- Fat: 22 g
- Saturated Fat: 13 g
- Unsaturated Fat: 9 g
- Trans Fat: 0 g
- Carbohydrates: 40 g
- Fiber: 2 g
- Protein: 4 g
- Cholesterol: 42 mg
Jenna Stewart
Head Chef & Recipe Innovator
Expertise
Farm-to-Table Cooking; Seasonal Menu Development; Visual Plating Techniques; Flavor Layering and Simple Prep Hacks.
Education
The Culinary Institute of America, Hyde Park, NY
Jenna Stewart is the inventive spirit behind many of our standout dishes at Pro of Delicious Creations. A proud graduate of The Culinary Institute of America, she built her skills mastering both classic recipes and fresh, modern twists.
Now, Jenna celebrates the beauty of seasonal, local ingredients, often sourced from her garden and nearby markets, to create recipes that are bursting with flavor yet easy to follow. When she’s not experimenting in the kitchen, Jenna loves exploring nature on hikes and discovering new treasures at local co-ops.