Dreamy Homemade Cannoli Filling Recipe: Sweet Italian Magic
Creamy cannoli filling has been my secret weapon for impressing dinner guests during special gatherings.
Italian pastry chefs would absolutely love this simple yet decadent recipe that captures authentic flavors.
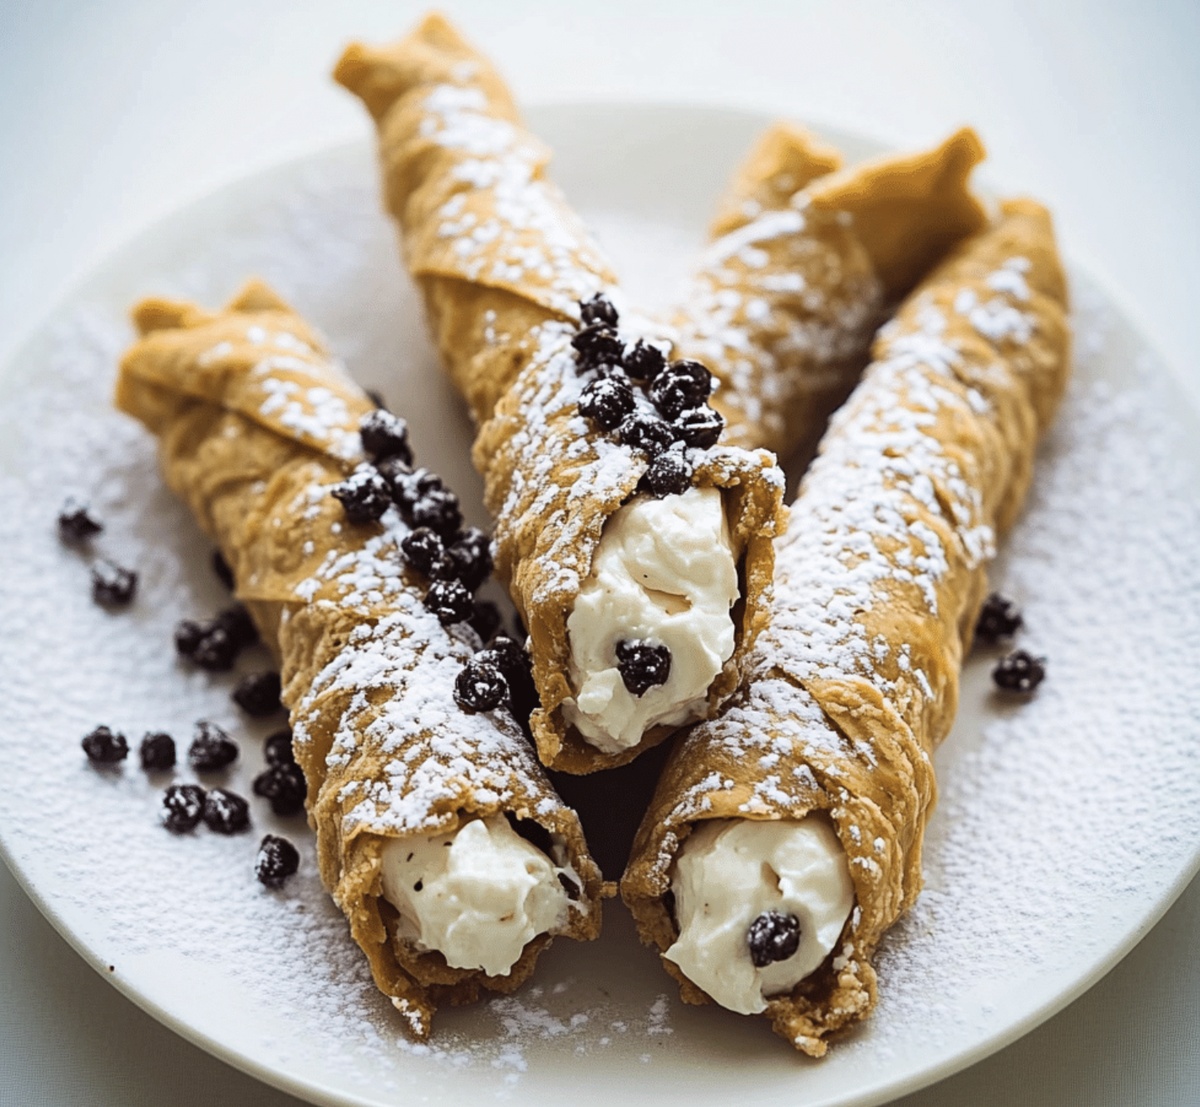
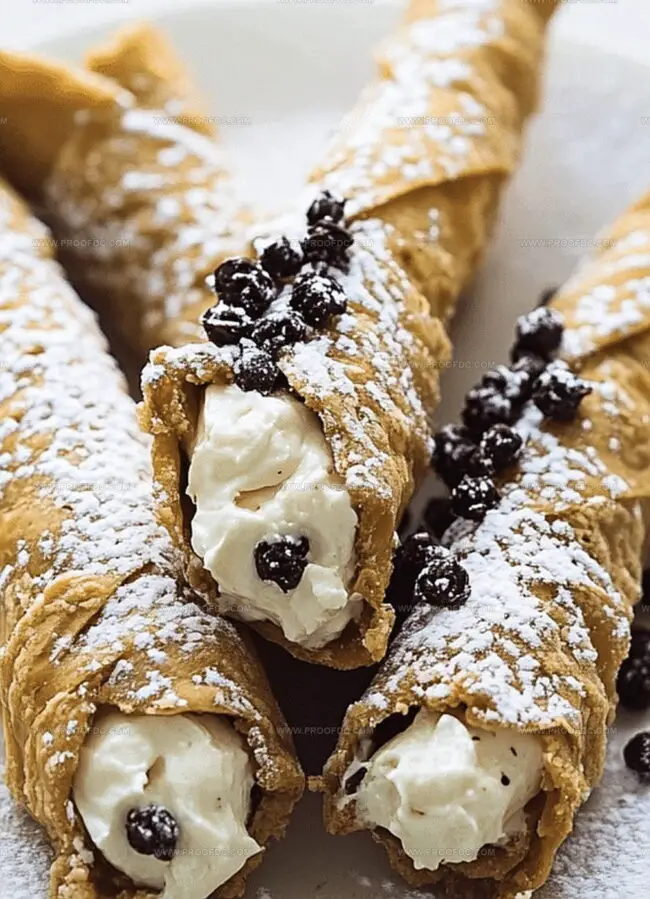
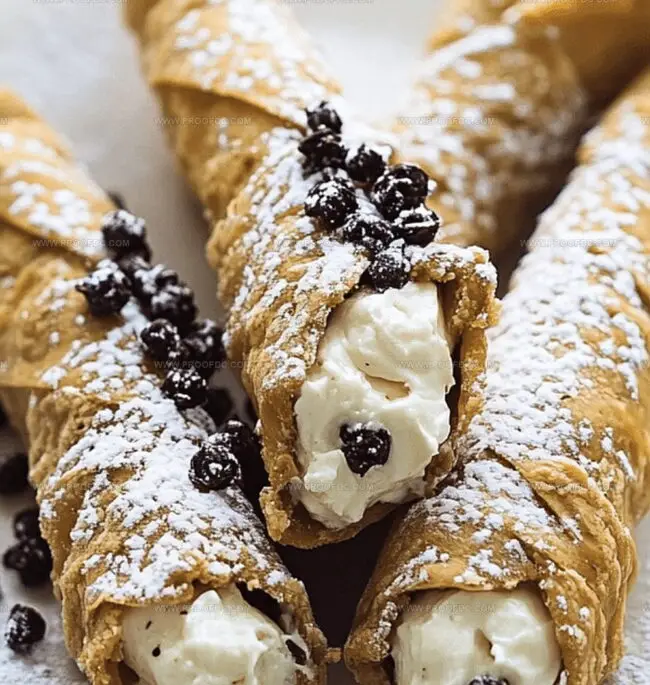
Sicily’s traditional dessert becomes magical when you blend ricotta cheese with powdered sugar and vanilla extract.
Professional bakers understand how precision matters in creating smooth, rich textures.
Each spoonful promises a delightful mix of sweetness and complexity that feels like a culinary adventure.
Carnival celebrations or weekend brunches become extraordinary moments when you serve these incredible treats.
Surprising everyone with a homemade dessert that looks and tastes professionally crafted – this recipe makes you a kitchen hero.
Why Cannoli Filling Recipe Tastes So Creamy
What You’ll Need For Cannoli Filling Recipe
Main Ingredients:
Dry Ingredients:Wet Ingredients:Optional Add-Ins:Glaze Ingredients:Topping Options:How To Whip Up Cannoli Filling Recipe Easily
Step 1: Whip Up the Creamy Base
In a spacious mixing bowl, combine:Blend the ingredients until smooth and velvety, ensuring no lumps remain. Use an electric mixer for the best consistency, beating on medium speed for about 2-3 minutes.
Step 2: Enhance the Flavor Profile
Gently fold in:Stir these mix-ins delicately to distribute evenly throughout the creamy mixture. The goal is to create a harmonious blend of textures and flavors.
Step 3: Achieve Perfect Consistency
Place the filling in a fine-mesh strainer positioned over a bowl. Allow excess moisture to drain for 30 minutes at room temperature. This step ensures a thick, luxurious filling that won’t make your cannoli shells soggy.
Step 4: Prepare for Filling
Transfer the filling to a piping bag fitted with a large star tip. If you don’t have a piping bag, a zip-top bag with a corner snipped works wonderfully. Refrigerate for 15-20 minutes to firm up slightly before filling.
Step 5: Final Touch
Just before serving, sprinkle the filled cannoli with:Serve immediately to enjoy the perfect balance of crisp shell and creamy filling.
Tips To Make Cannoli Filling Recipe Smooth
How To Store Cannoli Filling Recipe The Smart Way
Best Foods To Pair With Cannoli Filling Recipe
Easy Changes To Cannoli Filling Recipe You Can Try
Cannoli Filling Recipe FAQs To Know
This cannoli filling is authentic and creamy, featuring classic ricotta cheese as the base. The traditional Italian recipe ensures a rich, smooth texture that captures the essence of authentic Sicilian desserts.
While you can use low-fat ricotta, full-fat ricotta provides the best flavor and creamiest texture. Low-fat versions might make the filling less rich and slightly watery.
Drain the ricotta cheese thoroughly by placing it in a cheesecloth-lined strainer for several hours or overnight. This removes excess moisture and ensures a thick, stable filling that won’t separate when piped into cannoli shells.
Yes, powdered sugar is crucial. It sweetens the filling and helps create a smooth, creamy consistency. Regular granulated sugar won’t blend as well and could create a grainy texture in the cannoli filling.
Print
Cannoli Filling Recipe
- Total Time: 35 minutes
- Yield: 12 1x
Description
Sicilian cannoli bring creamy ricotta magic to dessert lovers, offering a perfect balance of smooth cheese and sweet indulgence. Crisp pastry shells cradle this luxurious filling, inviting you to savor each delightful Mediterranean-inspired bite.
Ingredients
Main Ingredients:
- 3 cups (375 g) all-purpose flour
- 1 cup (200 g) granulated sugar
- 12 cup (115 g) unsalted butter, softened
Spices and Flavor Enhancers:
- 13 cup (30 g) unsweetened cocoa powder
- 1 tablespoon baking powder
- 1 teaspoon ground cinnamon
- 12 teaspoon ground nutmeg
- 12 teaspoon ground cloves
- 12 teaspoon salt
- 1 teaspoon vanilla extract
- 1 teaspoon orange or lemon zest
Liquid and Additional Ingredients:
- 2 large eggs
- 12 cup (120 ml) milk
- 12 cup (80 g) mini chocolate chips or chopped nuts (optional)
- 1 12 cups (180 g) powdered sugar
- 2–3 tablespoons milk or orange juice
- 12 teaspoon vanilla extract
- Colored sprinkles
- Chopped nuts
Instructions
- Craft a smooth, luscious mixture by thoroughly blending ricotta cheese, ensuring all moisture is drained using a fine-mesh strainer or cheesecloth to prevent watery filling.
- Incorporate powdered sugar gradually into the ricotta, whisking consistently to create a velvety, uniform texture without any lumps.
- Fold in finely chopped dark chocolate and fragrant orange zest, distributing ingredients evenly throughout the creamy base.
- Enhance the filling’s complexity by introducing a delicate splash of marsala wine or vanilla extract, which will elevate the overall flavor profile.
- Gently mix candied citrus peels or chopped pistachios into the mixture, providing delightful textural contrast and additional aromatic dimensions.
- Cover the cannoli filling with plastic wrap, pressing directly onto the surface to prevent skin formation, and refrigerate for at least one hour to allow flavors to meld and intensify.
- Before serving, give the filling a quick stir to reincorporate any separated liquid and ensure a smooth, spreadable consistency.
- Transfer the chilled filling into a piping bag fitted with a wide tip, preparing to fill crisp cannoli shells just before presenting, maintaining optimal crispness and freshness.
- For optimal taste and texture, consume filled cannoli within a few hours of assembly to preserve the delicate balance between the crisp shell and creamy interior.
Notes
- Customize the chocolate intensity by adjusting cocoa powder quantity, making the cookies darker or lighter based on preference.
- Experiment with alternative flours like almond or gluten-free blends to accommodate dietary restrictions without compromising texture.
- Add warming spices like cardamom or ginger for a unique flavor profile that elevates the traditional cookie taste.
- Use plant-based butter and egg substitutes to create a vegan-friendly version that maintains the original recipe’s richness and moisture.
- Prep Time: 20 minutes
- Cook Time: 15 minutes
- Category: Desserts, Snacks
- Method: Baking
- Cuisine: Italian
Nutrition
- Serving Size: 12
- Calories: 300
- Sugar: 18 g
- Sodium: 150 mg
- Fat: 12 g
- Saturated Fat: 7 g
- Unsaturated Fat: 3 g
- Trans Fat: 0 g
- Carbohydrates: 40 g
- Fiber: 1 g
- Protein: 4 g
- Cholesterol: 50 mg
Jenna Stewart
Head Chef & Recipe Innovator
Expertise
Farm-to-Table Cooking; Seasonal Menu Development; Visual Plating Techniques; Flavor Layering and Simple Prep Hacks.
Education
The Culinary Institute of America, Hyde Park, NY
Jenna Stewart is the inventive spirit behind many of our standout dishes at Pro of Delicious Creations. A proud graduate of The Culinary Institute of America, she built her skills mastering both classic recipes and fresh, modern twists.
Now, Jenna celebrates the beauty of seasonal, local ingredients, often sourced from her garden and nearby markets, to create recipes that are bursting with flavor yet easy to follow. When she’s not experimenting in the kitchen, Jenna loves exploring nature on hikes and discovering new treasures at local co-ops.