Festive Candy Cane Brownies Recipe: A Jolly Holiday Treat
Sweet chocolate meets festive peppermint in these irresistible candy cane brownies that promise a delightful twist on classic desserts.
Winter gatherings deserve something special and memorable.
Rich chocolate layers mingle with cool mint undertones, creating a perfect holiday treat.
Nobody can resist these decadent squares bursting with seasonal charm.
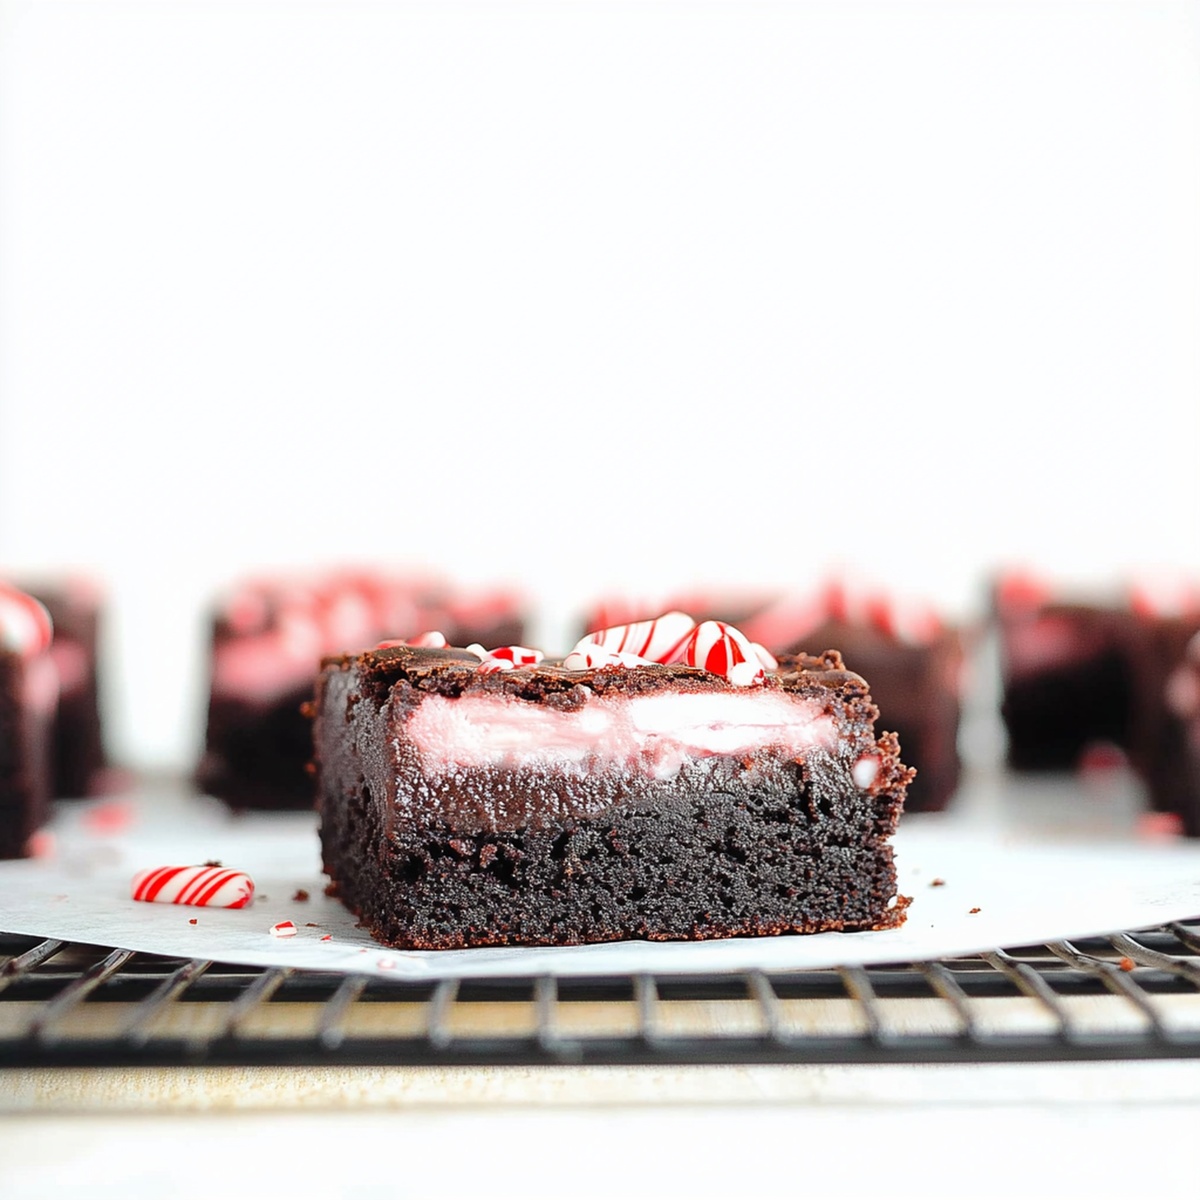
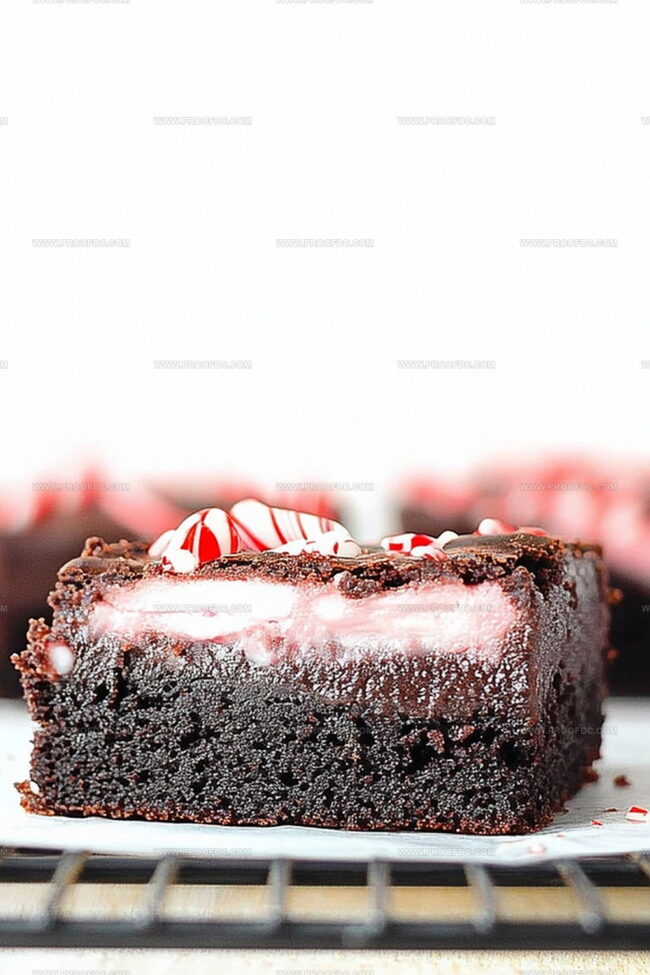
Cutting into a fudgy brownie sprinkled with crushed candy cane pieces that add delightful crunch and color.
Each bite delivers a magical blend of smooth chocolate and refreshing mint that feels like a celebration.
You’ll want to savor every single crumb of this delectable seasonal indulgence.
Why Candy Cane Brownies Are A Minty Delight
Ingredients For Candy Cane Brownies
Base Ingredients:Flavor Enhancers:Dry Ingredients:Topping Ingredients:Preparation Extras:How To Make Candy Cane Brownies Without Fuss

Step 1: Prepare the Oven
Fire up your oven to 350°F (175°C). Grab an 8×8-inch baking pan and give it a quick spray with cooking oil. Line the pan with parchment paper, letting the edges hang over for easy brownie removal.
Step 2: Create Chocolatey Magic
In a large mixing bowl, whisk together:Crack in the eggs and splash in vanilla and peppermint extracts. Whisk until the mixture looks smooth and glossy.
Sift in the dry ingredients:Gently fold everything together until just combined. Don’t go crazy with mixing – we want fudgy brownies!
Step 3: Bake to Perfection
Pour the rich chocolate batter into the prepared pan. Spread it evenly with a spatula. Slide the pan into the preheated oven and bake for 20-25 minutes. Check for doneness by inserting a toothpick – it should come out with a few moist crumbs clinging to it.
Let the brownies cool completely in the pan. Patience is key!
Step 4: Decorate with Festive Flair
Melt chocolate chips in the microwave, stirring every 30 seconds until smooth and glossy. Drizzle the melted chocolate over the cooled brownies.
Crush some candy canes (the fun part!) and sprinkle the peppermint pieces across the top.
Step 5: Slice and Serve
Allow the chocolate topping to set for about 10-15 minutes. Use the parchment paper handles to lift the brownies out of the pan. Slice into squares or rectangles with a sharp knife.
Step 6: Indulge and Enjoy
Serve these minty chocolate delights immediately. Store any leftovers in an airtight container for up to 5 days – if they last that long!
Tips For Fudgy Candy Cane Brownies
How To Store Candy Cane Brownies The Right Way
What Drinks Go With Candy Cane Brownies
Fun Add-Ons For Candy Cane Brownies
Answers To Candy Cane Brownies Questions
Peppermint extract adds a delightful holiday flavor that perfectly complements the rich chocolate, creating a festive and refreshing taste sensation that makes these brownies extra special.
Absolutely! If you don’t have candy canes, you can skip the topping or substitute with crushed peppermint candies, white chocolate chips, or even a sprinkle of sea salt for a different twist.
Be careful not to overmix the batter and avoid overbaking. Remove the brownies from the oven when a toothpick comes out with a few moist crumbs – this ensures a fudgy, rich texture that chocolate lovers crave.
While not mandatory, using both creates a deeper chocolate flavor and contributes to a more decadent, rich brownie. If you’re short on ingredients, you can use one or the other, but the combination delivers the most intense chocolate experience.
Print
Candy Cane Brownies Recipe
- Total Time: 35 minutes
- Yield: 12 1x
Description
Sweet chocolate meets festive peppermint in these irresistible candy cane brownies, blending rich cocoa with cool mint for a holiday dessert that delights. Holiday bakers will savor this simple yet spectacular treat that brings Christmas cheer to every delectable bite.
Ingredients
Chocolate Base:
- ⅓ cup unsweetened cocoa powder
- ½ cup all-purpose flour
- ¼ teaspoon baking powder
- ¼ teaspoon salt
Primary Ingredients:
- ½ cup (113 grams) unsalted butter, melted
- 1 cup (200 grams) granulated sugar
- 2 large eggs
- ½ cup (85 grams) semi-sweet chocolate chips (optional, for drizzling)
- ½ cup (50 grams) crushed candy canes
Flavor Enhancers:
- 1 teaspoon vanilla extract
- ½ teaspoon peppermint extract
Instructions
- Prepare the baking vessel by lining an 8×8-inch pan with parchment paper, ensuring edges are fully covered for effortless brownie extraction.
- Create a luxurious chocolate base by whisking melted butter and sugar until silky smooth, then incorporate eggs and aromatic extracts of vanilla and peppermint until perfectly blended.
- Sift cocoa powder, flour, baking powder, and salt directly into the wet mixture, gently folding with a spatula until ingredients are just harmonized – avoiding overmixing which can lead to tough brownies.
- Transfer the velvety batter into the prepared pan, spreading evenly with a spatula to ensure uniform thickness and smooth surface.
- Slide the pan into a preheated 350°F oven, allowing the brownies to bake for approximately 22-25 minutes, watching for subtle signs of doneness like slightly pulled edges and a toothpick emerging with minimal moist crumbs.
- Remove from oven and permit brownies to cool completely within the pan, allowing the texture to stabilize and intensify.
- Melt chocolate chips using gentle microwave technique, stirring between 30-second intervals until glossy and fluid.
- Drizzle molten chocolate across the cooled brownie surface, creating an artistic pattern that hints at the decadence within.
- Sprinkle crushed candy canes generously over the chocolate layer, ensuring even distribution for a festive and crunchy texture contrast.
- Allow chocolate topping to set for 10-15 minutes at room temperature, then lift the entire brownie slab using parchment paper edges.
- Slice into precise squares or elegant rectangles, revealing the rich, fudgy interior.
- Serve immediately or store in an airtight container, where these indulgent treats will maintain their exceptional quality for up to five days.
Notes
- Enhance the mint flavor by adding an extra splash of peppermint extract for a more intense, refreshing taste that cuts through the rich chocolate.
- Experiment with different chocolate types like dark or white chocolate for the topping to create unique flavor variations that complement the candy cane crunch.
- Prevent candy cane pieces from becoming soggy by sprinkling them just before serving, ensuring maximum crispness and vibrant color contrast.
- Transform these brownies into a gluten-free option by substituting all-purpose flour with almond flour or a gluten-free baking blend, maintaining the same decadent texture.
- Prep Time: 10 minutes
- Cook Time: 25 minutes
- Category: Desserts, Snacks
- Method: Baking
- Cuisine: American
Nutrition
- Serving Size: 12
- Calories: 185
- Sugar: 16 g
- Sodium: 75 mg
- Fat: 8 g
- Saturated Fat: 5 g
- Unsaturated Fat: 3 g
- Trans Fat: 0 g
- Carbohydrates: 27 g
- Fiber: 1 g
- Protein: 2 g
- Cholesterol: 30 mg
Jenna Stewart
Head Chef & Recipe Innovator
Expertise
Farm-to-Table Cooking; Seasonal Menu Development; Visual Plating Techniques; Flavor Layering and Simple Prep Hacks.
Education
The Culinary Institute of America, Hyde Park, NY
Jenna Stewart is the inventive spirit behind many of our standout dishes at Pro of Delicious Creations. A proud graduate of The Culinary Institute of America, she built her skills mastering both classic recipes and fresh, modern twists.
Now, Jenna celebrates the beauty of seasonal, local ingredients, often sourced from her garden and nearby markets, to create recipes that are bursting with flavor yet easy to follow. When she’s not experimenting in the kitchen, Jenna loves exploring nature on hikes and discovering new treasures at local co-ops.