Description
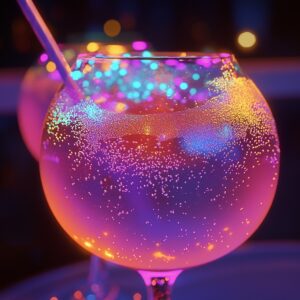
Candy bubble bliss brings childhood nostalgia with a whimsical twist of sugary sweetness. Sweet memories dance through each playful bite, inviting you to savor pure joy in delightful, colorful confections.
Ingredients
Scale
Main Ingredients:
- 1 cup (240 ml) clear soda (like Sprite or sparkling water)
- 1 envelope (7 g) unflavored gelatin
- 1 cup (200 g) white chocolate or candy melts
Sweeteners and Colorings:
- 2 tablespoons granulated sugar
- Gel food coloring (variety of colors)
Decorative Elements:
- ¼ cup (50 g) sprinkles, edible glitter, or crushed candy
- Cotton candy
- Whipped cream
- Candy pearls
Instructions
- Prepare the gelatin base by gently warming clear soda in a saucepan, careful not to let it reach a boil. Whisk in sugar and gelatin until completely integrated, creating a translucent liquid mixture.
- Divide the warm gelatin solution into separate small containers, introducing a hint of gel food coloring to each. Stir thoroughly to achieve vibrant, uniform hues.
- Select your shaping technique: either carefully pour the tinted gelatin into spherical silicone molds or use a piping bag to create delicate bubble-like droplets on parchment paper.
- Transfer the molded gelatin shapes to the refrigerator, allowing them to solidify and develop a firm, glossy texture for approximately 1-2 hours.
- While gelatin sets, prepare the chocolate coating by gradually melting white chocolate or candy melts in brief microwave intervals, stirring between each to ensure smooth consistency.
- Gently extract the chilled gelatin bubbles from their molds, handling them with care to maintain their delicate shape.
- Meticulously dip each gelatin bubble into the melted chocolate, allowing excess coating to gracefully drip away, creating an elegant shell.
- Immediately embellish the freshly coated bubbles with decorative elements like sparkling sprinkles, edible glitter, or crushed candy pieces before the chocolate solidifies.
- Artfully arrange the completed candy bubbles on a serving platter, adding whimsical garnishes such as soft cotton candy, billowy whipped cream, or iridescent candy pearls for a stunning presentation.
Notes
- Customize colors by experimenting with different gel food coloring shades for vibrant, eye-catching gelatin bubbles.
- Use silicone molds with various shapes to create unique bubble designs beyond traditional spheres.
- Work quickly when coating bubbles in chocolate to prevent gelatin from melting or losing shape.
- Prevent sticking by lightly greasing molds or parchment paper before pouring gelatin mixture.
- Achieve smoother chocolate coating by tempering white chocolate instead of microwaving, ensuring a glossy professional finish.
- Store decorated bubbles in refrigerator for up to 3 days, separating layers with parchment paper to maintain intricate decorations.
- Adapt recipe for dietary restrictions by using dairy-free chocolate alternatives or sugar-free gelatin for specialized treats.
- Enhance visual appeal by mixing edible glitter or metallic sprinkles for a glamorous, instagram-worthy dessert presentation.
- Prep Time: 15 minutes
- Cook Time: 1 hour
- Category: Desserts, Snacks
- Method: Mixing
- Cuisine: Fusion
Nutrition
- Serving Size: 12
- Calories: 60
- Sugar: 5 g
- Sodium: 0 mg
- Fat: 3 g
- Saturated Fat: 2 g
- Unsaturated Fat: 1 g
- Trans Fat: 0 g
- Carbohydrates: 8 g
- Fiber: 0 g
- Protein: 1 g
- Cholesterol: 5 mg