The Fluffiest Authentic Sopaipillas Recipe for Sweet Bliss
Crispy, pillowy authentic sopaipillas have been my comfort food since childhood in chile.
My abuela taught me this treasured recipe passed through generations of our family.
These golden, puffy pastries bring memories of warm kitchens and joyful gatherings.
Light as clouds and delicately crisp, sopaipillas transport you to a world of nostalgic flavors.
The magic happens with just a few simple ingredients and some gentle technique.
Each bite tells a story of tradition and culinary love.
Grab a cup of coffee and let’s create something delicious together!
Why Authentic Sopaipillas Recipe Feels So Comforting
Everything You Need For Authentic Sopaipillas Recipe
Dry Ingredients:Fat Ingredients:Liquid Ingredients:Optional Toppings and Fillings:Simple Steps To Make Authentic Sopaipillas Recipe

Step 1: Prepare the Dough Mixture
In a spacious mixing bowl, combine:Use your fingertips to work in softened butter until the mixture looks like sandy crumbs. Slowly pour in warm water, gently mixing until a soft, cohesive dough forms.
Step 2: Knead and Rest the Dough
Transfer the dough to a lightly floured surface. Knead with passion and purpose for 2-3 minutes until the dough becomes smooth and silky. Cover with a clean kitchen towel and let it relax for 20-30 minutes, allowing the gluten to develop and the flavors to mingle.
Step 3: Shape the Sopaipillas
Divide the dough into two equal portions. Roll out each section on a floured surface, aiming for a thin rectangle about 1/8 inch thick. Use a sharp knife or pizza cutter to create 3-inch squares or triangles with crisp, clean edges.
Step 4: Prepare for Frying
Select a deep skillet or Dutch oven. Pour vegetable oil to a depth of 2 inches. Heat the oil to 375°F, using a cooking thermometer to ensure precise temperature. Patience is key to perfect frying!
Step 5: Transform Dough into Golden Treats
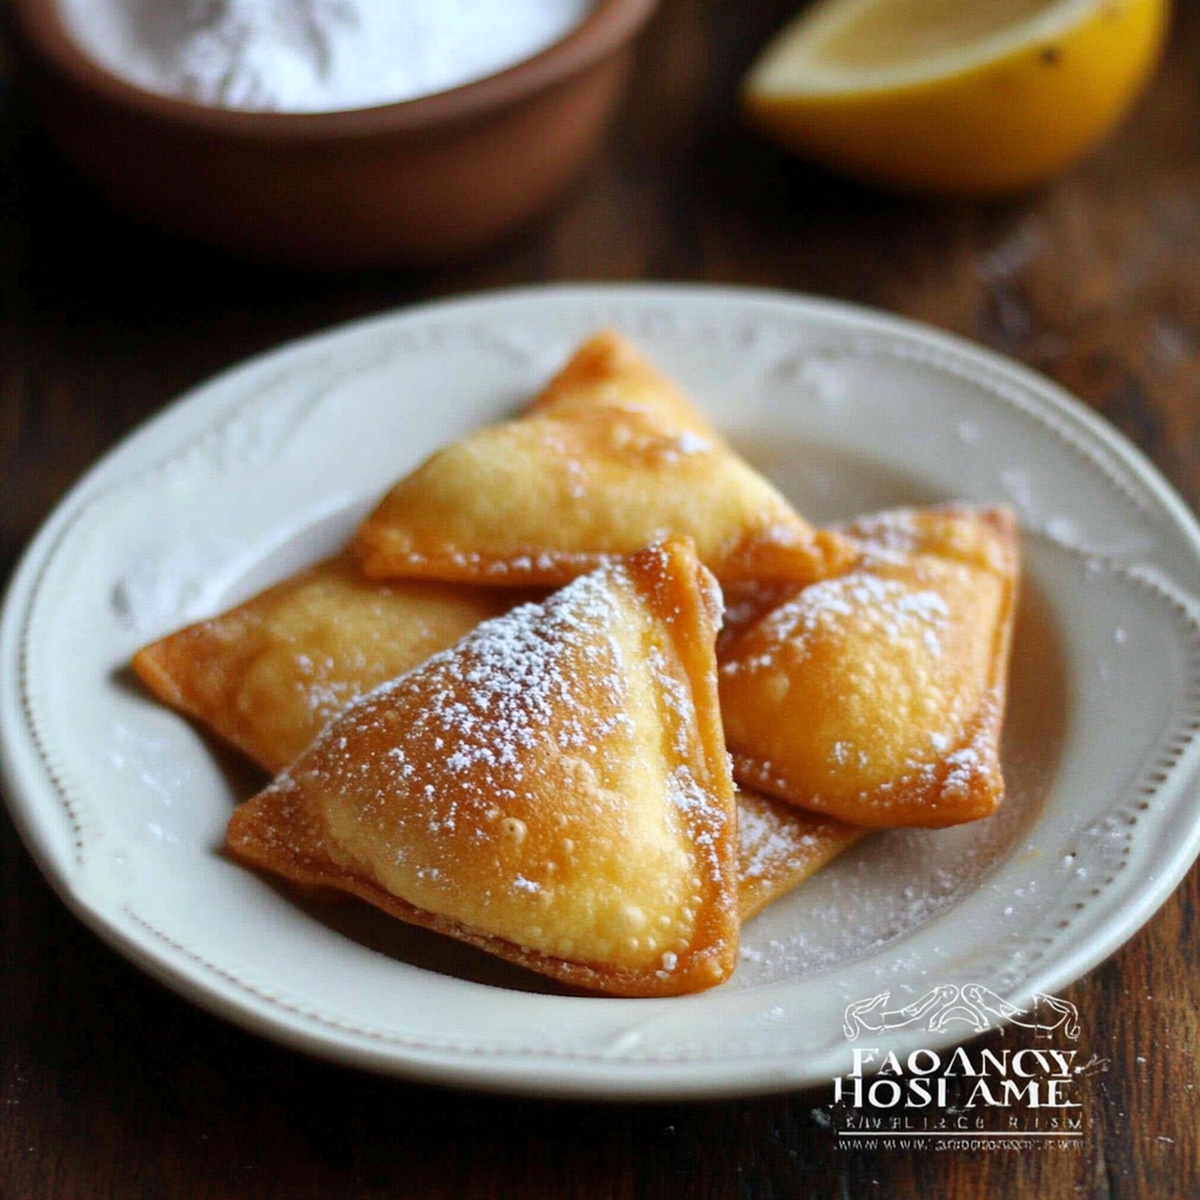
Gently lower a few dough pieces into the sizzling oil. Watch them magically puff and turn golden brown, about 1-2 minutes per side. Use tongs to flip and ensure even cooking. Transfer to a paper towel-lined plate to drain excess oil.
Step 6: Serve with Flair
Present your sopaipillas while still warm. Drizzle with:For a savory twist, stuff with:Best Tips For Authentic Sopaipillas Recipe Success
How To Store And Reheat Authentic Sopaipillas Recipe
What Goes Well With Authentic Sopaipillas Recipe
Fun Ways To Make Authentic Sopaipillas Recipe Your Own
Answers To Questions About Authentic Sopaipillas Recipe
Sopaipillas have roots in Chilean and Chilean-Peruvian cuisine, with strong influences from Spanish colonial cooking traditions. They’re especially popular in South American countries like Chile and New Mexico.
Sopaipilla dough is unique because it uses baking powder for a light, puffy texture and contains butter, which gives it a rich, slightly flaky quality different from typical bread or pastry doughs.
The combination of baking powder and hot oil creates steam inside the dough, causing the sopaipillas to inflate and create their signature puffy, hollow interior. This happens when the oil is at the right temperature around 375F.
While deep frying is traditional and creates the best texture, you can bake sopaipillas in an oven at 425F for a slightly different but still delicious result. However, they won’t puff up as dramatically as the fried version.
Print
Authentic Sopaipillas Recipe
- Total Time: 45 minutes
- Yield: 4 1x
Description
Crispy sopaipillas bring Chilean street food magic right to home kitchens with golden-brown pillows of deep-fried dough. Drizzled with honey or sprinkled with powdered sugar, these delightful pastries offer a simple yet irresistible taste of South American comfort.
Ingredients
Main Dry Ingredients:
- 2 cups (250 g) all-purpose flour
- 2 teaspoons baking powder
- ½ teaspoon salt
Fat and Liquid Ingredients:
- 2 tablespoons unsalted butter, softened
- ¾ cup (180 ml) warm water
- Vegetable oil, for frying
Serving Options:
- Honey or agave syrup
- Powdered sugar
- Cinnamon sugar
Instructions
- Prepare the foundational mixture by combining dry ingredients in a spacious mixing vessel. Incorporate softened butter using fingertips until the texture resembles scattered breadcrumbs. Introduce warm water gradually, blending until a cohesive, supple dough emerges.
- Transfer the dough onto a lightly dusted work surface. Gently manipulate and stretch the dough, working it with rhythmic motions until achieving a silky, responsive consistency. Allow the dough to relax and settle, covered with a pristine cloth, for approximately 20-30 minutes.
- Partition the rested dough into two equivalent segments. Using a rolling implement, transform each portion into a delicate, translucent sheet approximately 1/8 inch thick. Employ a sharp cutting tool to segment the dough into precise geometric shapes, preferably squares or triangular forms.
- Select a deep, heavy-bottomed cooking vessel. Pour vegetable oil to a depth of two inches and heat systematically. Monitor the temperature meticulously with a calibrated thermometer, aiming for an optimal 375°F.
- Delicately submerge small batches of shaped dough into the shimmering oil. Observe as the pieces quickly inflate and transform, turning a luminous golden hue. Utilize long-handled tongs to gracefully flip and ensure even browning, typically requiring 1-2 minutes per side.
- Extract the freshly fried pastries, allowing excess oil to drain onto absorbent paper. Present immediately for maximum enjoyment. For sweet variations, cascade honey, dust with powdered sugar, or coat in aromatic cinnamon. Alternatively, for savory adaptations, consider filling with robust beans, melted cheese, or seasoned meats.
Notes
- Check dough consistency by gently pressing; it should spring back slowly without sticking to your fingers, indicating proper hydration and kneading.
- Use a candy thermometer for precise oil temperature, preventing soggy or burnt sopaipillas during frying.
- Allow dough to rest completely to relax gluten, ensuring tender and light pastries that puff beautifully when fried.
- For gluten-free alternatives, substitute wheat flour with a blend of rice and almond flour, adding xanthan gum for binding.
- Experiment with whole wheat flour for a nuttier flavor and increased fiber content, though texture might be slightly denser.
- Maintain consistent oil temperature between 365-375°F to achieve golden, crispy exterior without absorbing excess oil.
- Pat dough pieces completely dry before frying to prevent dangerous oil splattering and ensure even browning.
- Store leftover sopaipillas in an airtight container, reheating briefly in a hot oven to restore crispness.
- Prep Time: 15 minutes
- Cook Time: 30 minutes
- Category: Snacks, Desserts
- Method: Frying
- Cuisine: Mexican
Nutrition
- Serving Size: 4
- Calories: 200
- Sugar: 0 g
- Sodium: 125 mg
- Fat: 10 g
- Saturated Fat: 5 g
- Unsaturated Fat: 3 g
- Trans Fat: 0 g
- Carbohydrates: 25 g
- Fiber: 1 g
- Protein: 3 g
- Cholesterol: 15 mg
Jenna Stewart
Head Chef & Recipe Innovator
Expertise
Farm-to-Table Cooking; Seasonal Menu Development; Visual Plating Techniques; Flavor Layering and Simple Prep Hacks.
Education
The Culinary Institute of America, Hyde Park, NY
Jenna Stewart is the inventive spirit behind many of our standout dishes at Pro of Delicious Creations. A proud graduate of The Culinary Institute of America, she built her skills mastering both classic recipes and fresh, modern twists.
Now, Jenna celebrates the beauty of seasonal, local ingredients, often sourced from her garden and nearby markets, to create recipes that are bursting with flavor yet easy to follow. When she’s not experimenting in the kitchen, Jenna loves exploring nature on hikes and discovering new treasures at local co-ops.