Irresistible Italian Arancini Recipe: Golden Crispy Rice Treasures
Golden, crispy, and bursting with flavor, these authentic italian arancini tell a story of sicilian culinary heritage passed down through generations.
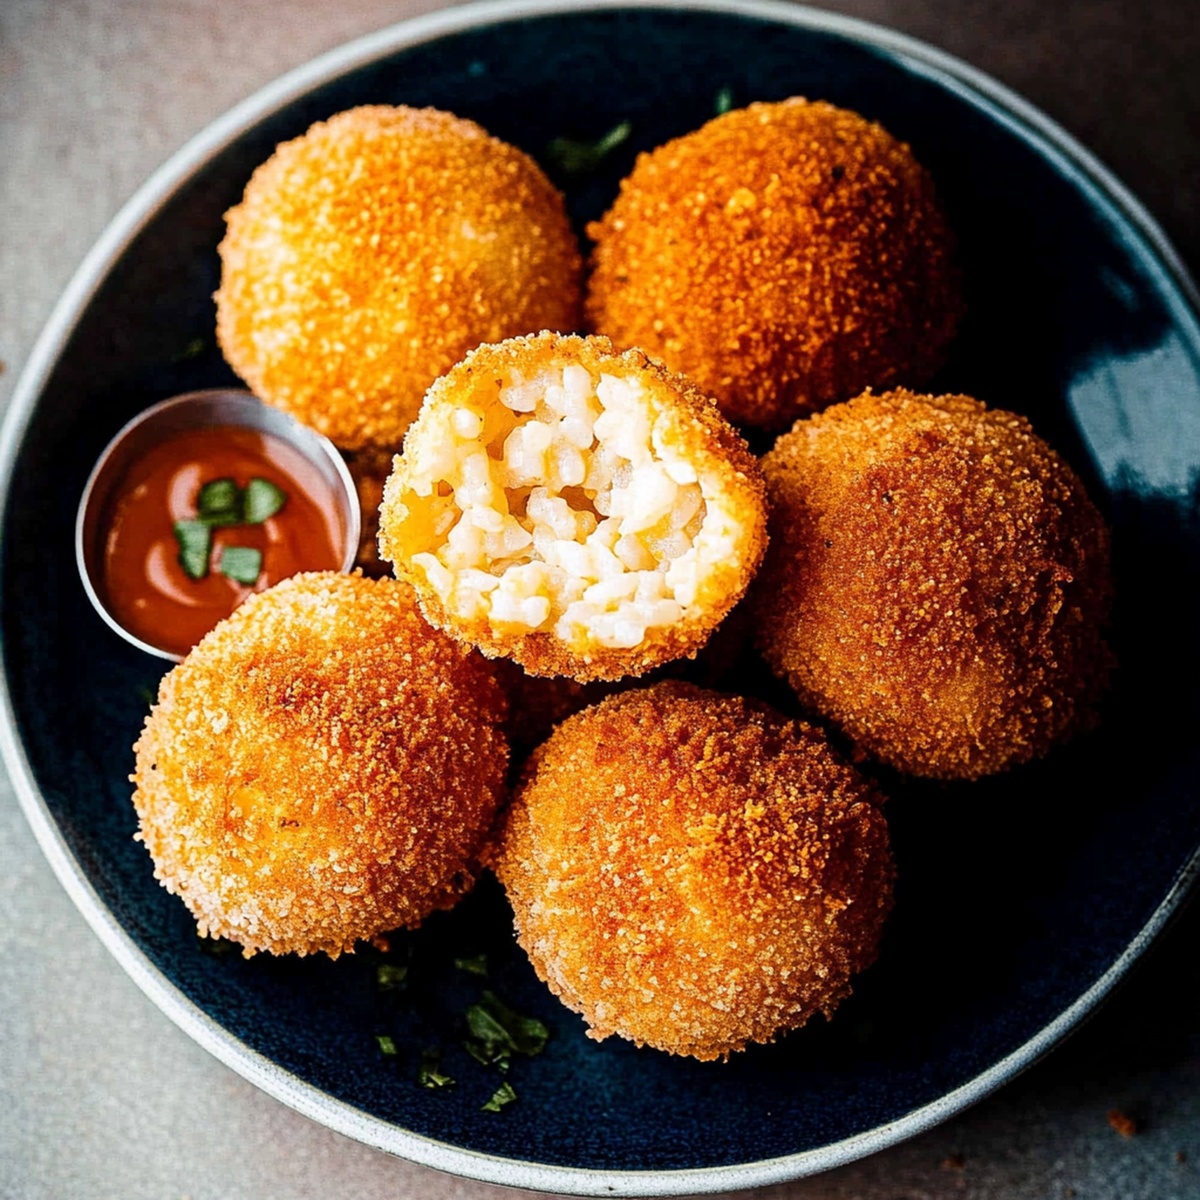
Rice balls packed with rich, melted cheese and savory fillings create a mouthwatering experience that transports you straight to the streets of palermo.
Each arancino offers a perfect balance of creamy risotto and crunchy exterior, crafted with love and tradition.
The delicate process of rolling, stuffing, and carefully frying these delectable treats requires patience and skill.
Generations of italian cooks have perfected this beloved street food, turning simple ingredients into an extraordinary culinary masterpiece.
Prepare to savor every bite of these irresistible rice balls that capture the heart of sicilian cuisine.
Indulge in this recipe and let the flavors of italy dance on your palate.
Quick Recipe Overview

What You’ll Use For Italian Arancini Crispy Stuffed Rice Balls
For Rice Base:For Filling and Stuffing:For Coating and Frying:Gear You’ll Need For Italian Arancini Crispy Stuffed Rice Balls
How To Make Italian Arancini Crispy Stuffed Rice Balls

Cook rice in simmering broth, stirring occasionally until liquid absorbs. Mix in cheese, butter, and egg yolks. Spread on tray and let cool completely.
Grab a handful of cooled rice and flatten in your palm. Nestle mozzarella (or optional fillings) in center. Gently mold rice around filling into compact spheres, roughly golf ball size.
Roll each rice ball through flour, then egg wash, finally blanket with breadcrumbs. Press coating gently to ensure complete coverage.
Heat oil to sizzling temperature. Carefully lower rice balls into hot oil, rotating until they turn deep golden brown. Extract with slotted utensil and rest on absorbent paper.
Arrange freshly fried arancini on serving plate. Accompany with marinara sauce or sprinkle extra cheese. Serve immediately while crispy and warm.
Tips For Italian Arancini Crispy Stuffed Rice Balls
Ways To Serve Italian Arancini Crispy Stuffed Rice Balls
Save Italian Arancini Crispy Stuffed Rice Balls Smartly
Print
Authentic Italian Arancini
- Total Time: 50 minutes
- Yield: 5 1x
Description
Rice lovers will adore these Italian arancini, classic Sicilian street food packed with creamy risotto and gooey cheese. Golden-brown spheres offer a delightful crunch that transports you straight to Sicily’s bustling markets.
Ingredients
- 2 cups (480 ml) arborio rice (or short-grain risotto rice)
- 4 cups (960 ml) chicken or vegetable broth (hot)
- 100 g (3.5 oz) mozzarella cheese (cut into small cubes)
- ½ cup cooked ground beef (seasoned with salt & pepper, optional)
- ¼ cup (60 ml) peas (optional, for extra texture)
- ½ cup grated Parmesan cheese
- 2 tbsps unsalted butter
- ½ tsp salt
- ½ tsp black pepper
- 2 eggs (beaten)
- 2 egg yolks (beaten, for binding)
- 1 cup all-purpose flour
- 1 ½ cups breadcrumbs (Italian or Panko for extra crunch)
- Vegetable oil (for frying, about 3-4 cups)
Instructions
- Broth Preparation: Craft a fragrant broth and delicately simmer Arborio rice, consistently stirring to encourage liquid absorption and develop a luxurious, creamy consistency.
- Rice Enrichment: Fold Parmesan, butter, and egg yolks into the cooked rice, transforming the mixture into a velvety, indulgent base for arancini.
- Cooling and Structuring: Spread rice across a flat surface, allowing complete cooling and stabilization for precise shaping of individual portions.
- Filling and Molding: Portion cooled rice, creating a small cavity in each segment to nestle mozzarella cubes, optional meat, or peas at the center, then carefully encase the filling by forming uniform spherical shapes.
- Breading Technique: Establish a three-stage breading process by systematically rolling rice balls through flour, immersing in beaten eggs, and thoroughly coating with breadcrumbs, ensuring an even, crisp exterior.
- Frying Precision: Heat oil to 350F in a deep pot, gently submerging breaded rice balls in small batches to maintain optimal temperature and prevent overcrowding, rotating periodically to achieve a uniform golden-brown crust.
- Serving Presentation: Transfer crispy arancini to absorbent paper towels to drain excess oil, then serve immediately with marinara sauce or a delicate Parmesan cheese garnish for an enhanced flavor profile.
Notes
- Choose Right Rice: Select high-starch Arborio or Carnaroli rice for creamy, sticky texture that helps rice balls hold perfect shape.
- Cool Rice Completely: Let rice mixture cool thoroughly at room temperature, allowing grains to firm up and become easier to shape without falling apart.
- Consistent Size Matters: Use a small ice cream scoop or uniform hand-rolling technique to create identically sized arancini for even cooking and professional presentation.
- Master Breading Technique: Press breadcrumbs firmly onto rice balls, ensuring complete and even coating for maximum crispiness and preventing filling from leaking during frying.
- Prep Time: 30 minutes
- Cook Time: 20 minutes
- Category: Appetizer, Snacks
- Method: Frying
- Cuisine: Italian
Nutrition
- Serving Size: 5
- Calories: 350
- Sugar: 1 g
- Sodium: 450 mg
- Fat: 18 g
- Saturated Fat: 8 g
- Unsaturated Fat: 10 g
- Trans Fat: 0 g
- Carbohydrates: 38 g
- Fiber: 2 g
- Protein: 12 g
- Cholesterol: 120 mg
Marcus Foley
Food Critic & Kitchen Coach
Expertise
Recipe Testing and Troubleshooting; Time-Saving Kitchen Hacks; Global Flavor Exploration; Engaging Food Writing and Honest Reviews.
Education
Institute of Culinary Education (ICE), New York, NY
Marcus Foley, based in Atlanta, GA, is a friendly food expert who makes cooking fun and simple.
With hands-on training from the Institute of Culinary Education and years of tasting everything from street food to fine dining, he shares easy kitchen hacks, global flavor ideas, and step-by-step recipes that turn kitchen mishaps into delicious surprises.