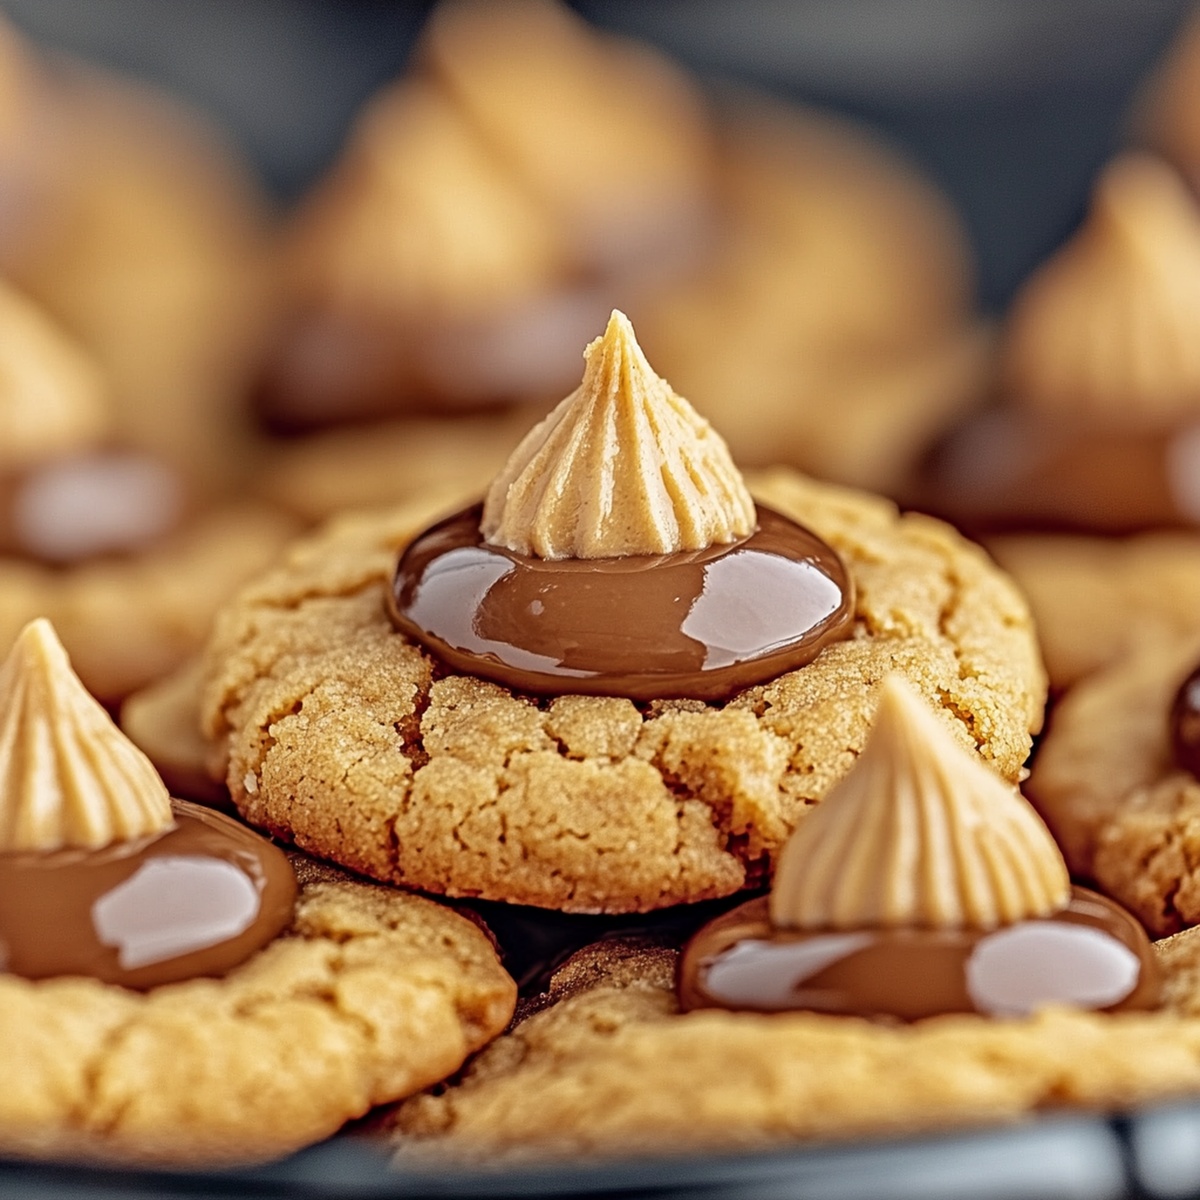
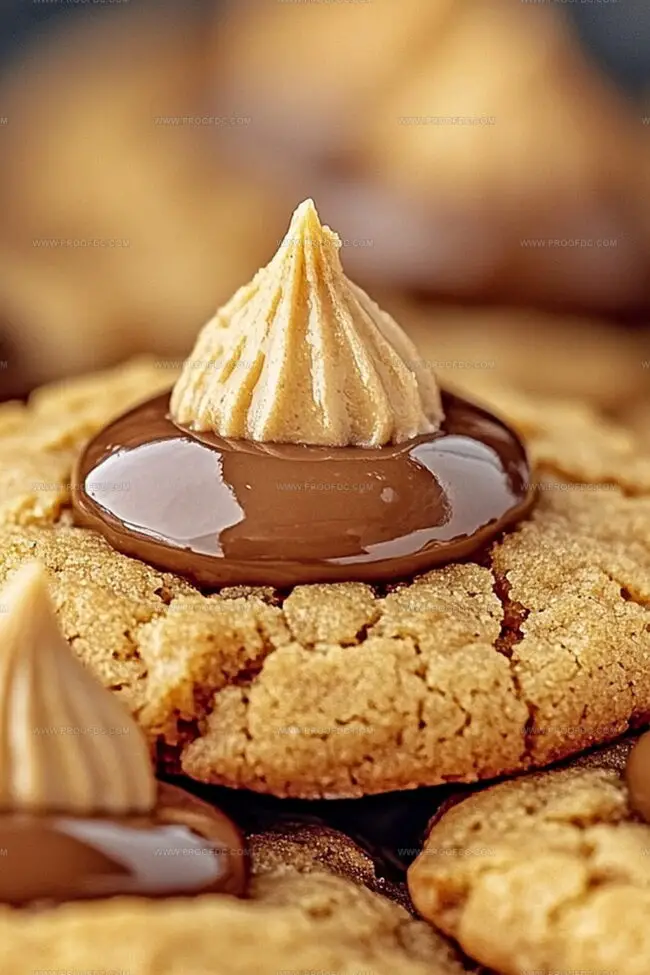
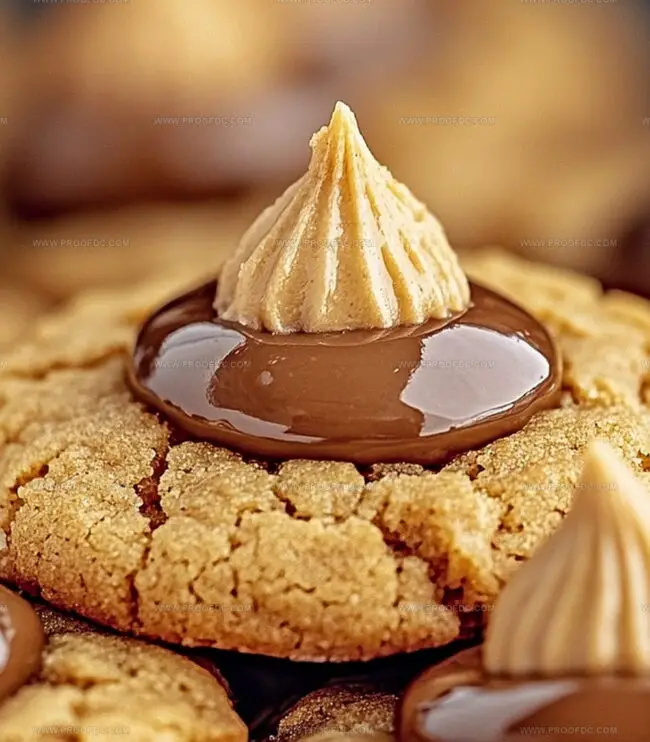
Effortless 6 Ingredient Peanut Butter Kiss Cookies Recipe
Making delectable peanut butter kiss cookies requires just six simple ingredients that dance together perfectly.
These charming treats capture childhood memories with their warm, nostalgic essence.
A classic cookie that feels like a sweet embrace from grandma’s kitchen.
Nothing beats the combination of rich peanut butter and smooth chocolate kisses melting together.
Each bite promises a delightful blend of textures and flavors you’ll absolutely adore.
A quick and effortless recipe that transforms ordinary ingredients into something magical.
Trust me, these cookies will become your new favorite go-to dessert for any occasion.
Why 6 Ingredient Peanut Butter Kiss Cookies Are So Easy And Good
Simple Ingredients For Peanut Butter Kiss Cookies
Base Ingredients:Binding Ingredients:Topping Ingredient:Notes: Choose smooth peanut butter for consistent texture. Use room temperature egg for better mixing. Select high-quality chocolate kiss for best flavor. Opt for granulated white sugar for classic cookie sweetness.
How To Make 6 Ingredient Peanut Butter Kiss Cookies
Step 1: Prepare Baking Setup
Preheat the oven to 350°F (175°C). Line a baking sheet with parchment paper, ensuring even coverage to prevent sticking.
Step 2: Create Cookie Dough
Gather your ingredients:In a large mixing bowl, combine all ingredients. Blend thoroughly until the mixture becomes smooth and fully integrated, with no lumps remaining.
Step 3: Shape Cookie Balls
Gently roll the dough into small round balls, each approximately 1 inch in diameter. Place the balls on the prepared baking sheet, spacing them about 2 inches apart to allow room for spreading during baking.
Step 4: Bake To Perfection
Slide the baking sheet into the preheated oven. Bake for 8-10 minutes, watching for edges that turn slightly golden while maintaining soft centers. The cookies should look slightly underbaked for maximum tenderness.
Step 5: Add Chocolate Kisses
Immediately after removing from the oven, carefully press a chocolate kiss into the center of each warm cookie. The heat will cause slight cracking around the edges, which adds rustic charm to the cookies.
Step 6: Cool And Serve
Allow cookies to rest on the baking sheet for 5 minutes. This helps them set and prevents breaking. Transfer to a wire cooling rack and let them cool completely. Once cooled, these treats are ready to delight friends and family.
Tips For Soft Peanut Butter Kiss Cookies
How To Keep Peanut Butter Kiss Cookies Fresh
Perfect Pairings For Peanut Butter Kiss Cookies
Ways To Mix Up Peanut Butter Kiss Cookies
FAQs On Peanut Butter Kiss Cookies
Yes, you can! Natural or crunchy peanut butter will work fine, but creamy peanut butter gives the smoothest texture.
No, these cookies don’t require chilling. You can mix and bake them right away, making them a quick and easy dessert.
You can substitute with chocolate chunks, chocolate chips, or even a small piece of chocolate bar pressed into the center of the warm cookie.
While the basic recipe doesn’t contain flour, always check your peanut butter and chocolate kiss labels to ensure they are truly gluten-free if that’s a concern.
Print
6 Ingredient Peanut Butter Kiss Cookies Recipe
- Total Time: 20 minutes
- Yield: 24 1x
Description
Irresistible 6 ingredient peanut butter kiss cookies melt hearts with classic comfort and simplicity. Sweet chocolate kisses nestled atop rich peanut butter cookies promise delightful moments of pure indulgence you’ll savor with each delectable bite.
Ingredients
Main Ingredients:
- 1 cup (240 milliliters) creamy peanut butter
- 1 cup (200 grams) granulated sugar
- 1 large egg
Binding Agent:
- ½ teaspoon (2.5 grams) baking soda
Flavor Enhancers:
- 1 teaspoon (5 milliliters) vanilla extract
- 24 chocolate kisses (unwrapped)
Instructions
- Craft a welcoming atmosphere in the kitchen by preheating the oven to a cozy 350F (175C) and preparing a baking sheet with parchment paper.
- Gather the peanut butter, sugar, egg, vanilla extract, and baking soda into a spacious mixing bowl, blending them into a harmonious, silky mixture that promises delectable results.
- Transform the smooth dough into petite, charming spheres approximately 1 inch in diameter, positioning them gracefully across the parchment-lined baking sheet with gentle spacing.
- Slide the cookie-laden sheet into the warm oven, allowing the treats to bake for 8-10 minutes until the outer edges achieve a delicate firmness while maintaining a tender, yielding center.
- Carefully extract the cookies from the oven and swiftly crown each one with a chocolate kiss, gently pressing the confection into the center, embracing the natural slight cracking that occurs.
- Grant the cookies a brief moment of rest on the baking sheet, allowing them to settle for 5 minutes before transferring to a wire cooling rack, where they can complete their journey to delicious perfection.
Notes
- Embrace gluten-free baking by using alternative flour or omitting flour completely, making these cookies perfect for those with wheat sensitivities.
- Create a lower-sugar version by replacing some sugar with natural sweeteners like stevia or using monk fruit sweetener for a diabetes-friendly option.
- Elevate the recipe by experimenting with different nut butters like almond or cashew butter for unique flavor profiles and added nutritional variety.
- Enhance texture and prevent cracking by chilling the dough for 30 minutes before rolling and baking, which helps cookies maintain a smoother appearance.
- Prep Time: 10 minutes
- Cook Time: 10 minutes
- Category: Desserts, Snacks
- Method: Baking
- Cuisine: American
Nutrition
- Serving Size: 24
- Calories: 140
- Sugar: 10 g
- Sodium: 50 mg
- Fat: 7 g
- Saturated Fat: 2 g
- Unsaturated Fat: 5 g
- Trans Fat: 0 g
- Carbohydrates: 17 g
- Fiber: 1 g
- Protein: 3 g
- Cholesterol: 15 mg
Jenna Stewart
Head Chef & Recipe Innovator
Expertise
Farm-to-Table Cooking; Seasonal Menu Development; Visual Plating Techniques; Flavor Layering and Simple Prep Hacks.
Education
The Culinary Institute of America, Hyde Park, NY
Jenna Stewart is the inventive spirit behind many of our standout dishes at Pro of Delicious Creations. A proud graduate of The Culinary Institute of America, she built her skills mastering both classic recipes and fresh, modern twists.
Now, Jenna celebrates the beauty of seasonal, local ingredients, often sourced from her garden and nearby markets, to create recipes that are bursting with flavor yet easy to follow. When she’s not experimenting in the kitchen, Jenna loves exploring nature on hikes and discovering new treasures at local co-ops.